Kitchens are commonly referred to as “the heart of the home,” bedrooms and bathrooms are often called “sanctuaries,” but a closet? It’s never put on a pedestal in the same way, but I’d argue that a well-functioning closet is one of the most important rooms in a home. Justice for good closets, please!! People are always asking me how to get more storage in their homes, but the reality is sometimes we don’t need more storage; we just need better storage. Let me show you what I mean…
I moved in with my boyfriend, Austin, back in February and was THRILLED that his house had a decent-sized walk-in closet in the primary bedroom. It was nothing fancy: mainly just a gray, builder-grade closet with carpet and a single rod/shelf combo across the whole thing. But it did have a good amount of space, potential, and tall ceilings, so I knew we could make it work. When it was just him in this house, it functioned super well and stayed organized (he also has fewer skirts! dresses! heels! accessories!). So before I moved in, the closet looked like this:


Then, everything changed. Austin tried to make room for me in the closet, but it just wasn’t cutting it. I’ve got a few more articles of clothes than Austin – which I’m sure many of you can relate to – so this space wasn’t gonna work for the two of us. Let’s just say it quickly became a bit ~chaotic~
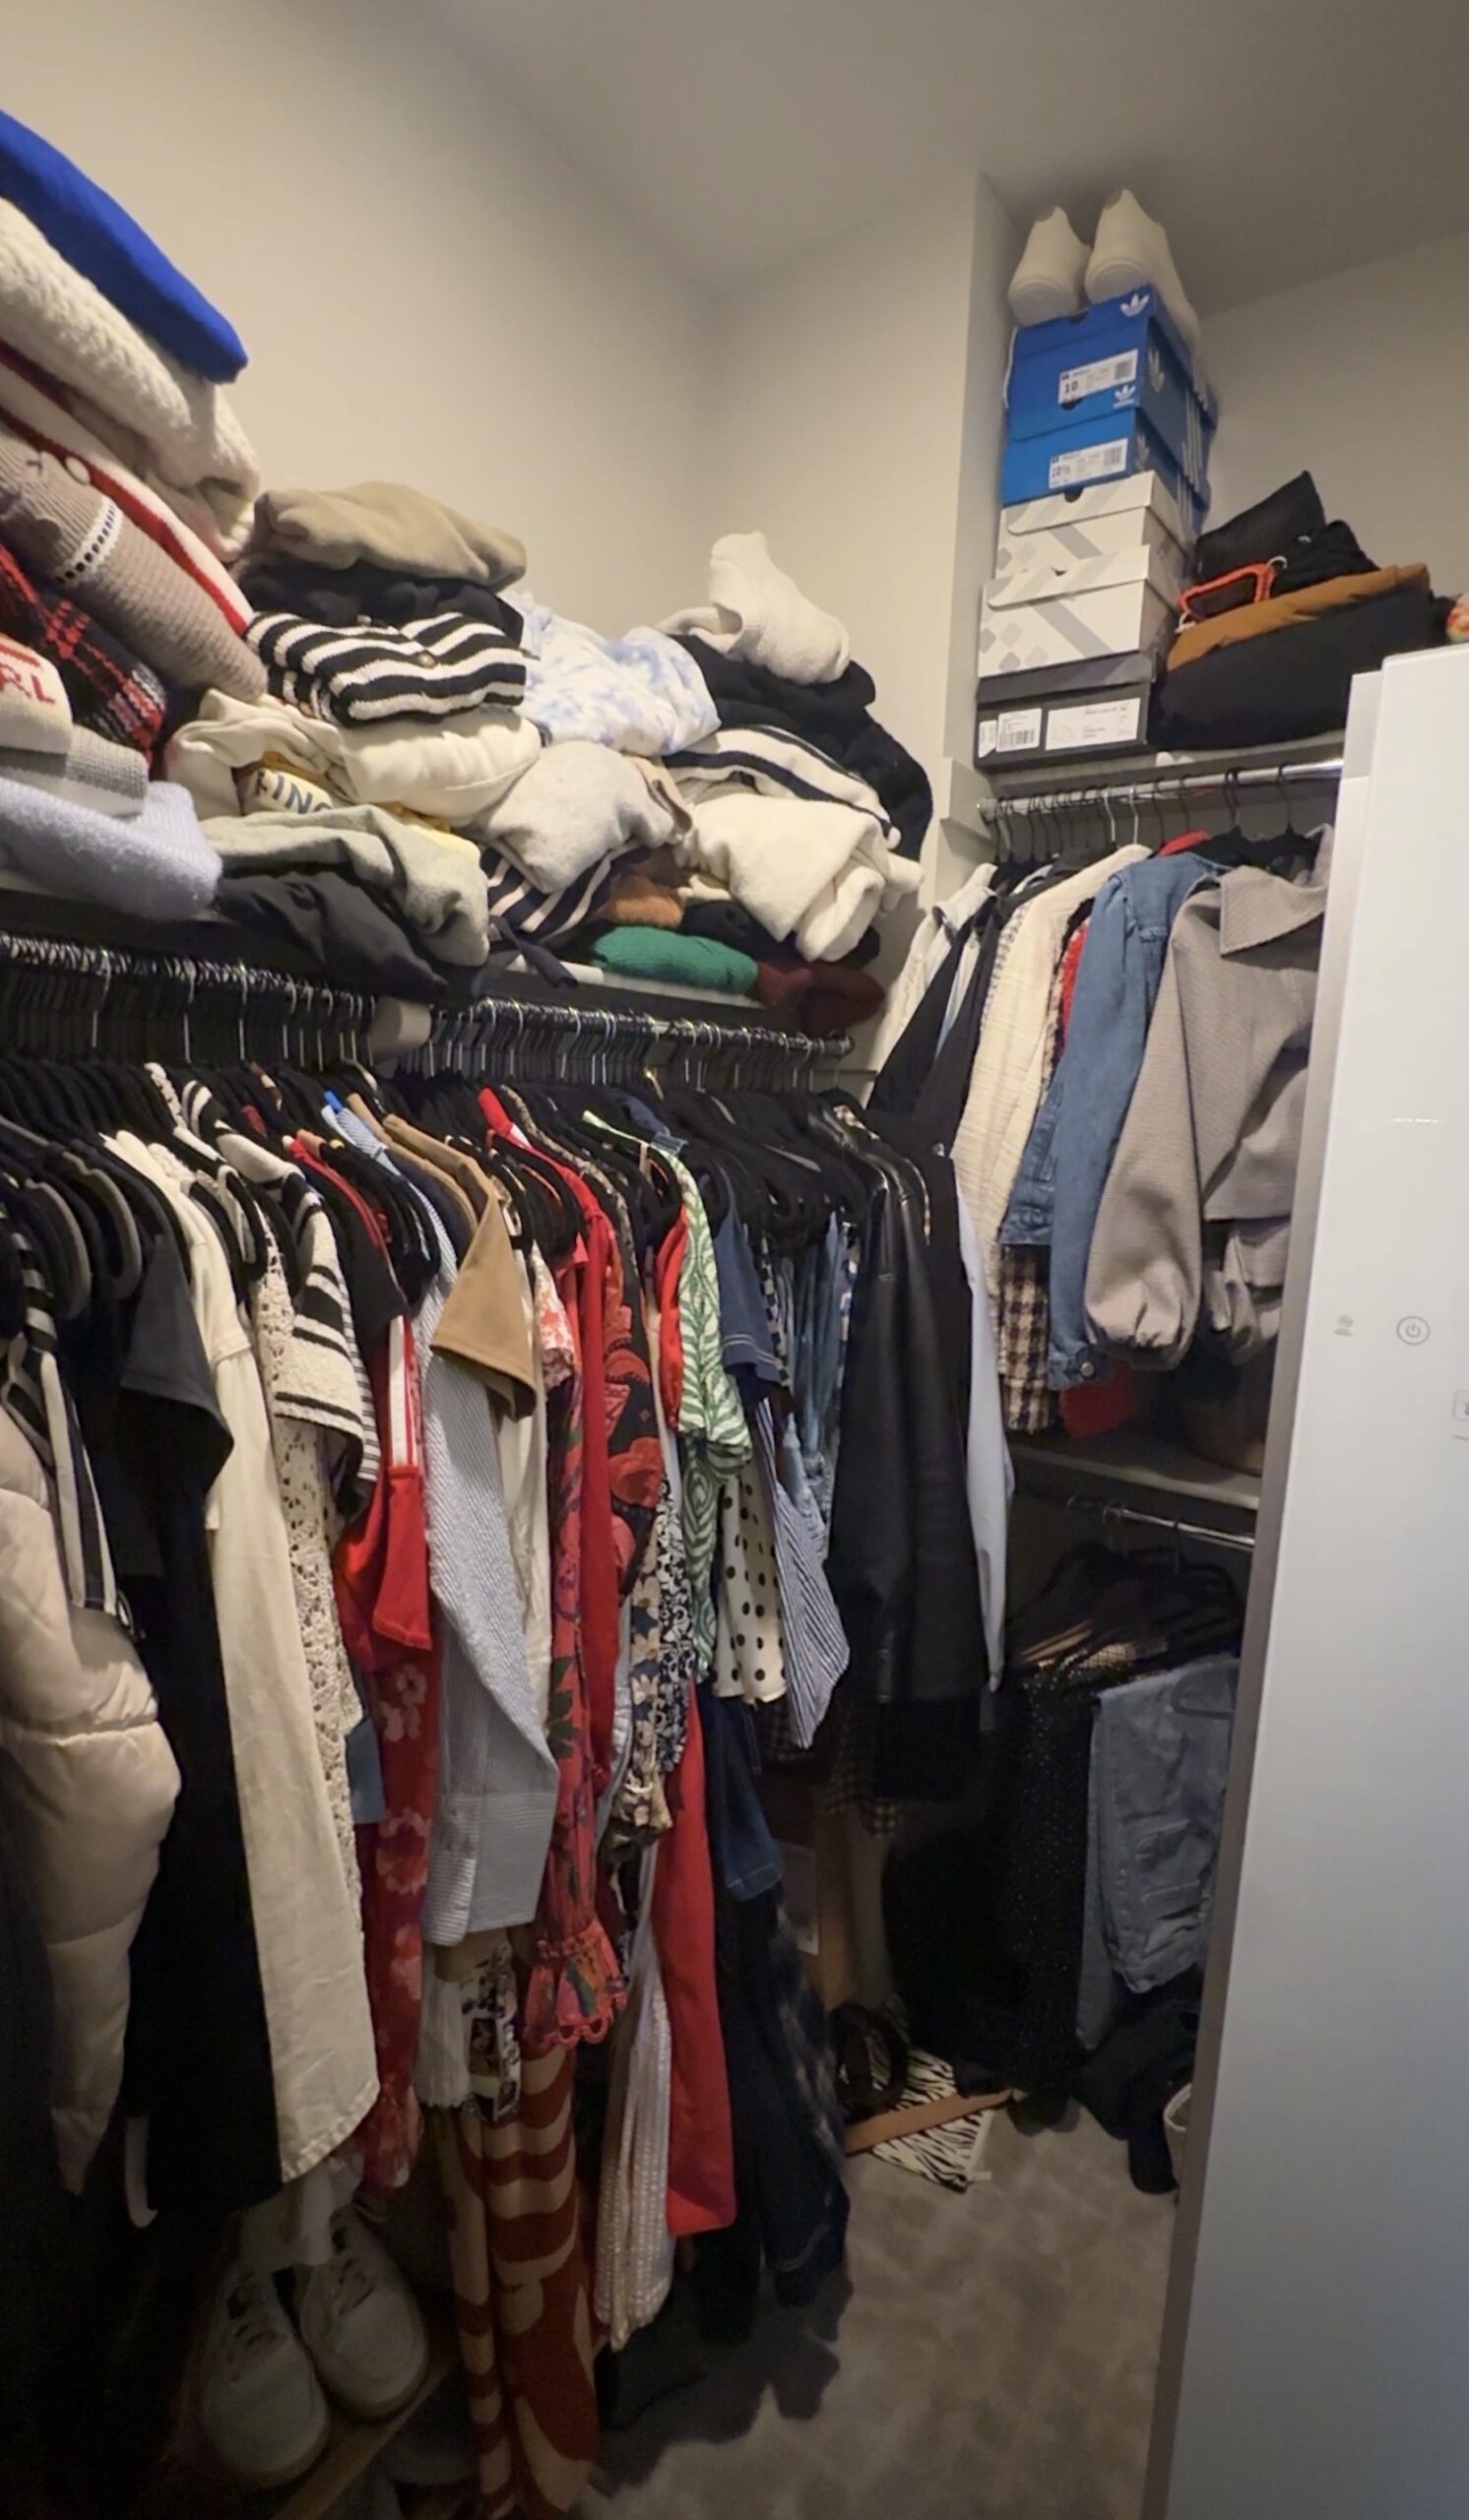
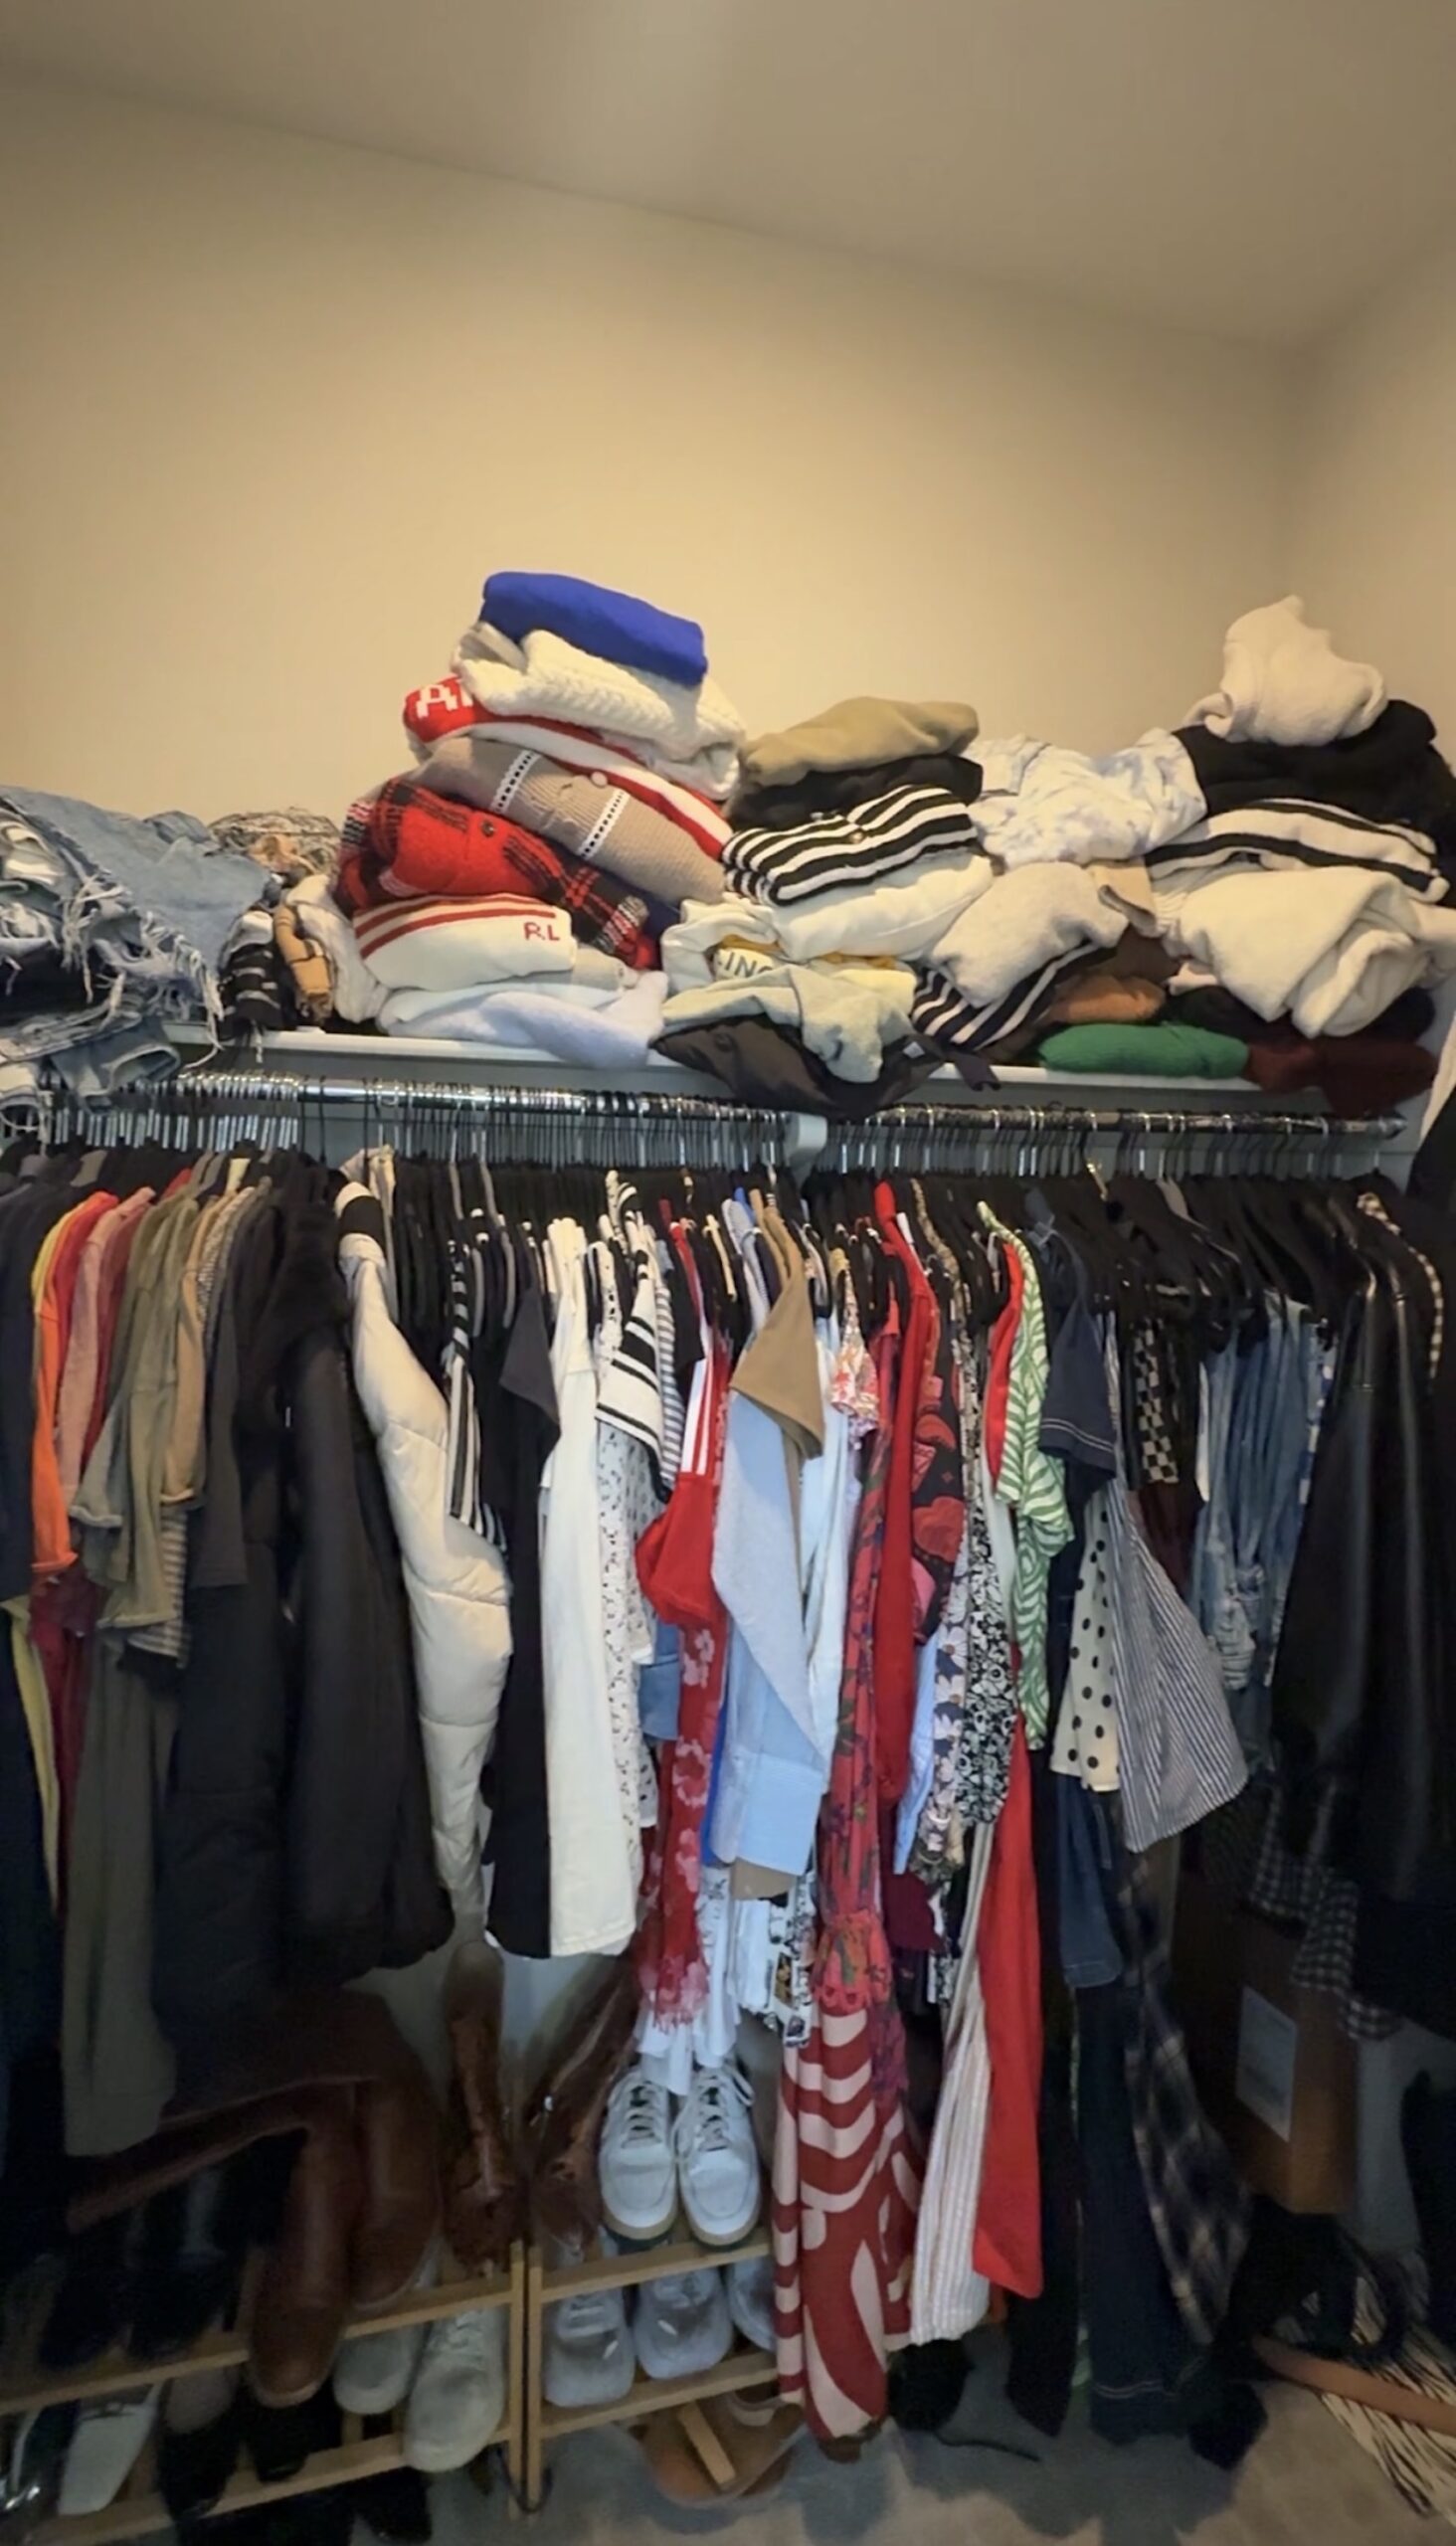
I consider myself a pretty organized person, so this stressed me the hell out. And this was with a large majority of Austin’s clothes in the guest room closet (which we are so lucky to have; otherwise it would have been even more of a nightmare). We knew we were going to have to do something…and fast. So we called up California Closets, and they sent a closet designer to come measure the space. Within a week, we had a full rendering of our closet design plan…it was incredible.

My jaw was on the FLOOR with how good and fast this design came to be! After the initial closet rendering was created, we met up and finalized the plan in the CA Closets showroom, where we got to look at finishes, hardware, and really customize the closet to our exact taste, which is important to me as a design girlie! Shoutout to Cooper, who really listened to our hopes and dreams and made them all come true! The CA Closets team really made this whole process so easy. I couldn’t believe how amazing they all were to work with.

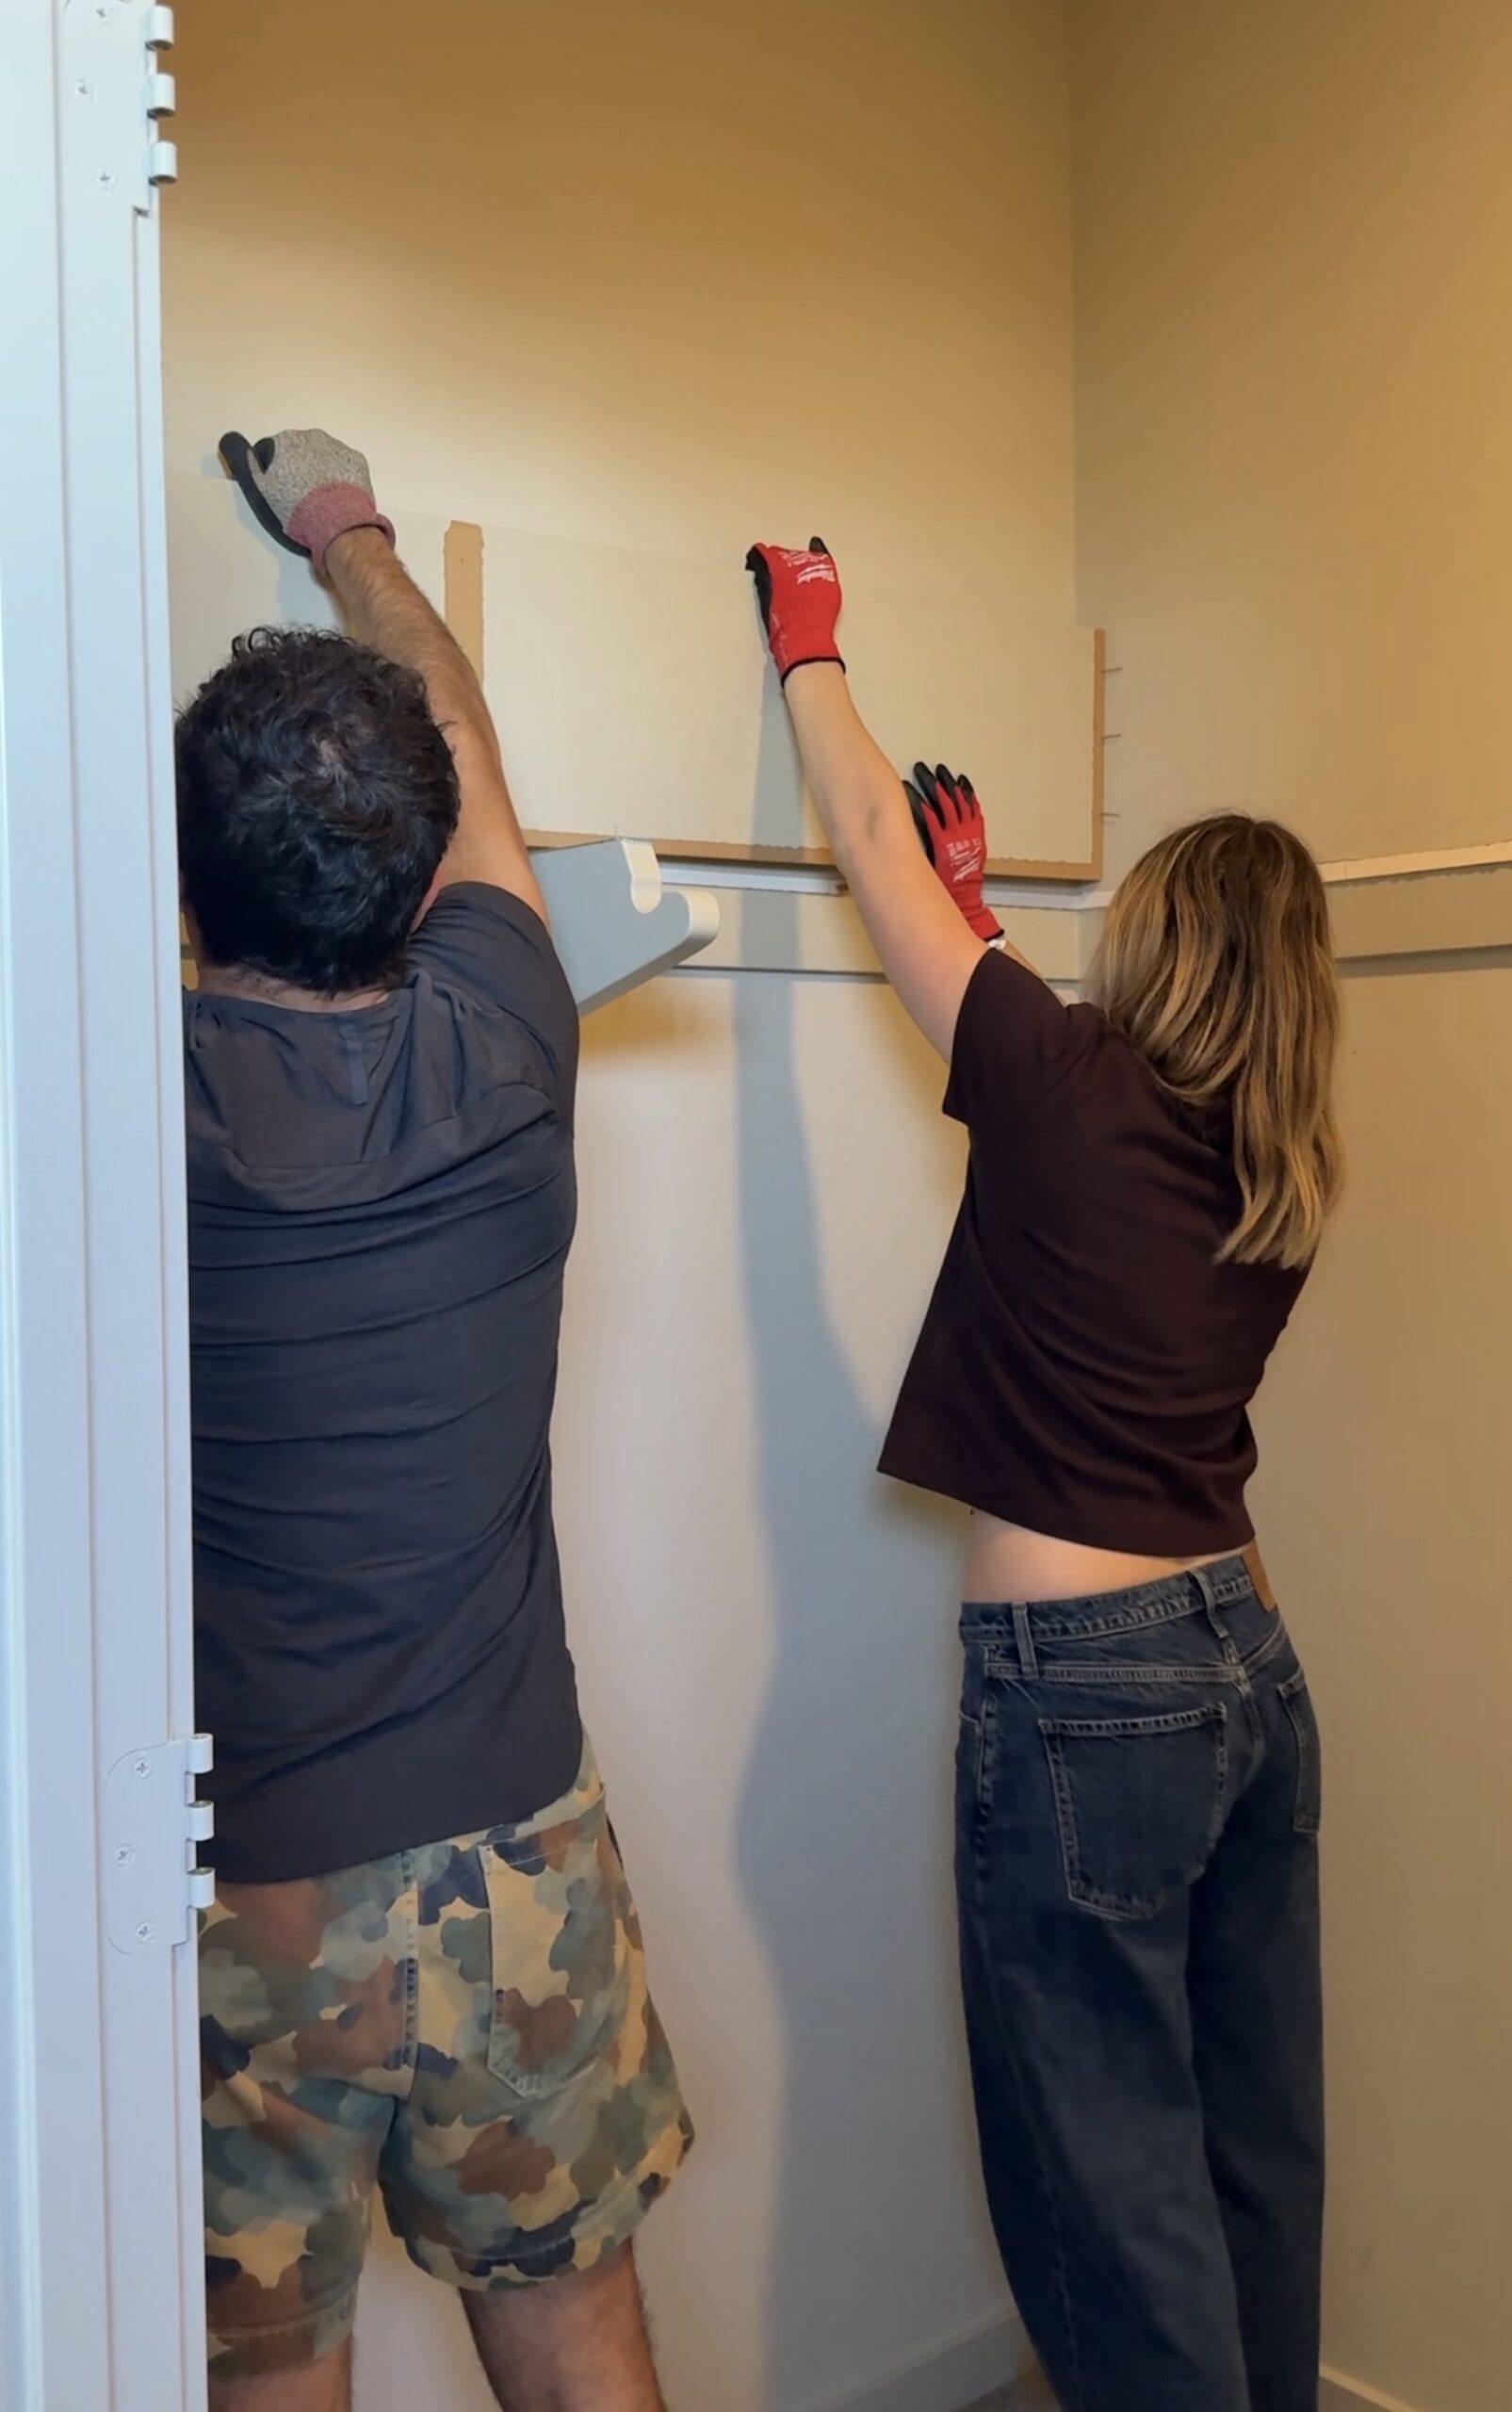
Then it was time to demo out the space, which was kind of therapeutic in a way…ripping out builder-grade grey carpet is a really cute date idea too, fyi. IT WAS SO FUN.


Then we had a whole tile saga that I could write 5,000 words on, but I’ll spare you and just give you the gist…This was THE MOST stressful part about the entire thing 🙂


So we wanted to do tile instead of carpet for 2 reasons: 1. We live by the beach and wet bathing suits and sand on carpet is gross to me, and 2. This space is small-ish, so the quotes we were getting for the pretty designer carpet we liked all had a “small cut fee,” which, after labor, made it more expensive than tile (crazy). We could have gotten more affordable carpet from State College Blvd in Anaheim, but after looking at those options I just felt like doing higher quality flooring was worth it (and I’m so glad we did). The more affordable options were also all neutral, and I knew I wanted something a bit more interesting on the floor in here.
We originally ordered this gorgeous tumbled Breccia Vino 4×4 tile in a checkerboard, which really is stunning and worked so well with the burgundy paint color we chose for the walls and ceiling. The lead time was supposed to be 3 weeks, which was a tight-ish timeline because the closet cabinetry was supposed to be finished around the same time, so we pushed the closet install a bit so we could put the flooring down first. Well, I got a call the week the tile was supposed to show up saying that their initial lead time was wrong and it was going to be another 4 weeks…so we had to cancel the order and find something new and in-stock. And in 2 days! Wooo!
Side note: if you’re wondering why we didn’t install the cabinetry first, then the flooring, it’s because we were putting in a special cabinet for our LG steam styler (which is the coolest gadget…I’ll explain more later in this post). This cabinet had flooring inside of it, so it made more sense to do the flooring first so it looked seamless.
Anyway, I found out that Zia Tile has a warehouse pickup option in LA that could be ready same-day (if you called and asked really nicely and if they had it in stock), so I panic-called Gretchen and asked if I should do the color “Iconic Blue” or “Ethereal Blue” and we both agreed Ethereal Blue was the move – so I ordered 50sqft sight-unseen (we didn’t have time to wait for samples), drove to the Zia warehouse in Bell Gardens to pick up the tile same-day, and THANK GOD WE LOVED IT. It was only mildly anxiety-inducing:)


Looking back now, the checkerboard floor might have been too much with everything that’s going on in the closet, so I am SO happy we went with this tile!! Everything happens for a reason! Austin and his dad installed the tile (in case you missed the last post…they’re VERY handy). We went with a tonal grout, and I could not love it more – especially with the paint color!! I sampled a ton of burgundy paints, but ultimately went with Caponata by Benjamin Moore, and it’s PERFECT for this room. It leans more purple than red, and has a good amount of brown in it, which is why it pairs so well with walnut. I could not love it more!


Once the flooring fiasco was over (thank the lord), the installers came and in 8 hours, our closet went from these scary photos above to…

THIS!!! AH, THIS CLOSET IS MY DREAM! DREAMS DO COME TRUE! I actually cannot fathom that this is ours. It’s perfect in every. single. way. We doubled our storage space! I have a place for my sweaters and shoes! Let me walk you through some of the insanely cool features we added…

Okay, everyone wants to know more about this steam styler, so let me tell you!!! I am not getting paid to write about this product; it wasn’t gifted by the brand, we’re just obsessed with it, and I gotta tell you about it. So when we first started talking about the closet renovation, Austin was like, “Please, can we put a steam styler in?!” and I responded with, “What the heck is that…” and basically he explained that it sanitizes and cleans your clothes, sort of like a dry cleaner. At first, I was super nervous about losing a decent chunk of clothing storage space. The whole point of redoing this closet was to make our clothes fit, and we were going to put in a 6-foot…machine? Where we could hang clothing? I was baffled at first, but then he sold me with “we will never have to do dry cleaning again,” and we got the steam styler, haha.
I will say, after having it and using it for a while, you still have to bring your clothes in to get dry cleaned sometimes, but it’s MUCH LESS. Basically what the steam styler does is it sanitizes and cleans your clothing with a ton of different settings ranging from 20 minutes to 2 hours. It doesn’t use any harsh chemicals, and it can clean delicate items like silk, lace, and even leather jackets (!!!) Here’s how we use it:


There are a lot of other things you can do with it too that we’re still learning – like the “pants crease” feature in the door that’s supposed to press your pants so they’re not wrinkled. We haven’t used that feature a ton yet. We learned that some fabrics “de-wrinkle” much better than others in here, so if you’re wanting it mostly for the steaming capabilities – nothing truly beats a handheld steamer or a classic iron and ironing board. But it will get out light wrinkles and, more importantly, it sanitizes and cleans, which is what we use it for more!

Even with the steam styler, we were able to fit this gorgeous glass cabinet that has a pull-out hamper and jewelry drawer at the bottom. The steam styler was Austin’s main request, and a jewelry drawer, shoe storage, and a full-length mirror were mine. We checked ALL THE BOXES. The pull-out hamper is incredible because the bags are obviously removable and the quality is excellent.

Now I’m going to address the elephant in the room: where are all of Austin’s shoes?! And the answer is downstairs by the front door! We have a large shoe cabinet downstairs (it’s a bigger version of this one) that almost all of his shoes and some of my shoes reside in, but it was more important to me to have shoes up here so I can plan out how my shoes will look with my outfits (and Austin didn’t care about that…at all lol). So behold! My wall of shoes:

We did hooks over here for belts, bags, scarves, etc because you can’t totally tell in this photo, but there’s an electrical panel we have to access on this wall that made this side of the closet cabinetry a bit shallower.

We put in double clothing racks on each side of the glass cabinet, which literally doubled our hanging storage, and then I folded all of my sweaters on the top shelf with this folding device, and they’re looking crispy!! For some reason, when I fold without this guided folding tool, it looks like a raccoon did it – so this really helps if you have folded clothing displayed! Using our vertical space was absolutely critical in maximizing our storage space, but we weren’t going to ruin this gorgeous closet with an ugly step stool, so we ordered this one, which is absolutely perfect in here.
This closet is obviously pretty dark since it doesn’t get a ton of natural light, so the black bins I actually have in real life under my hanging shirts weren’t really showing up on camera (so we put shoes there instead). But I left one up above the long dresses on the right (which is where I keep my sweatshirts) so you could see this clothing storage in action. One of the big things Marie Kondo preaches is folding clothing vertically instead of stacking it on top of each other. This way you can actually SEE what you have instead of digging through a pile. These bins make it so easy to do just that; I use them for my sweatshirts, shorts, non-denim pants, and even my bathing suits. They’re perfect. While we’re on the subject of organizers, I also got this to organize my bags and this to organize our baseball caps (we have so. many. baseball caps). Other than swapping the boxes for shoes, this is actually pretty accurate to what this closet looks like on the day-to-day. These organizers helped us have a place for everything and everything in its place!!


Before I go, here’s a fun before-and-after slider!


That’s all for my closet reveal!! I hope you guys love it as much as we do – it was such a fun project to work on and has improved my daily life GREATLY. Huge thank you to California Closets for collaborating on this; it has made our lives so much better (I’m not being dramatic!). If you’re interested in upgrading your closet space too, be sure to check them out. Thank you for being here!
*Design by Mallory Wackerman and Cooper VonAchen from California Closets
**Photo by Sara Ligorria-Tramp
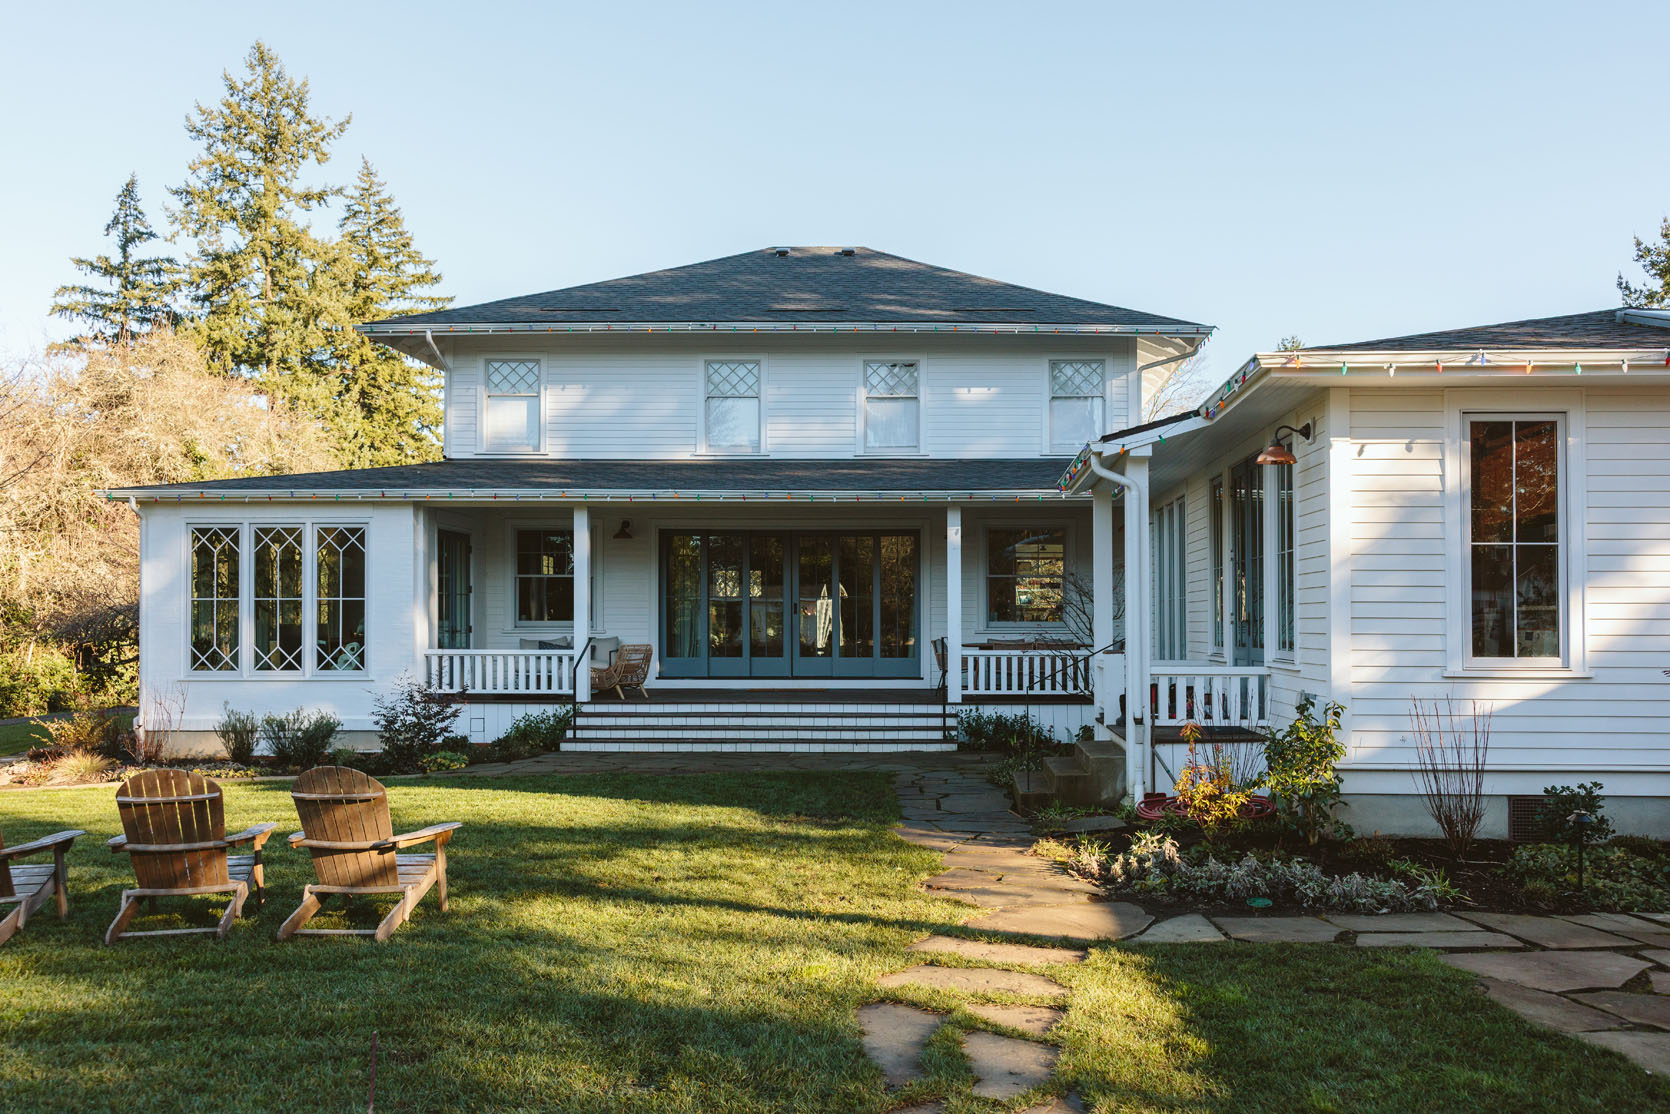
The garden has exploded this year (turns out heavy rain + lots of sun + good design + good maintenance are the key, lol). Get excited for this backyard tour, y’all. Last summer we finished another phase of landscaping and turned the massive broken-tennis-court-turned-cement pad into a smaller pickleball court, and then we hired Dennis’ 7 Dees to do all the hardscape and landscape (shout out to Eric, our designer who totally got us). Year one was sooooo pretty. And yet year 2 is an even more magical wonderland of plants. A quick and satisfying recap:
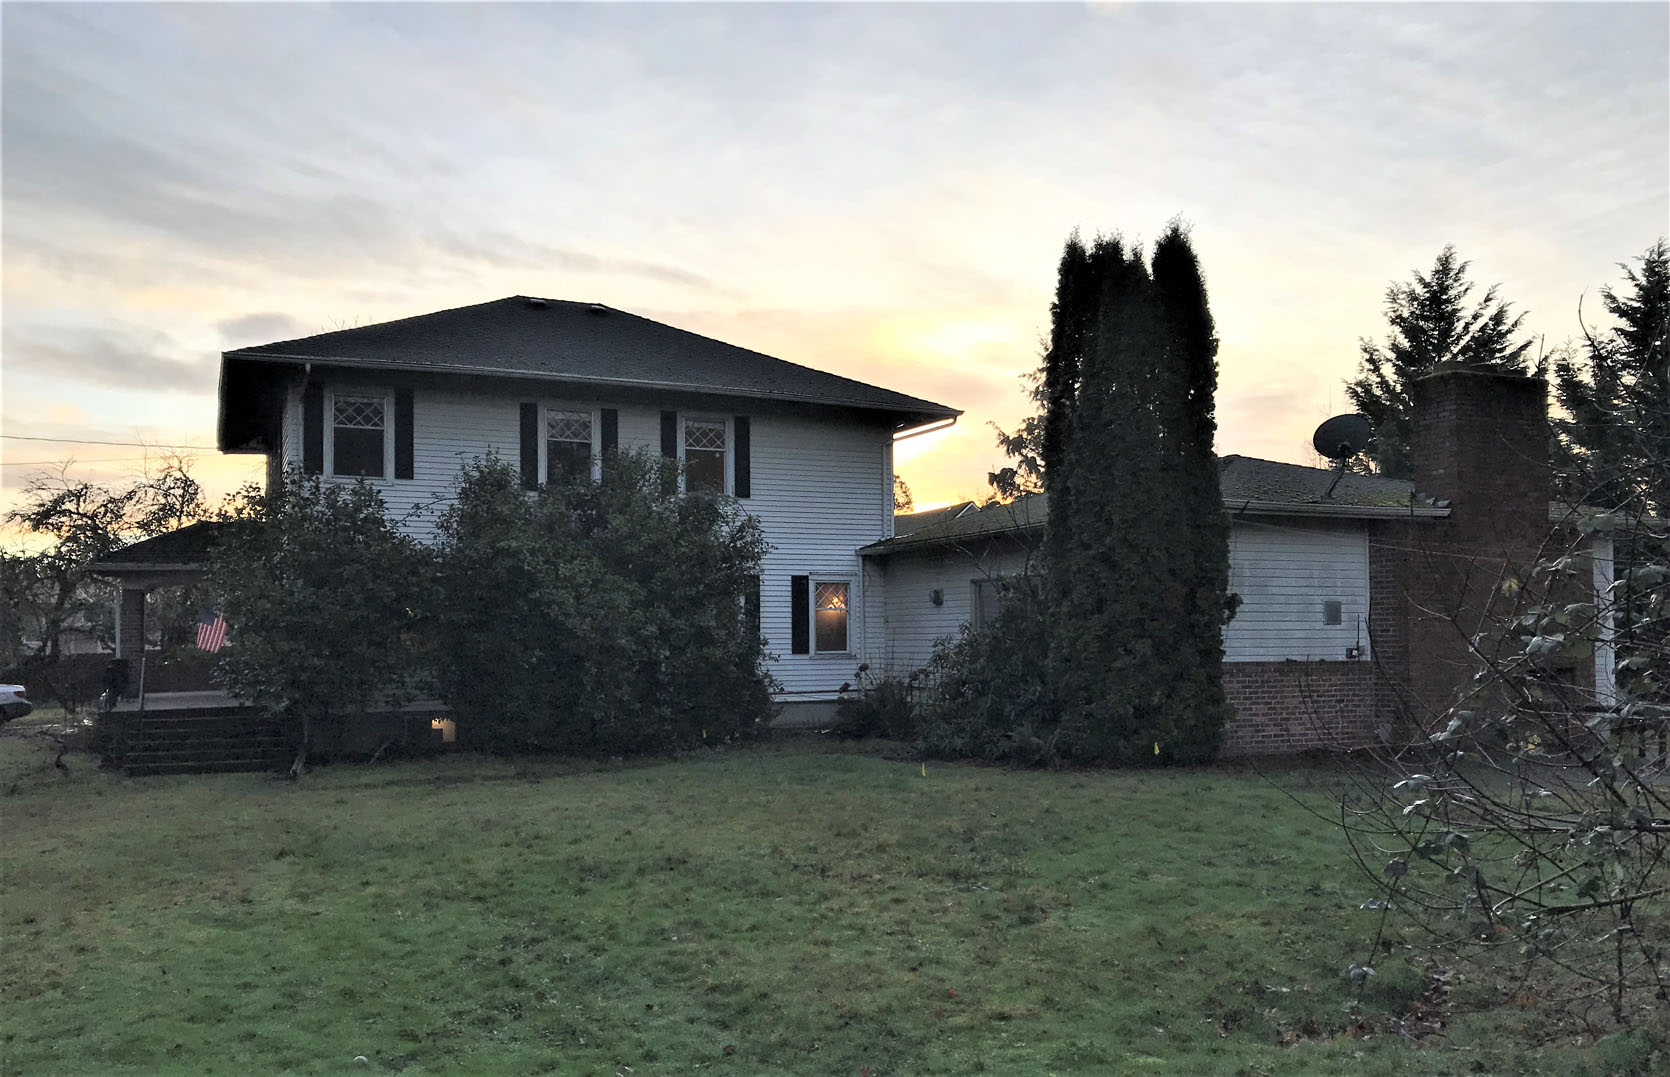


It was rustic and charming, and while we didn’t intend on doing so much (we loved the idea of grass and using the existing tennis court as a sports court), the construction of the house ruined a lot of the original landscaping, so we launched into re-landscaping. The end of that string was very hard to find (and we still aren’t done – so doing it all in phases).

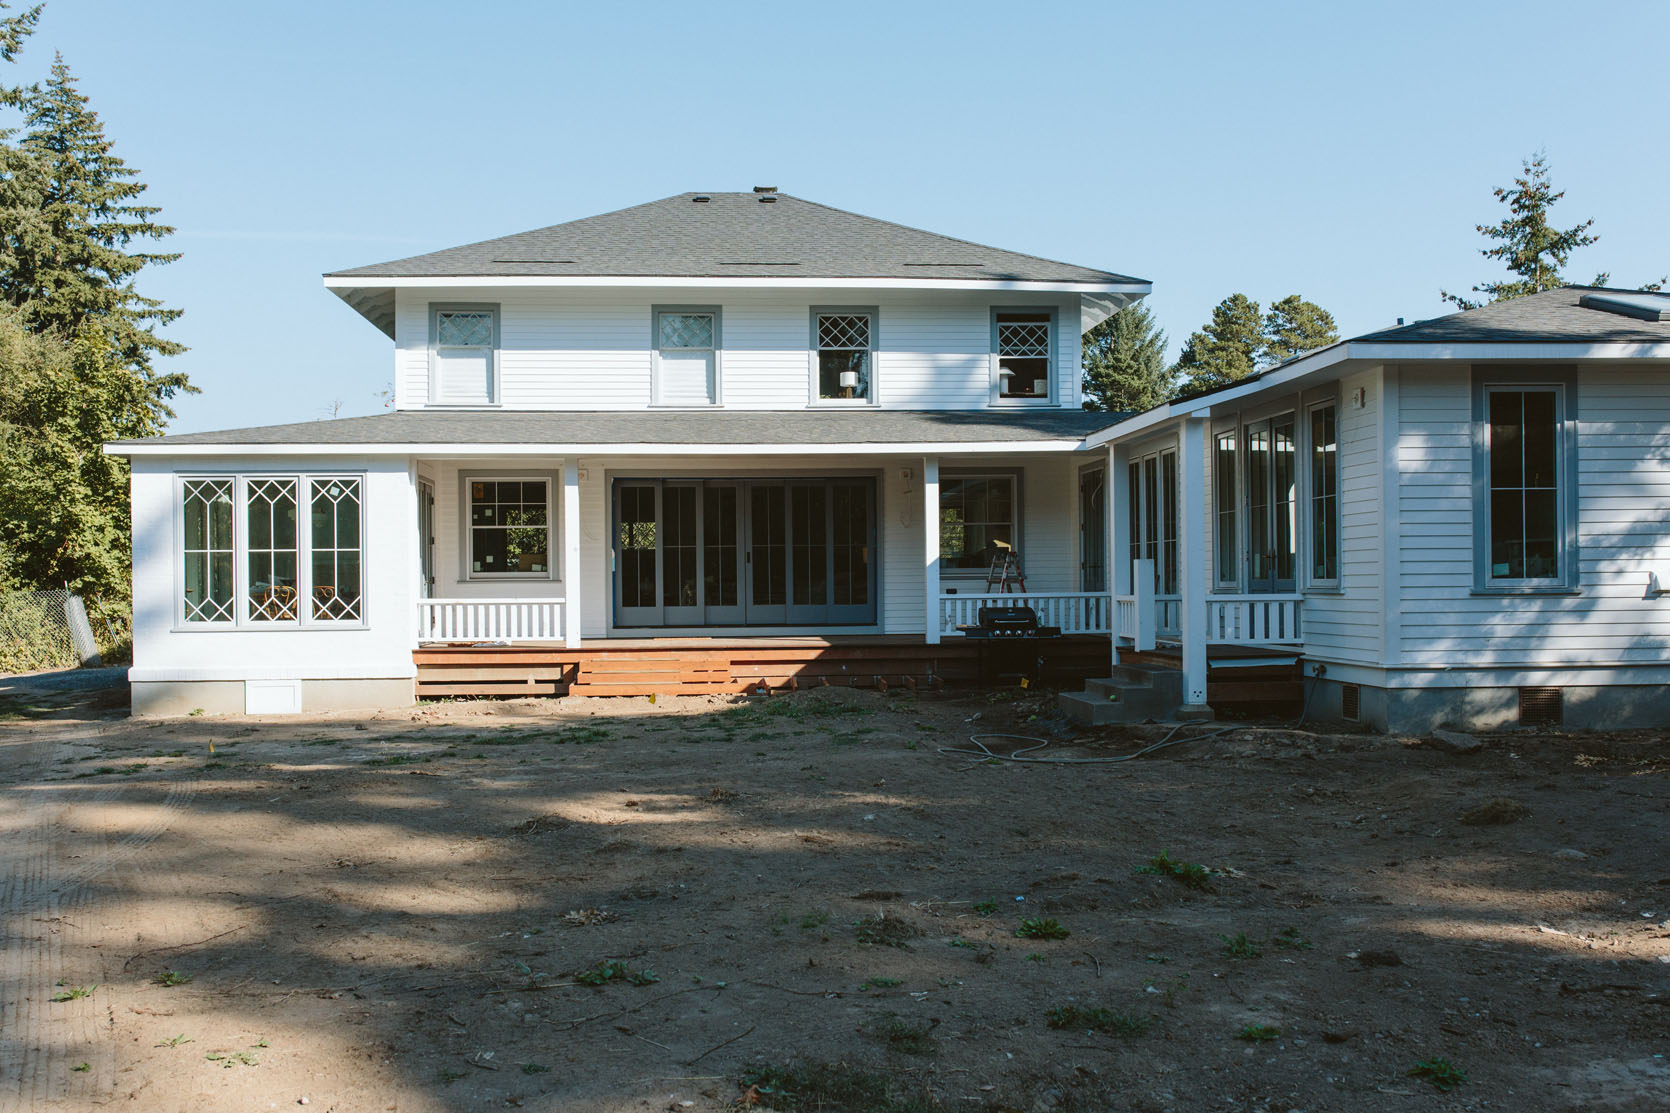
Despite our efforts, we had to take out the broken tennis court (which we were able to grind into gravel, BTW, and we used for our access lane), and once the machines were here ripping it all up, the entire yard became a mud pit. I’m not sure if it was more “give a mouse a cookie” syndrome or an unstoppable snowball, but let’s just say it triggered extensive updates that we are so grateful for. The band-aid was pulled off, and the hardscape, landscape, mini-gym, and Soake pool area were all put in.

But the reduced-sized tennis court was still too big (IMHO, Brian loved the huge sports court, lol, but now realizes that I’m right). So we took a year and a half break and last year hired Dennis’ 7 Dees to reduce the pad and landscape the area underneath it and around the future outdoor BBQ area.

Last summer I did a full process post showing how they did it and how long it took, so if you are new to this and you want more info, check out this post.

The Dennis’ 7 Dees crew did such an impressive job – fast, professional, and super high quality. Hot tip – Book them in the fall so they design in the winter for an early spring install – that is their slower time, so they have more crew to put on your project. We finalized the design by February, and it was completely done in late April (or somewhere around there – but FAST).


It looked amazing in year one. Monrovia, which is a huge nursery in Oregon, grows really healthy, robust plants, so they planted larger than you can typically. You could still see bark and some plants were still small, but for year one we were so impressed.

It’s so lush and beautiful right now, and we are enjoying the heck out of this yard. It changes every month, so I didn’t know when to shoot it, and August normally gets pretty hot, so I thought mid-July would be best. But little did I know that all the hydrangeas turn to blush pink in late July, and now I want to show you that!

The winter was actually still so pretty thanks to the abundance of evergreens (you can see that tour here). We already have had a huge harvest and cutback of the white garden roses, so there are less of them in these shots, but they are coming back really strong. Oh, and as you can see, we added some way more comfortable and durable seating by Polywood that I can leave out year-round without being covered (yes, in the extreme rain).


The sofa and chair set is really comfortable and is getting so much use already (it’s the best place to read while the kids are playing on the sports court). Being surrounded by the greenery feels like you are in a hidden garden, and by the time I’m out there reading (in the evening ) it’s shaded by the tall trees. But we have a third umbrella on hand during daytime hangs.

The entire garden looks like it’s been here for years and years. It’s just so lush and natural. Remember that Oregon conditions make it much easier to have a lush garden – the entire city looks so beautiful and abundant right now. Our summers are dry, so you don’t invest in this kind of landscaping without irrigation unless you are good at daily watering, but the rest of the year is so wet that the second the sun comes out, everything just bursts and it’s incredibly satisfying. We have all our irrigation on our well, thank goodness, and Dennis’ 7 Dees monitors the water needs closely.


I love that the ground cover in between the stones is thriving and so sweet. Dennis’ 7 Dees also did the area on the left side of the gazebo, which really softened that harshness of the building and made it look like it’s been there longer.


Aesthetically, we loved the wood picnic tables more, but functionally no one really wanted to sit in them (I think people felt locked into a conversation during parties, not to mention the lack of back support). I found that most people remained standing holding their food and drink, and as a host that mostly cares that people have fun and can relax, it bummed me out. So having these two conversation groupings (one for firepit, one for lounging) has been awesome, and they get SO MUCH USE.

I chose the green Polywood in hopes that it would blend the most year-round. We thought that black would be too modern and that white would be too bright, and we already had the green stools so we just went with it. Then we chose a more tonal soft green Sunbrella fabric to reduce contrast and again, just have them blend in with the garden.

Our wild strawberry groundcover has really taken hold in some places, but it’s so lush and natural that we love it.


We love how layered it is with different heights, textures, sizes of leaves, and color variation. There are still a lot of perennials, and some are just not popping up (so many more echinaceas have bloomed since we shot this).


I’m sure a lot of you are wondering about maintenance, because obviously this doesn’t maintain itself. Because of my job, this property needs to look good year-round, so I’m so grateful to have Dennis’ 7 Dees crew maintain it (Fernando comes every week in the summer and once a month after big cutbacks in the winter). Charlie and Elliot mow the lawns unless we are out of town. And then once a quarter, a project manager will come by and see if there are any more major tweaks that need to be made or requests from us. The garden has a mind of its own, and some plants take over, or maybe we want a jasmine to climb the posts, etc. So then we pay extra for additional work outside of maintenance. It’s a big property, but they did a really good job of weed abatement, so it’s usually a 2-3 hour maintenance every week.

I think we are those odd clients that don’t mind it more grown and less manicured (I don’t even like sharp edgelines on the grass), so we often let things grow more and then we’ll cut back in the late fall. I know it’s an extreme luxury and privilege to have maintenance, but one of the best things we did this time around is hiring the same people that designed and installed the landscaping to do the maintenance. They just know the overall art direction and irrigation system so well when it needs to be tweaked. There is so much trust. Also, having an in-house maintenance team means they are inherently much more invested in keeping it looking really good and keeping all the plants healthy because it’s their work. Same with interior design, there are going to be changes and tweaks based on how a family lives so I actually love it when my friends call and say “hey we need to get new bedding, what do you think about this” so that the room remains looking good 🙂 (Don’t worry, it’s not a requirement and I’m not weird about it, but I like that we both care that the design work continues to look really good, even years after its “reveal”).


The hydrangeas really are the star right now. They are Panicle (sun-loving) hydrangeas from Monrovia that Dennis’ 7 Dees has at most of their nurseries. They change colors – more pink in late summer and burgundy in the fall. Truly incredible.

Eric also redesigned the pool area this year, which is growing in so well, but I’ll show you that in our next Soake pool update post. While I loved the wildflowers from years 1-3, they were getting too messy even for us, so we took most of them out and Dennis’ 7 Dees planted more of what we have around the flagstone here instead. It’s still natural, but it’s so pretty and is easier to see over.

The overhead shots really are my favorites – we feel extremely, extremely lucky. This summer we had so many kids here every day running around. And don’t worry, all the random socks, towels, plastic squirt guns, frisbees, balls, water cups, janky pool toys, and trash are not shown – it doesn’t always look this good. We always have to do a huge yard cleanup before we shoot in the summer because these feral summertime kids do a lot of beloved damage.
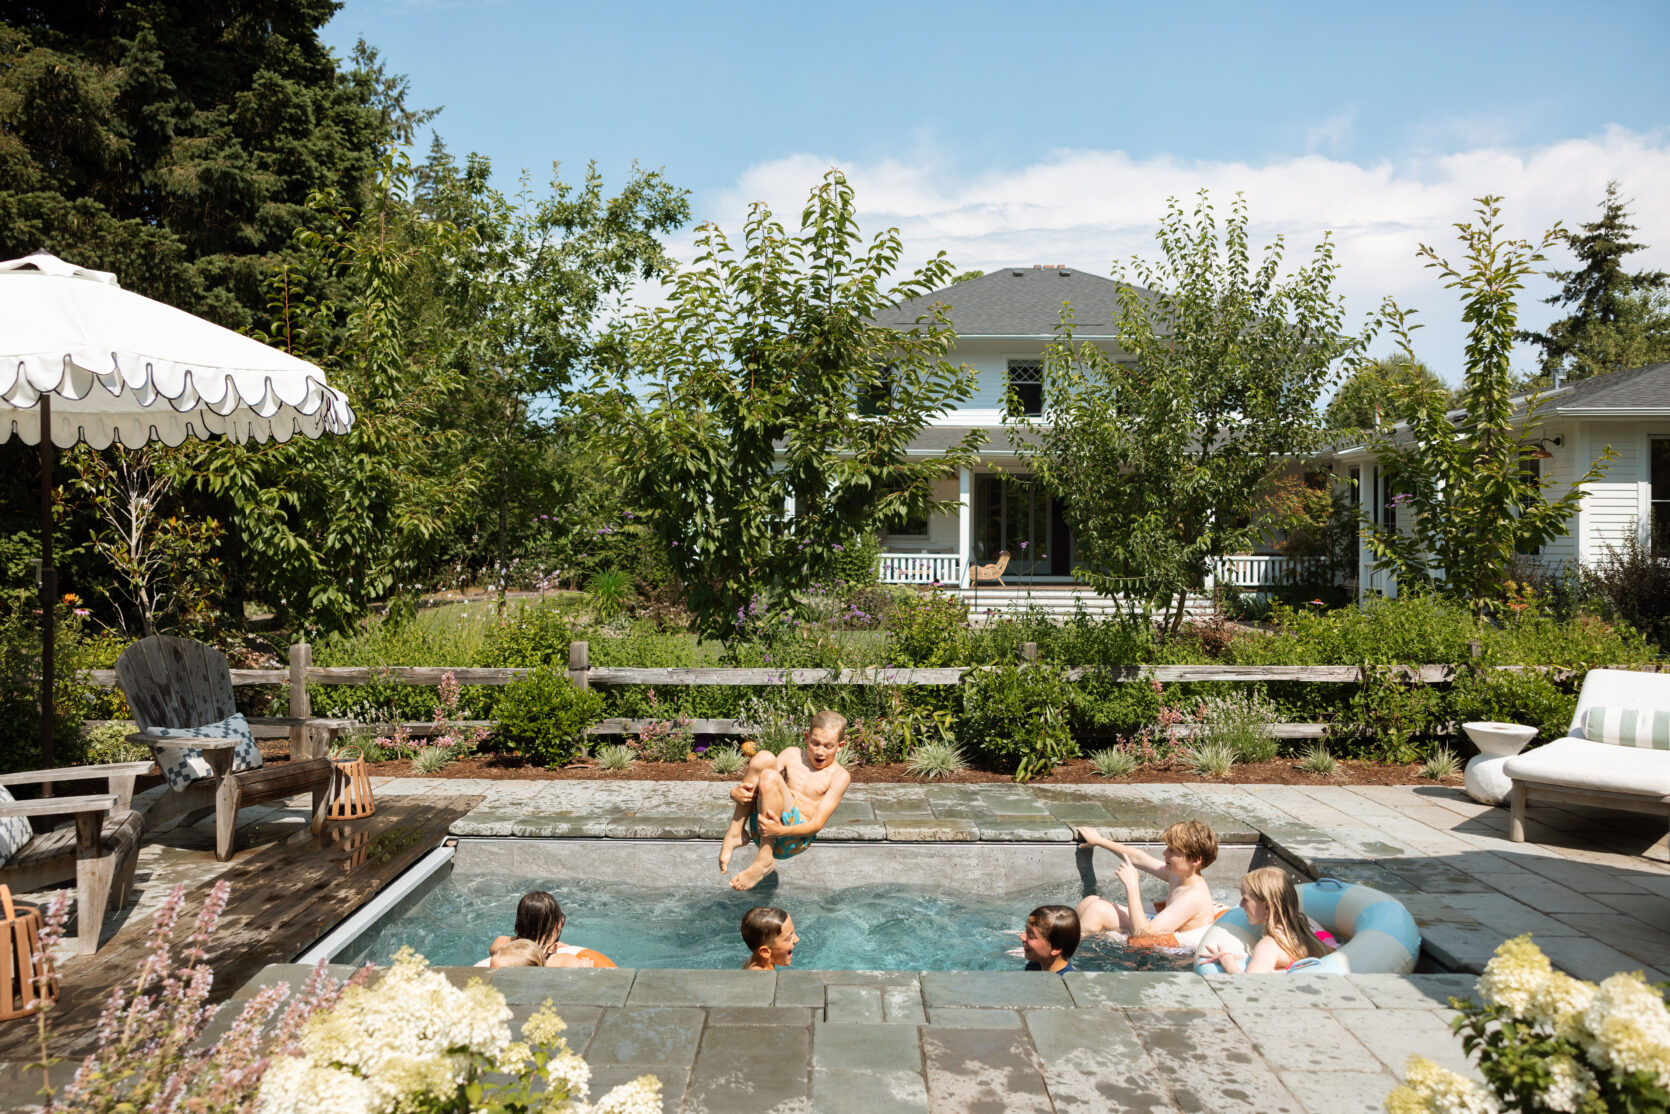
Our Soake pool has gotten so much use this summer (and winter and fall and spring) because even though it’s small, when it’s hot outside it’s PERFECT.

We have our annual pickleball tournament fundraiser for our elementary school in two weeks, which is only for grownups (and taken very seriously by some of our neighbors). It’s always a blast, so I’ll try to take more footage (but understandably not all our neighbors are as psyched to be all over the internet as I am). Point is, we feel extremely grateful and lucky to live here and continue to use and share our yard.
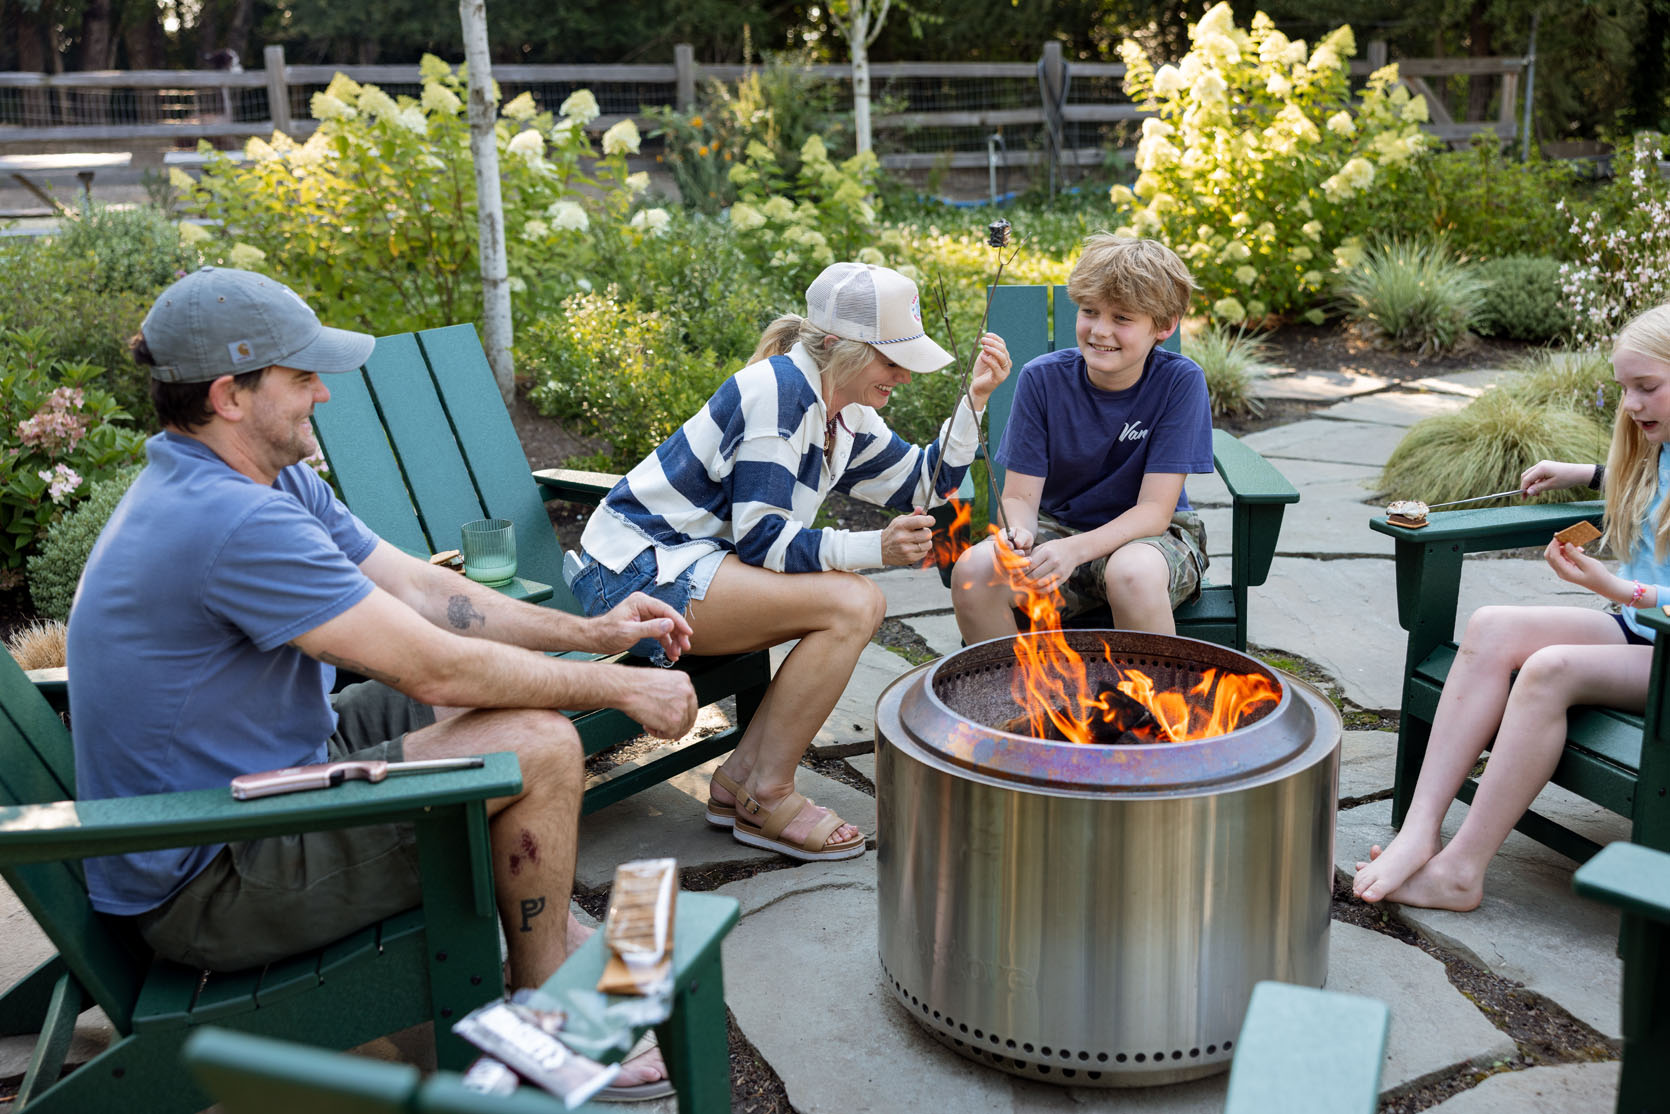
We have 2-3 more months of nightly hangs out here before the great long dark. So trust me that we’ll take advantage of every night possible.
Here is a pretty fun true “before and after”!


And the next two are sliders showing the difference between last year and this year:)


A huge thanks to Dennis’ 7 Dees for the design and install of the garden. If you are in the Portland area, I can’t recommend them enough for design, project management, install, and maintenance. And for most people who aren’t going to hire out for a full design, their nurseries are the best (one in Lake Oswego, a new one near me in Raleigh Hills, Cedar Hills, and Vancouver). And for a very fun perspective from their side as well as specific plants they used, head to their post on the project🙂
*Photo by Kaitlin Green
]]>YOU GUYS IT’S THE FIRST REVEAL IN MY NEW HOUSE AHHHH!! I am absolutely thrilled to be here sharing my rooftop with all of you today! Quick recap: I moved from my Los Feliz apartment (see all of those reveals here) to my boyfriend, Austin’s house in February of this year. We hit the ground RUNNING on some fun house projects – the first of which was OUR ROOFTOP!!! We live in a townhouse that’s very vertical and therefore doesn’t have a traditional backyard, but what we do have is a decent-sized square on the top of our house that was just begging to be the ultimate party spot. It was begging for an outdoor kitchen DIY. It’s not a small space by any means, and it’s definitely the largest outdoor space I’ve ever had as an adult, but it’s also not crazy huge, so we had to get creative on how to fit all of the “zones” into it to make it as functional and comfortable as possible. Let’s start from the beginning:


So here’s where we started. There wasn’t much out here other than a sofa with some white cushions in desperate need of attention, but we dreamed of it becoming the ultimate hangout spot for our friends and family. We already entertain A TON, so we knew this roof would get a ton of use (especially in the summer) if we just put in a little elbow grease. Also, I got SO lucky because right before I moved in, they repainted the paint color on the wall from a crazy orange to this more nautical blue. I was absolutely thrilled!! So we had a fresh coat of paint, some string lights, and a dream; it was time to get to work. The opportunities were endless, but we knew we wanted 3 areas ideally: an outdoor kitchen to grill delicious food, a dinner table to eat said delicious food, and then a fire pit area to digest the delicious food while talking with our friends for hours. So after a lot of space planning, we came up with this…


We decided the best spot for the outdoor kitchen was this corner because it’s the only area that doesn’t look directly onto our neighbor’s deck, and it has the best view hands down. Although had we faced the kitchen the other way, it would’ve looked over at my parents’ house, which is actually hilarious… For context: Austin and I met back in college (we actually studied abroad together in Madrid!), but we were more acquaintances than friends who hung out all the time. Then a couple of years ago, I was driving over to my parents’ house when I spotted Austin working out in his garage (he likes to say he was on his 1000th rep). I pulled over to say hi, and the rest is history. Flash forward two years, and now I am neighbors with my parents (like literally 7 doors down…it’s actually kinda awesome). So yeah, you can literally see this rooftop from the window in my parents’ living room makeover. Life is so weird sometimes!! And to answer your question, yes, we see them a lot, and they hang out on this roof all the time 🙂
Okay, now back to the design and DIY of it all. Austin and his dad built the whole outdoor kitchen together, and I was genuinely so impressed by everything they did. They started this project a few months before I moved in, so I will try to give you the details as best I can, but I wasn’t there for a good portion of the build! So a family friend who works in construction provided all of the steel, which was incredible. Austin says it was something similar to this. They borrowed his special steel-cutting saw and screwed the steel pieces together with special metal screws.


The roof slopes down so that rainwater can drain, so they used these feet to level it out. Also, I’m fully aware that cutting steel is a wild DIY for most people (me included), so if you’re looking for something similar, I actually found a ton of ready-made steel frame options online like this one at Home Depot that’s a bit smaller than ours or this big one that’s fully modular and customizable (but it’s definitely pricey). They also have more affordable options here that seem a little less heavy-duty but might work well depending on where and how you’re planning to do this DIY.
Some of these ready-made galvanized steel frames can definitely get pricey, so if you’re looking for something more plug-and-play, you can also sleuth the Pottery Barn and Crate and Barrel Outlets to find pieces like this. That option definitely takes longer since you have to wait for the pieces to get to the outlet and go on sale, but you can always call the outlets to see if they have any in stock:) Also, shop around for the exact layout you’re looking for – the internet has a ton of ready-made options!
The next part of the DIY goes crazy…get ready…


They screwed composite decking into the steel, so this thing is crazy durable. This material is ideal since our rooftop is really exposed to all the elements (which is mainly just marine layer from the beach since we live in Southern California but still). They snagged about 14 12ft planks of the decking (in the color “toasted sand”), which ended up being around $350-$400. Then they installed some stainless steel drawers and this propane pull-out next to the grill. The open cavity on the left was the space they left for the mini fridge!
Then the wildest part was they wired electrical through the steel frame and installed a few outlets for appliances like our slushy machine (which we’re obsessed with and use for parties all the time). You guys, Austin and his dad are so handy; it is wild. This genuinely was so impressive, and I was shook when I walked up here, and it was just like…done. I’ve always been the one doing DIYs (but obviously never on this level), so this was pretty awesome to just walk up and see the whole thing basically finished. Dating into a handy, DIY family is actually incredible, and I feel so lucky!!
As you can see, it was A TON of work to get to this point, but we still needed one major thing for this kitchen: the countertops!


Austin’s dad went back to his workshop (his house), created some molds, and poured a few concrete slabs for the top. You are not ready for what’s about to happen next. Once they were dry, we got a call saying he was going to come drop them off and…

This crane shows up at our house 😂 Like WHAT?! This felt like a total fever dream to me, and looking back at the photos, I am still in shock. I guess when you work in construction, there are a few perks haha! This actually was a miracle because those slabs were HEAVY and carrying them up the stairs would have been a nightmare…crane to the rescue!

So after some cranes, trains, and automobiles (literally) – WE HAD AN OUTDOOR KITCHEN!! The fridge was put in, and the blackstone grill arrived (which is now completely out of stock or 4x the price…we got it on sale for $400 so timing is everything!) and WE ARE OBSESSED. Hot tip: GET THE BBQ COVER! We’re anal about protecting this grill, so this cover for the inside and this one for the outside have worked so well so far. I actually can’t believe how the outdoor kitchen area turned out – we use it ALL THE TIME. Once the grill area was complete, all we needed to add was some seating! That’s really where I came in…I was like, guys, I got this. The two zones left to add were: dining area and a fire pit…so cue the pretty photos because it wouldn’t be a reveal post without them!!

Swivel Chairs | Fire Pit | Rug | Dining Table | Accent Table | Shell Bowl | Sofa | Bar Cart | Cordless Lamp | Dining Chairs
WE COULD NOT BE MORE THRILLED!! I’ve never had an outdoor space of my own that’s big enough to entertain, and it really is so special. Our whole summer has pretty much been spent up here, and I am not mad about it! The dining table and chairs were the last thing we added to the space, but they made it WAY more functional considering how much we cook out here. The table was a splurge from West Elm, and the chairs were super affordable from Target (sadly not available anymore?? Like Target, PLEASE put them back in stock!) They’re also stackable, which is awesome if we want to put them away after we have our larger parties.

Swivel Chairs | Fire Pit | Rug | Accent Table | Sofa | Cordless Lamp | Propane Tank Side Table
Let’s take a look at our little fire pit area, shall we? You might remember the sofa from the before photos; Austin already had it before I moved in (pro-tip: they got it at the Pottery Barn outlet for a steal – so again, always be sure to check the outlets if you’re looking for a great deal!) You also might remember that the cushions were absolutely nasty…Well, I looked up the cost of a replacement, realized you HAD to buy the whole cushion and couldn’t just get a cover, so it was going to be $700 to replace them, then I immediately went on the longest journey to get them clean again…and you guys…IT WORKED! Well, for the most part. There’s still a little bit of slight discoloration, but literally no one ever notices. We store all of the cushions inside now so they should last a very long time 🙂 The rest of the product is all super affordable – I did a Wayfair partnership earlier this summer (which was SO COOL!) and was able to furnish it with some of my DREAM pieces! The fire pit is one of the more cost-effective ones I’ve seen, and we absolutely love it. It’s also hollow on the inside, so it’s not CRAZY heavy (which was great for us moving it upstairs), but it’s still heavy enough where it’s certainly not going to blow away. We cut a small hole in the rug and ran the propane cord underneath. It’s hardly noticeable and is a great solution if you want a fire pit but can’t run a gas line. The propane side table is the best because it has a door that opens to the front as opposed to the ones you have to lift up every time that are crazy heavy. It’s the little things!

Swivel Chairs | Fire Pit | Rug | Dining Table | Accent Table | Bar Cart | Dining Chairs
Like I said, there’s not a crazy amount of space up here, but it’s the perfect amount of space to fit everything we need. I’ve called this “roof summer” because for the last 2 months all we’ve been doing is hosting events with like 10-15 people at a time, and the space honestly works GREAT. People end up spinning the dining chairs around, and we can form a big circle around the fire pit and make s’mores or just drink our slushy drinks and have a blast.


We cook up here all. the. time. Austin is an incredible cook – he is always cooking up the most insane dishes from steak au poivre to sushi to literally the best lasagna I have ever had. There are A TON of things you can do on the Blackstone griddle too, so we’ve had taco nights, smash burgers (of course) and one of our favs…

HIBACHI NIGHT! We just did this last week with some friends, and it was a blast. Austin makes incredible fried rice so this has been really fun to cook 🙂 Oh, and if you’re wondering about the beating sun up here…let me show you our solution!


Yes, it gets crazy hot up here, and you’re really just standing in the sun with nowhere to go UNTIL – we put these guys up, and they made the biggest difference. We’ll take them down in the winter when we’re not using this space as much, but boy are they incredible in the summer (and I LOVE the yellow stripe). We left the area above the grill open so that the smoke can go off into the distance and not directly onto the shade (which would’ve been giving fire hazard)…

But when it becomes sunset, the shades are totally not necessary, obviously. And this roof THRIVES at sunset; it’s truly become one of my favorite places in the whole world. Slide the slider, and you’ll see what I mean 🙂


So that’s our roof!! It’s come a long way, and I just feel so grateful that we get to call this place ours! If you’re wanting to see more photos and videos, you can follow me on IG here 🙂

We are just obsessed with it. Thank you for reading and for following along. Just so happy to be here. You guys rock!
*Design by Mallory Wackerman
**Photo by Sara Ligorria-Tramp
A couple of readers commented the other day that they miss the farmhouse vibe of our living room (from the first version) and it made me wonder if they/you are right …. Now, my style has never been specifically and only “farmhouse”, I’ve always been drawn to contemporary shapes and Scandinavian motifs as well. But, I kinda agree. The Barb sofas are cool and so comfortable (and I love the colors), but admittedly, they are very post-modern/contemporary and definitely not ‘farm’. And that should be fine, right? Like, your furniture doesn’t have to match the style of your house perfectly. But I would have never designed these sofas to go in this room (they are samples from our sofa line that we had in storage and shot to market them in here). I love them and they are so comfortable, but are they perfect for the style of the house? Maybe not. Could the perfect vintage rug solve the problem? Let’s explore a bit.
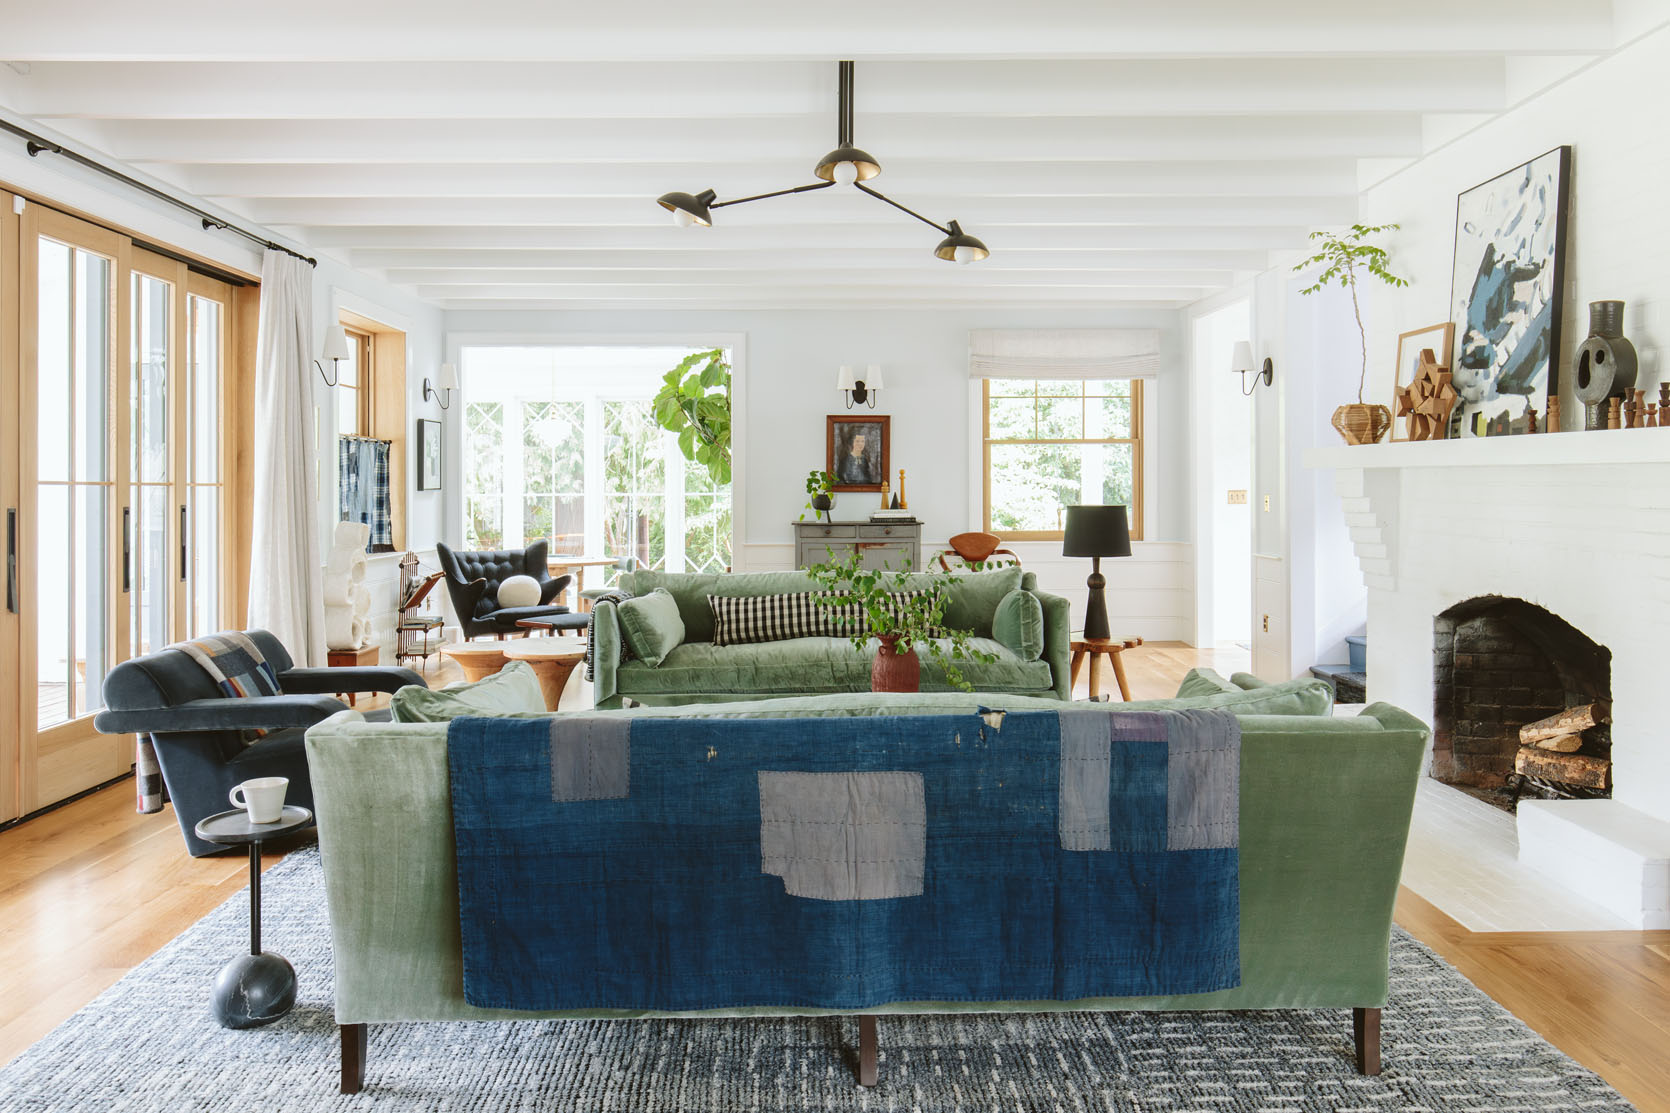
Ok this is what we originally revealed a few years ago when we shot it for Real Simple. I really, really liked this version of the room (but didn’t love – it felt like the walls and fireplace weren’t fully designed). But after months/years of searching for the right vintage sofas (and not finding one) I had to make a decision with the big Real Simple shoot impending so I bought these Fabian sofas and genuinely loved them (so comfortable)…. except that my dogs sat on the back pillows and smooshed them down every single day. It was so annoying and became a daily physical chore. Then everything changed because I launched a rug line and a sofa line, so I sold that awesome rug to my brother (I want it back!!) and sold the sofas locally knowing that I would put in sofas from my own line. But RugsUSA couldn’t make any of our rugs 12×15 and most of them didn’t even come in 10×14 (we tried) even though they said they could, so I brought in the rug I was using in my bedroom and tried it out with the green Alice sofas I designed for this room. See below:
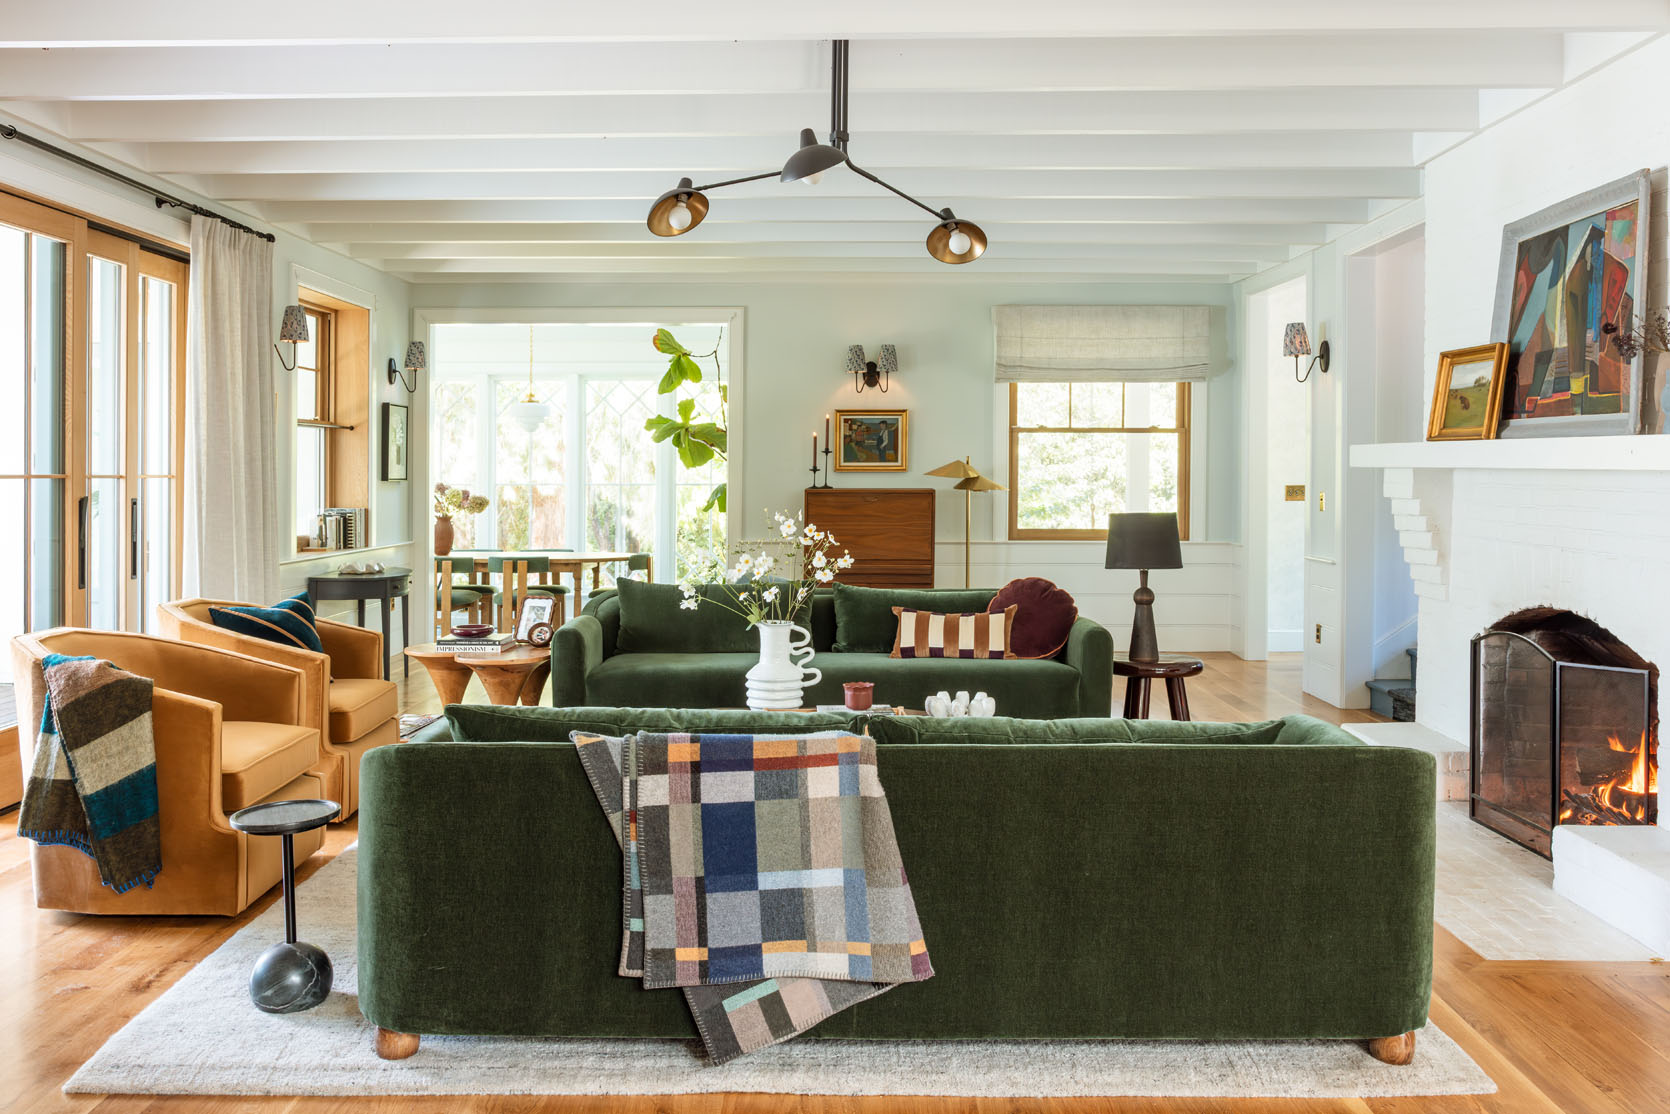
I liked this version, too. But Brian and I just loved the layout and softer color palette of the most recent double Barb layout so much more. The darker bolder green doesn’t not work, but it just felt more hotel lobby and less like an inviting home. So last winter when we had to shoot holiday two ways (one for us, one for a magazine) we brought the Barbs back in and just left them because they are so comfortable (yes we have a storage unit on our property for our furniture – not typical, I know).
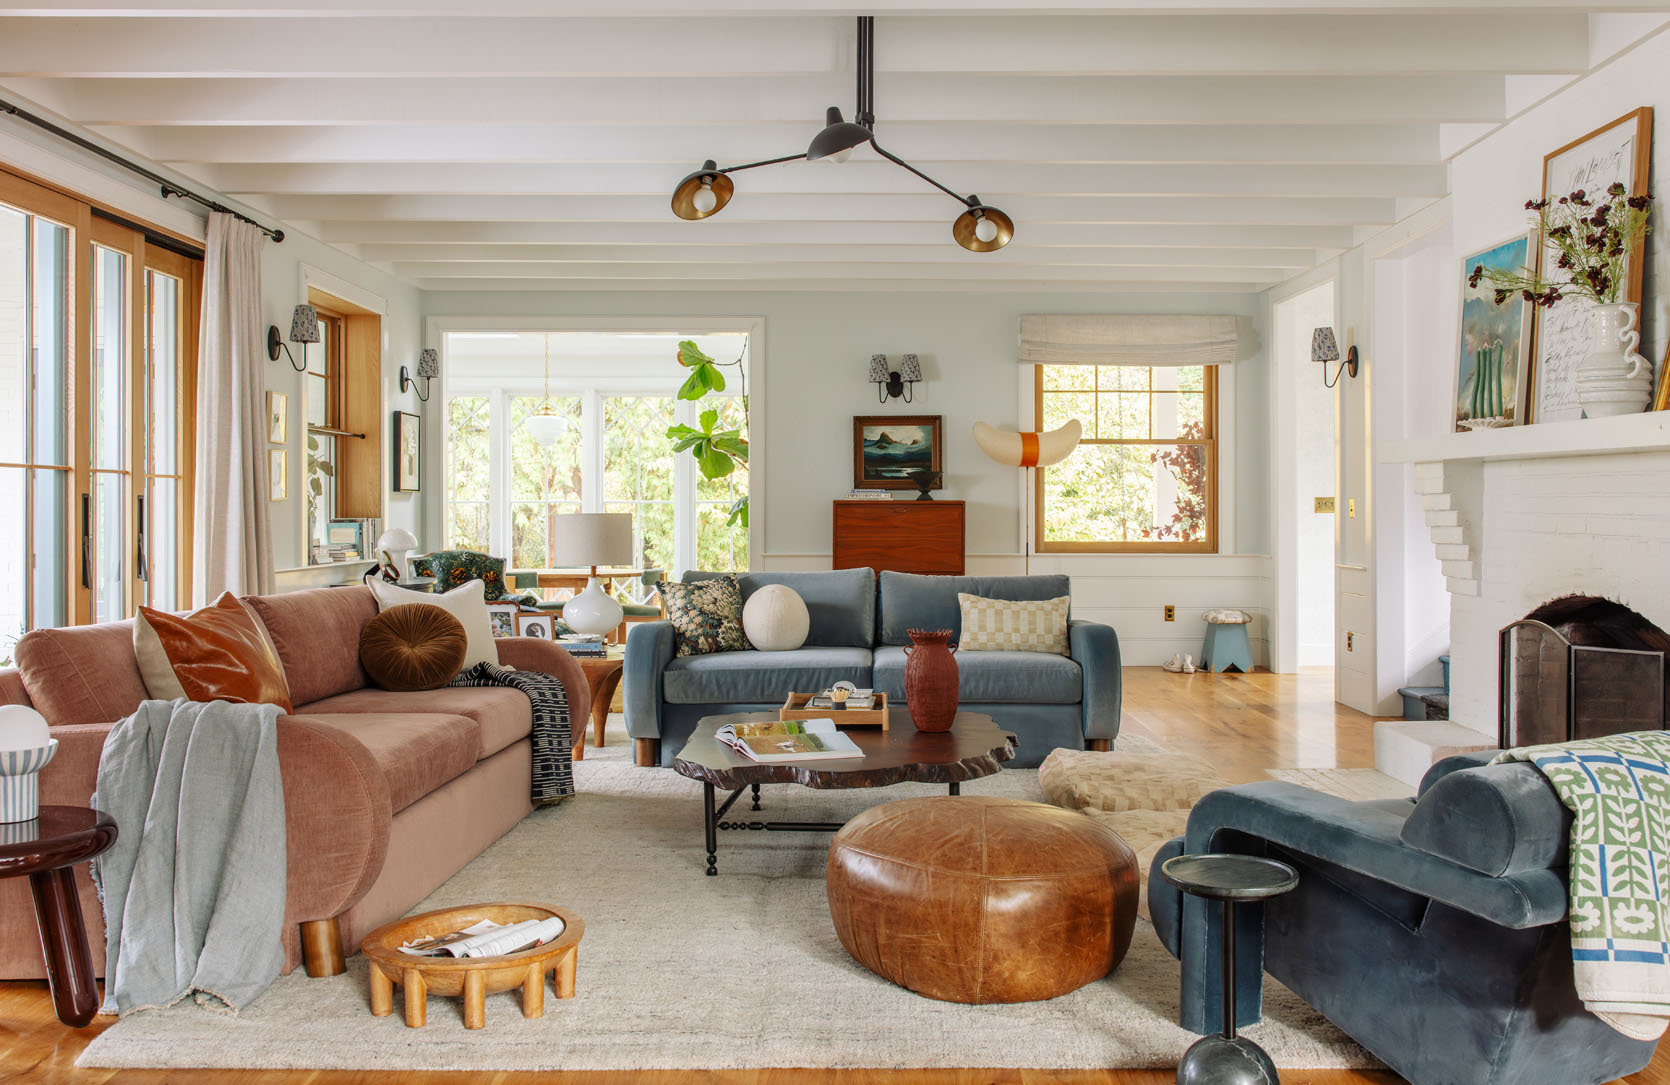
So the double Barbs came in for a shoot and never left because they are so comfortable and we like the long sofa + shorter sofa layout. The rug is one I’ve had for 8 years, and it’s admittedly pretty dang boring, but it’s the most cozy, comfortable, and forgiving rug that I can’t seem to find on the market (I got it at HD Buttercup and never knew the manufacturer). It’s more of a bedroom rug (that’s where I last had it), and it’s not big enough to be in here (this room wants a 12×15, and that rug is a 10×14) but it’s so soft, plush and hides every bit of dog and kid stuff despite being light.

Then I wanted to finally try the antique Swedish hutch that I bought years ago for this house. It was a beast to move in here but we had movers doing other things on the property and I was like ‘now’s my chance!!’. So we shot it again to show you. And between the boring rug and the hutch something felt pretty off. I have found myself just staring at this room and wondering how to fix it since then.
But after being so incredibly frustrated with myself that I can’t nail this room I’ve decided to do an experiment where I give myself permission to take the time to actually design it for the first time, with intention, instead of making last minute choices (the Real Simple shoot) or using product that I need to sell (my sofas and rugs). It’s been really fun to fantasize about my dream floral sofa and shop for the perfect rug (while keeping most of the other elements that I love so much). I still want it to lean Scandinavian farmhouse, with color, but have it feel balanced and flow easily with the rest of the first floor and up the landing.
Meanwhile, I know for sure that I wanted a Persian-style vintage rug in the guest cottage, so I’ve been shopping and I actually found a one on Etsy with a good return policy that I’m trying out in here.
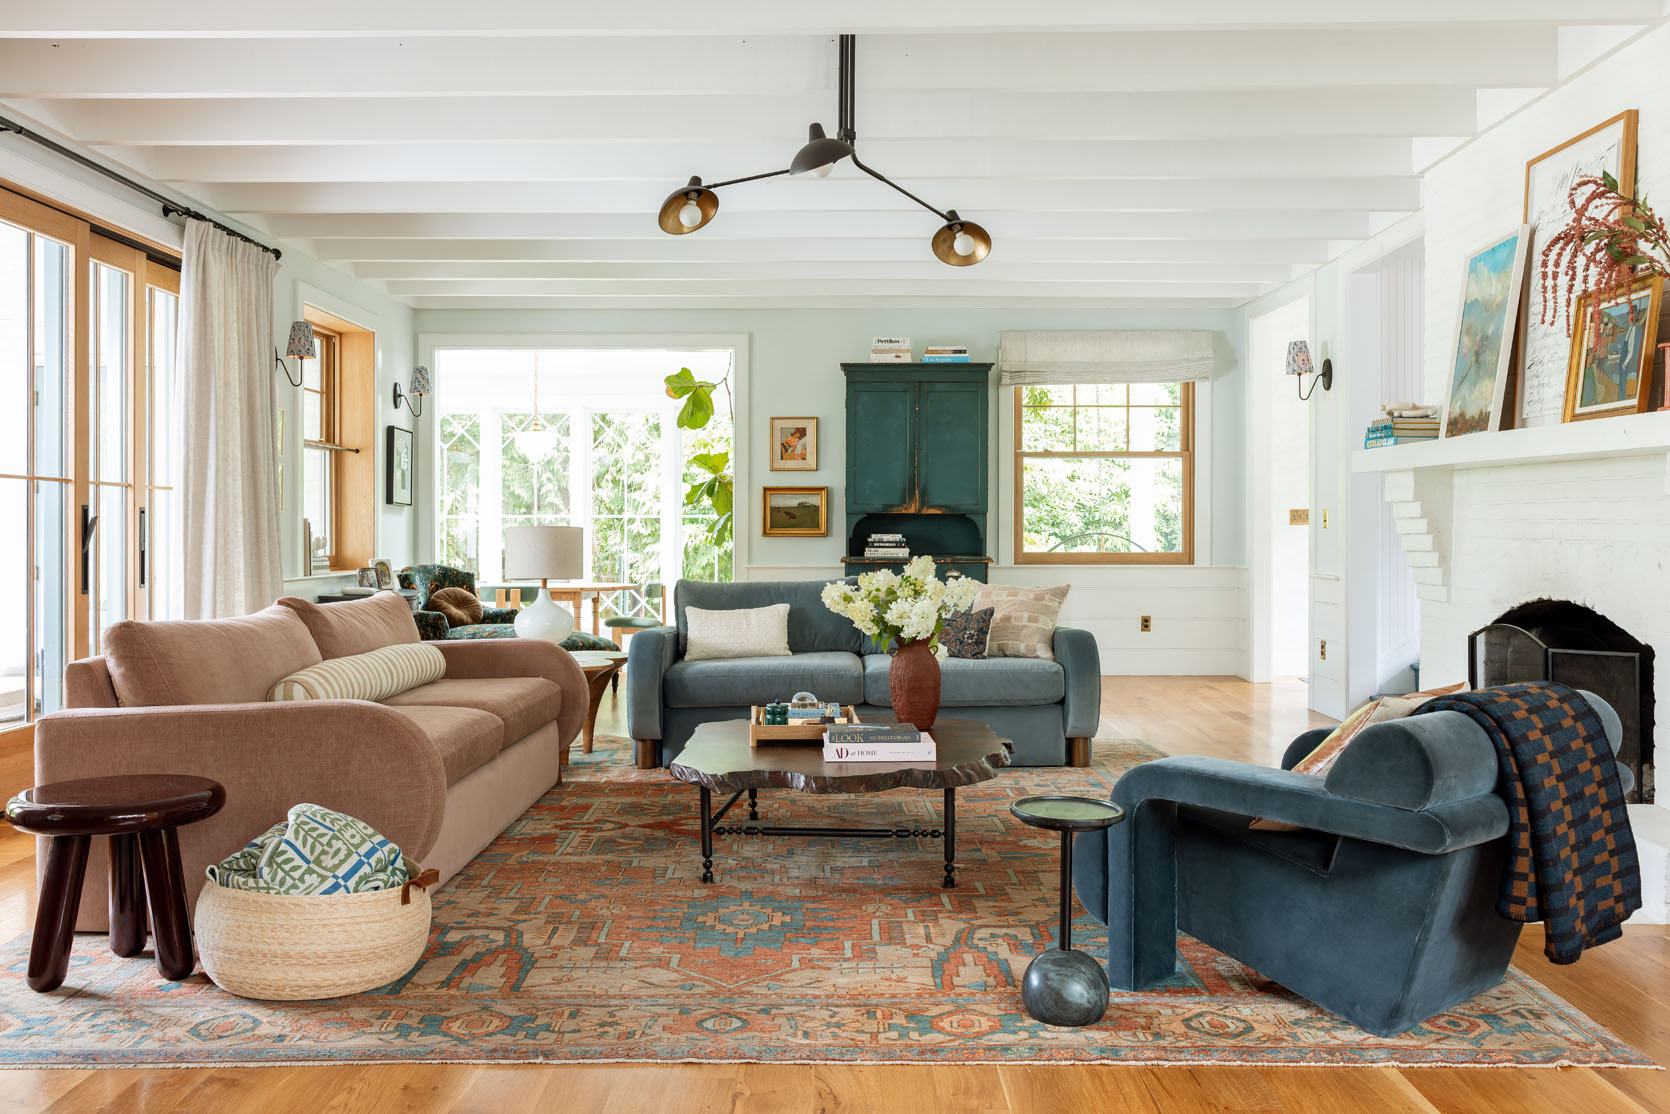
OK. Let’s. Talk. About. It. I love that it has a lot of the tones that are already happening (the blue of the hutch, the warmer tones that work so well with the coffee table and the kitchen island). It’s huge, 12×15, which is the size that this room wants and is so impossible to find vintage unless you spend like $15k, which I won’t. When it arrived it was a bit muddier than I thought it would be and yet is still really pretty. I love that it’s not super dark and busy, but it’s not quite singing with everything else, either. But whose fault is that? The rug or the Barbs?

And if you are wondering if I plugged said vintage rug into AI to render it out first, I did and it looked pretty dang great. Good enough to help me order it to see it in person. But the colors ended up being off – it’s deeper and darker in the render than in real life.
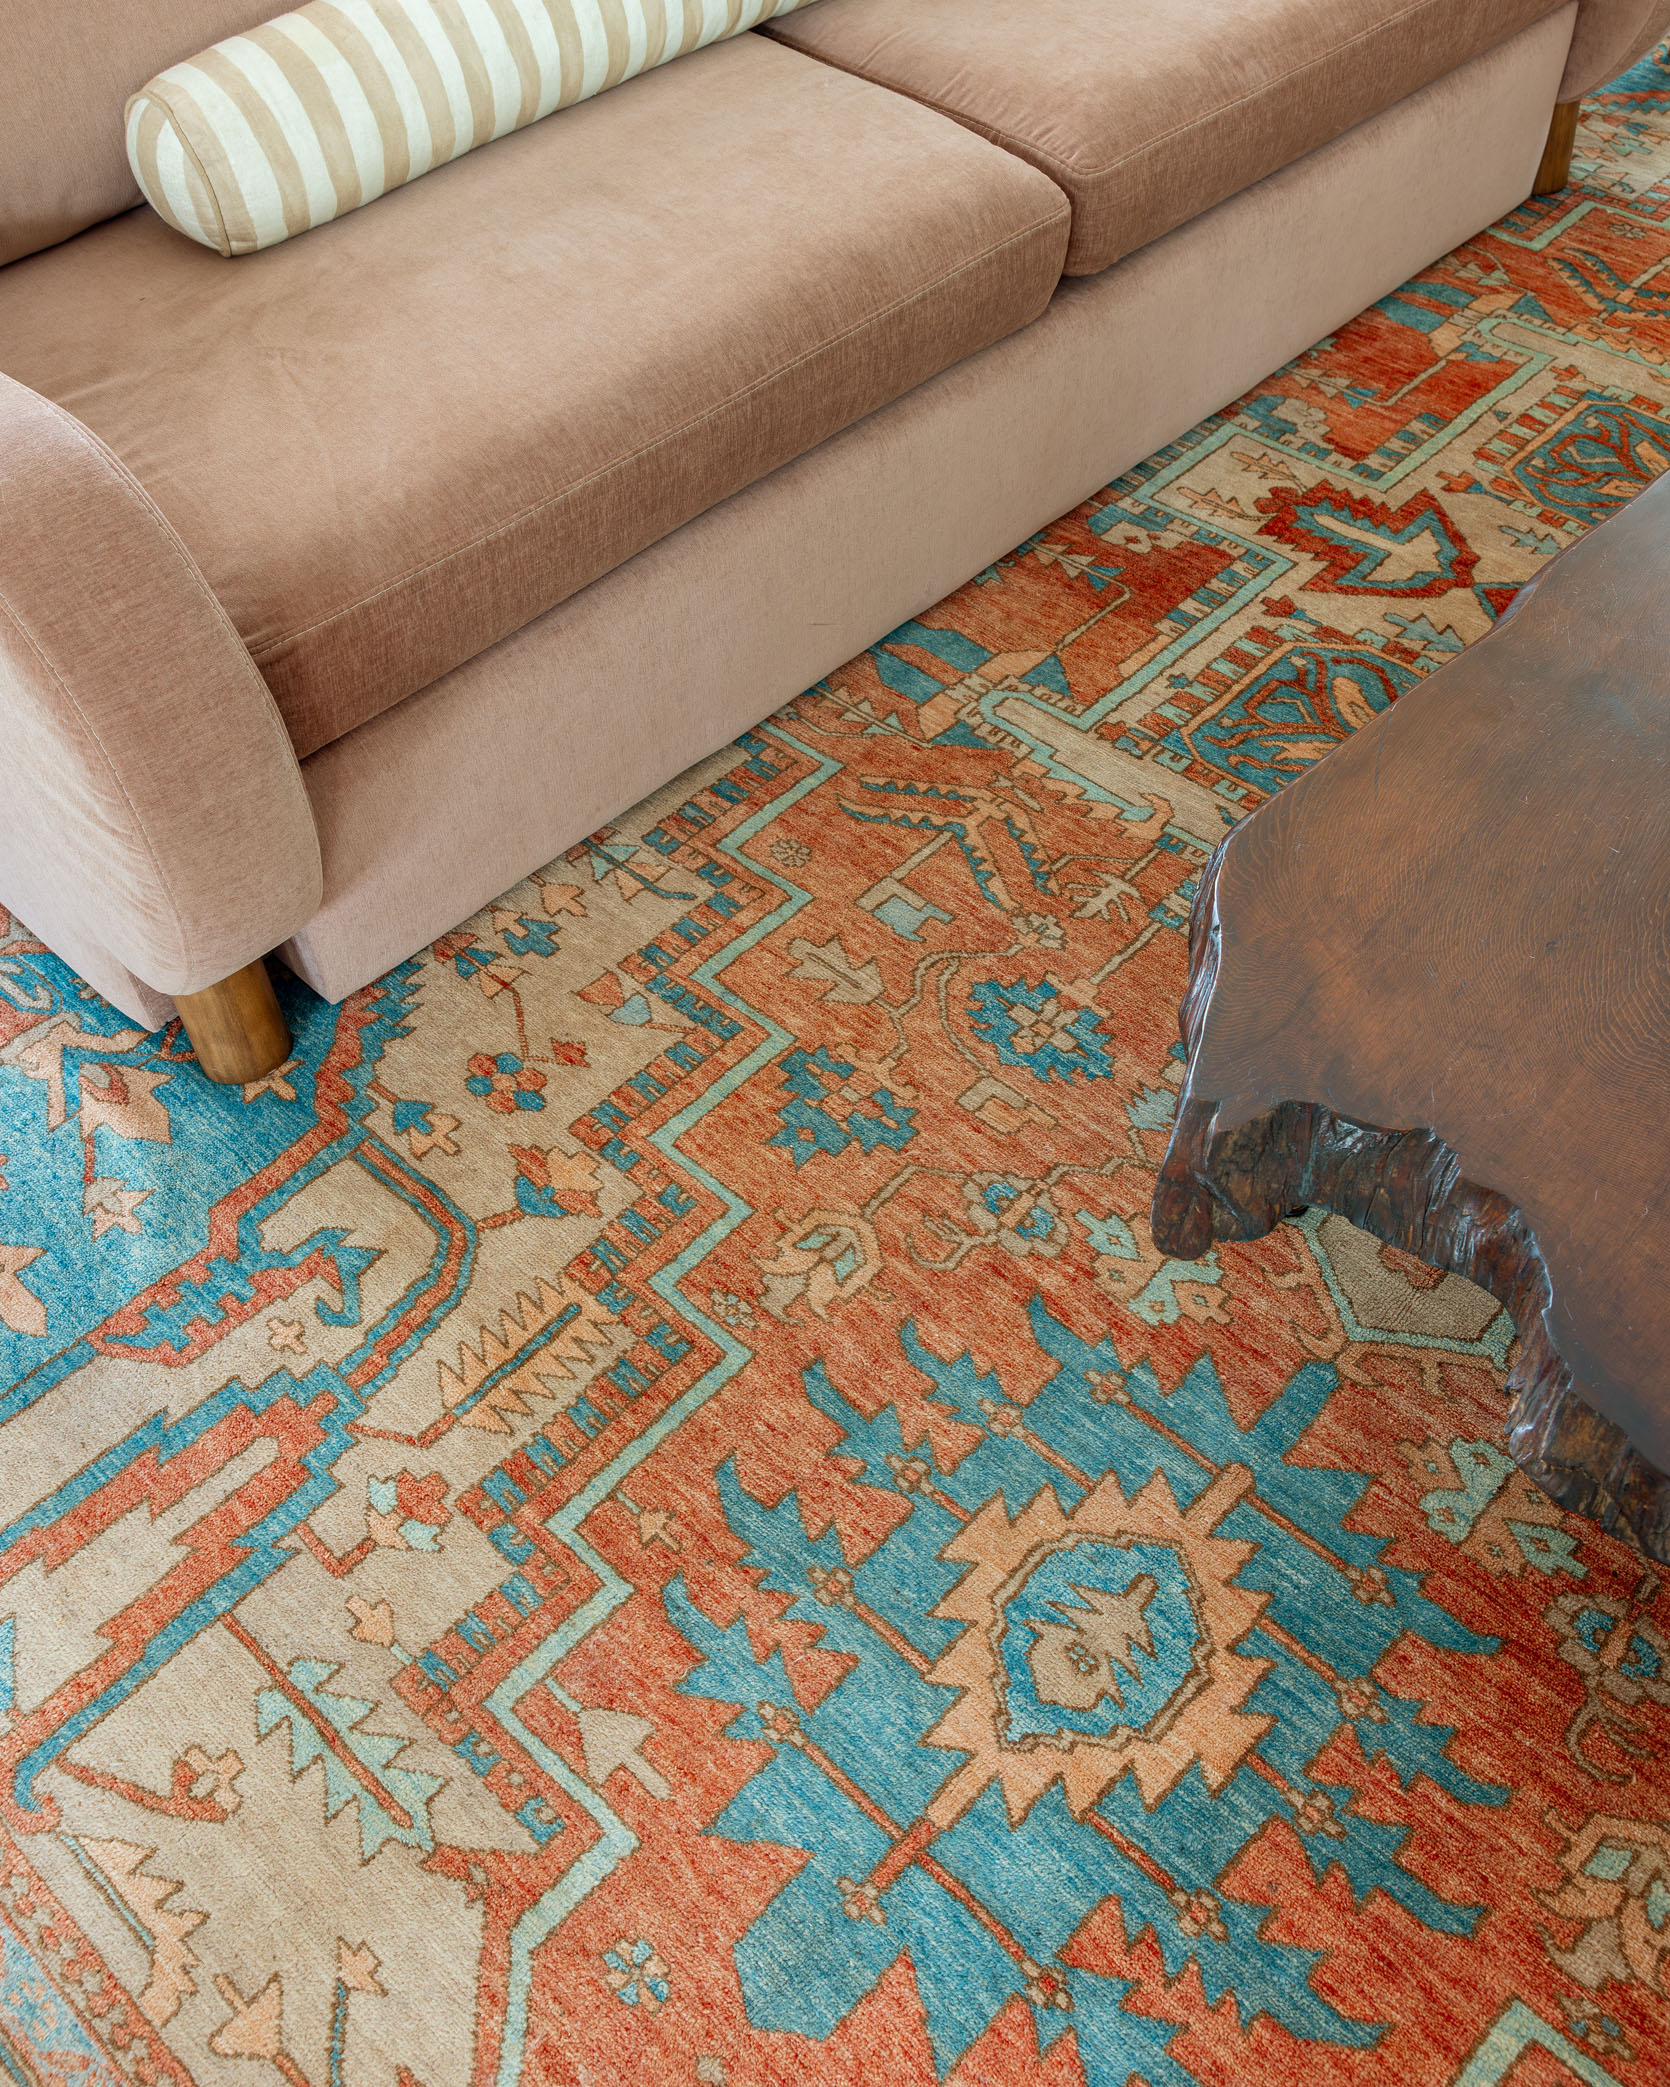
There are times when I love it and other times when I walk in and i’m like, ‘Nope. Not there yet’. It’s making me wonder if a 12×15 vintage rug exists that I will ever love (that is in a normal price range). But I wanted to shoot it and show you guys because that’s what we do – try things, show and tell, and generally obsess about whether or not they are right.
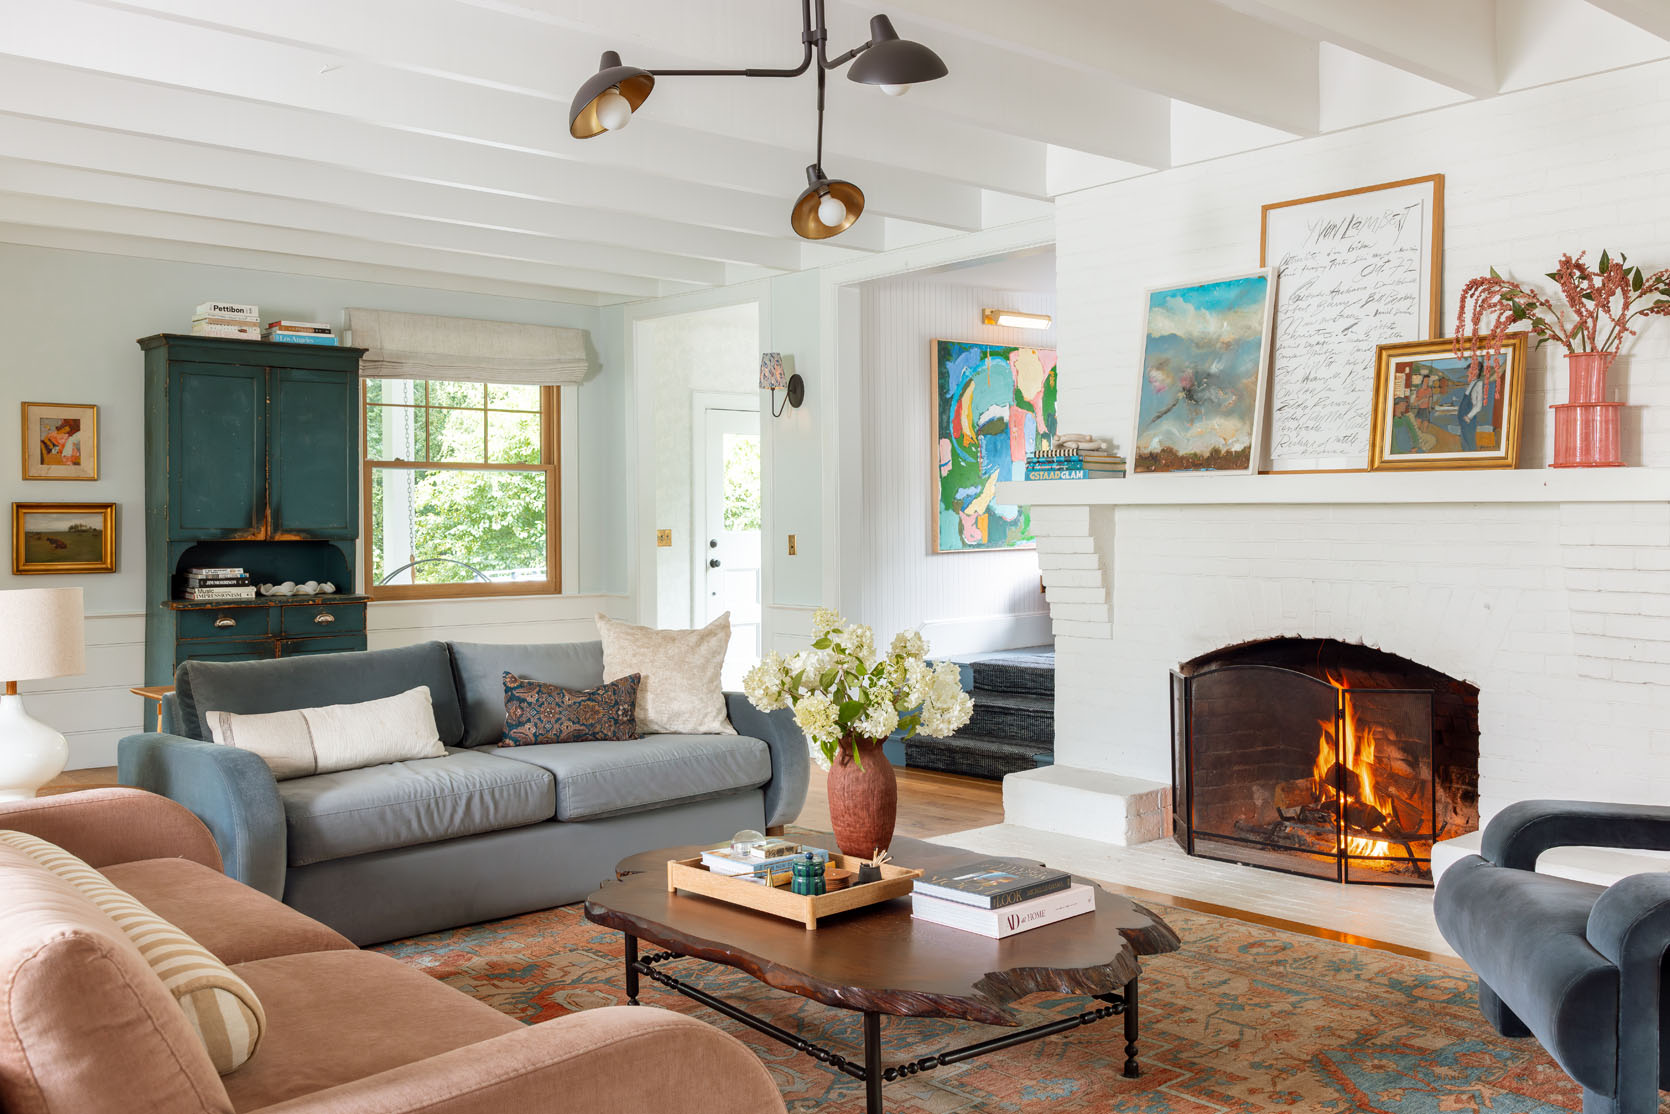
I also switched out the art next to the hutch so that it read more vintage/traditional which I think speaks to the rug and the hutch more. And then I had hoped that some of the colors in this vintage rug would speak to the painting in the landing that is so colorful, and it does and it doesn’t.
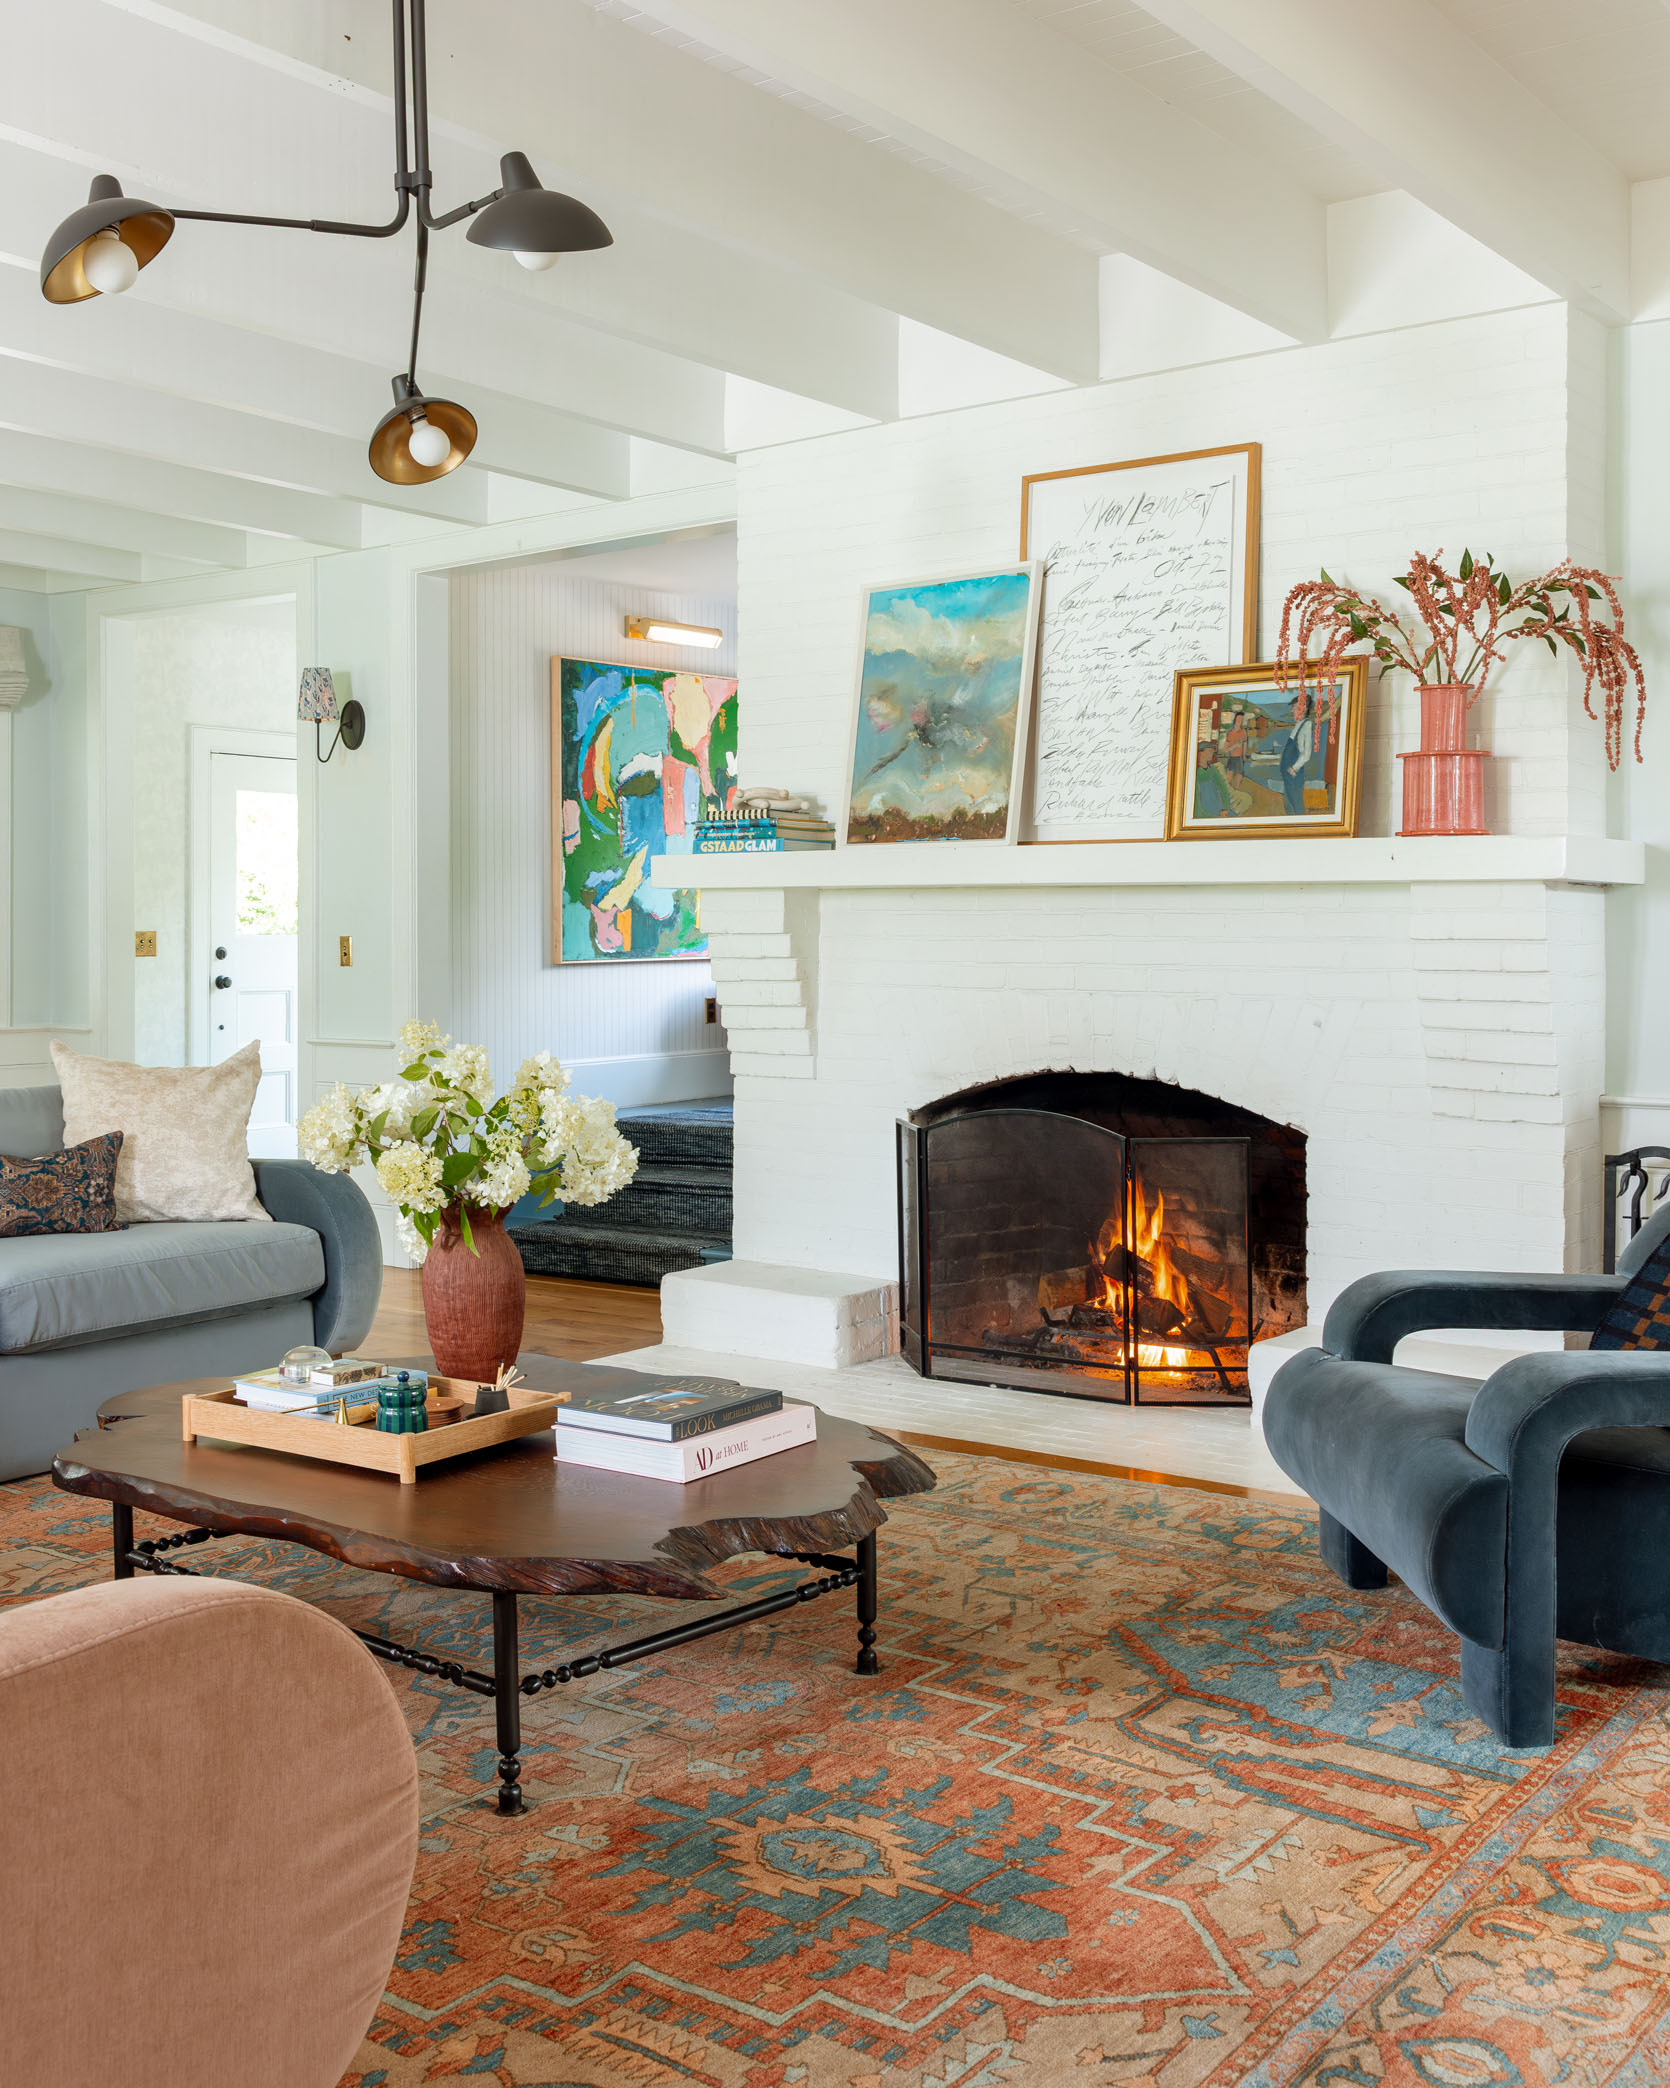
It’s pretty dang soft and obviously very forgiving and durable. It’s nothing like the boring comfy one, but even after a day or two I’ve gotten used to it in here and I love the bigger size.
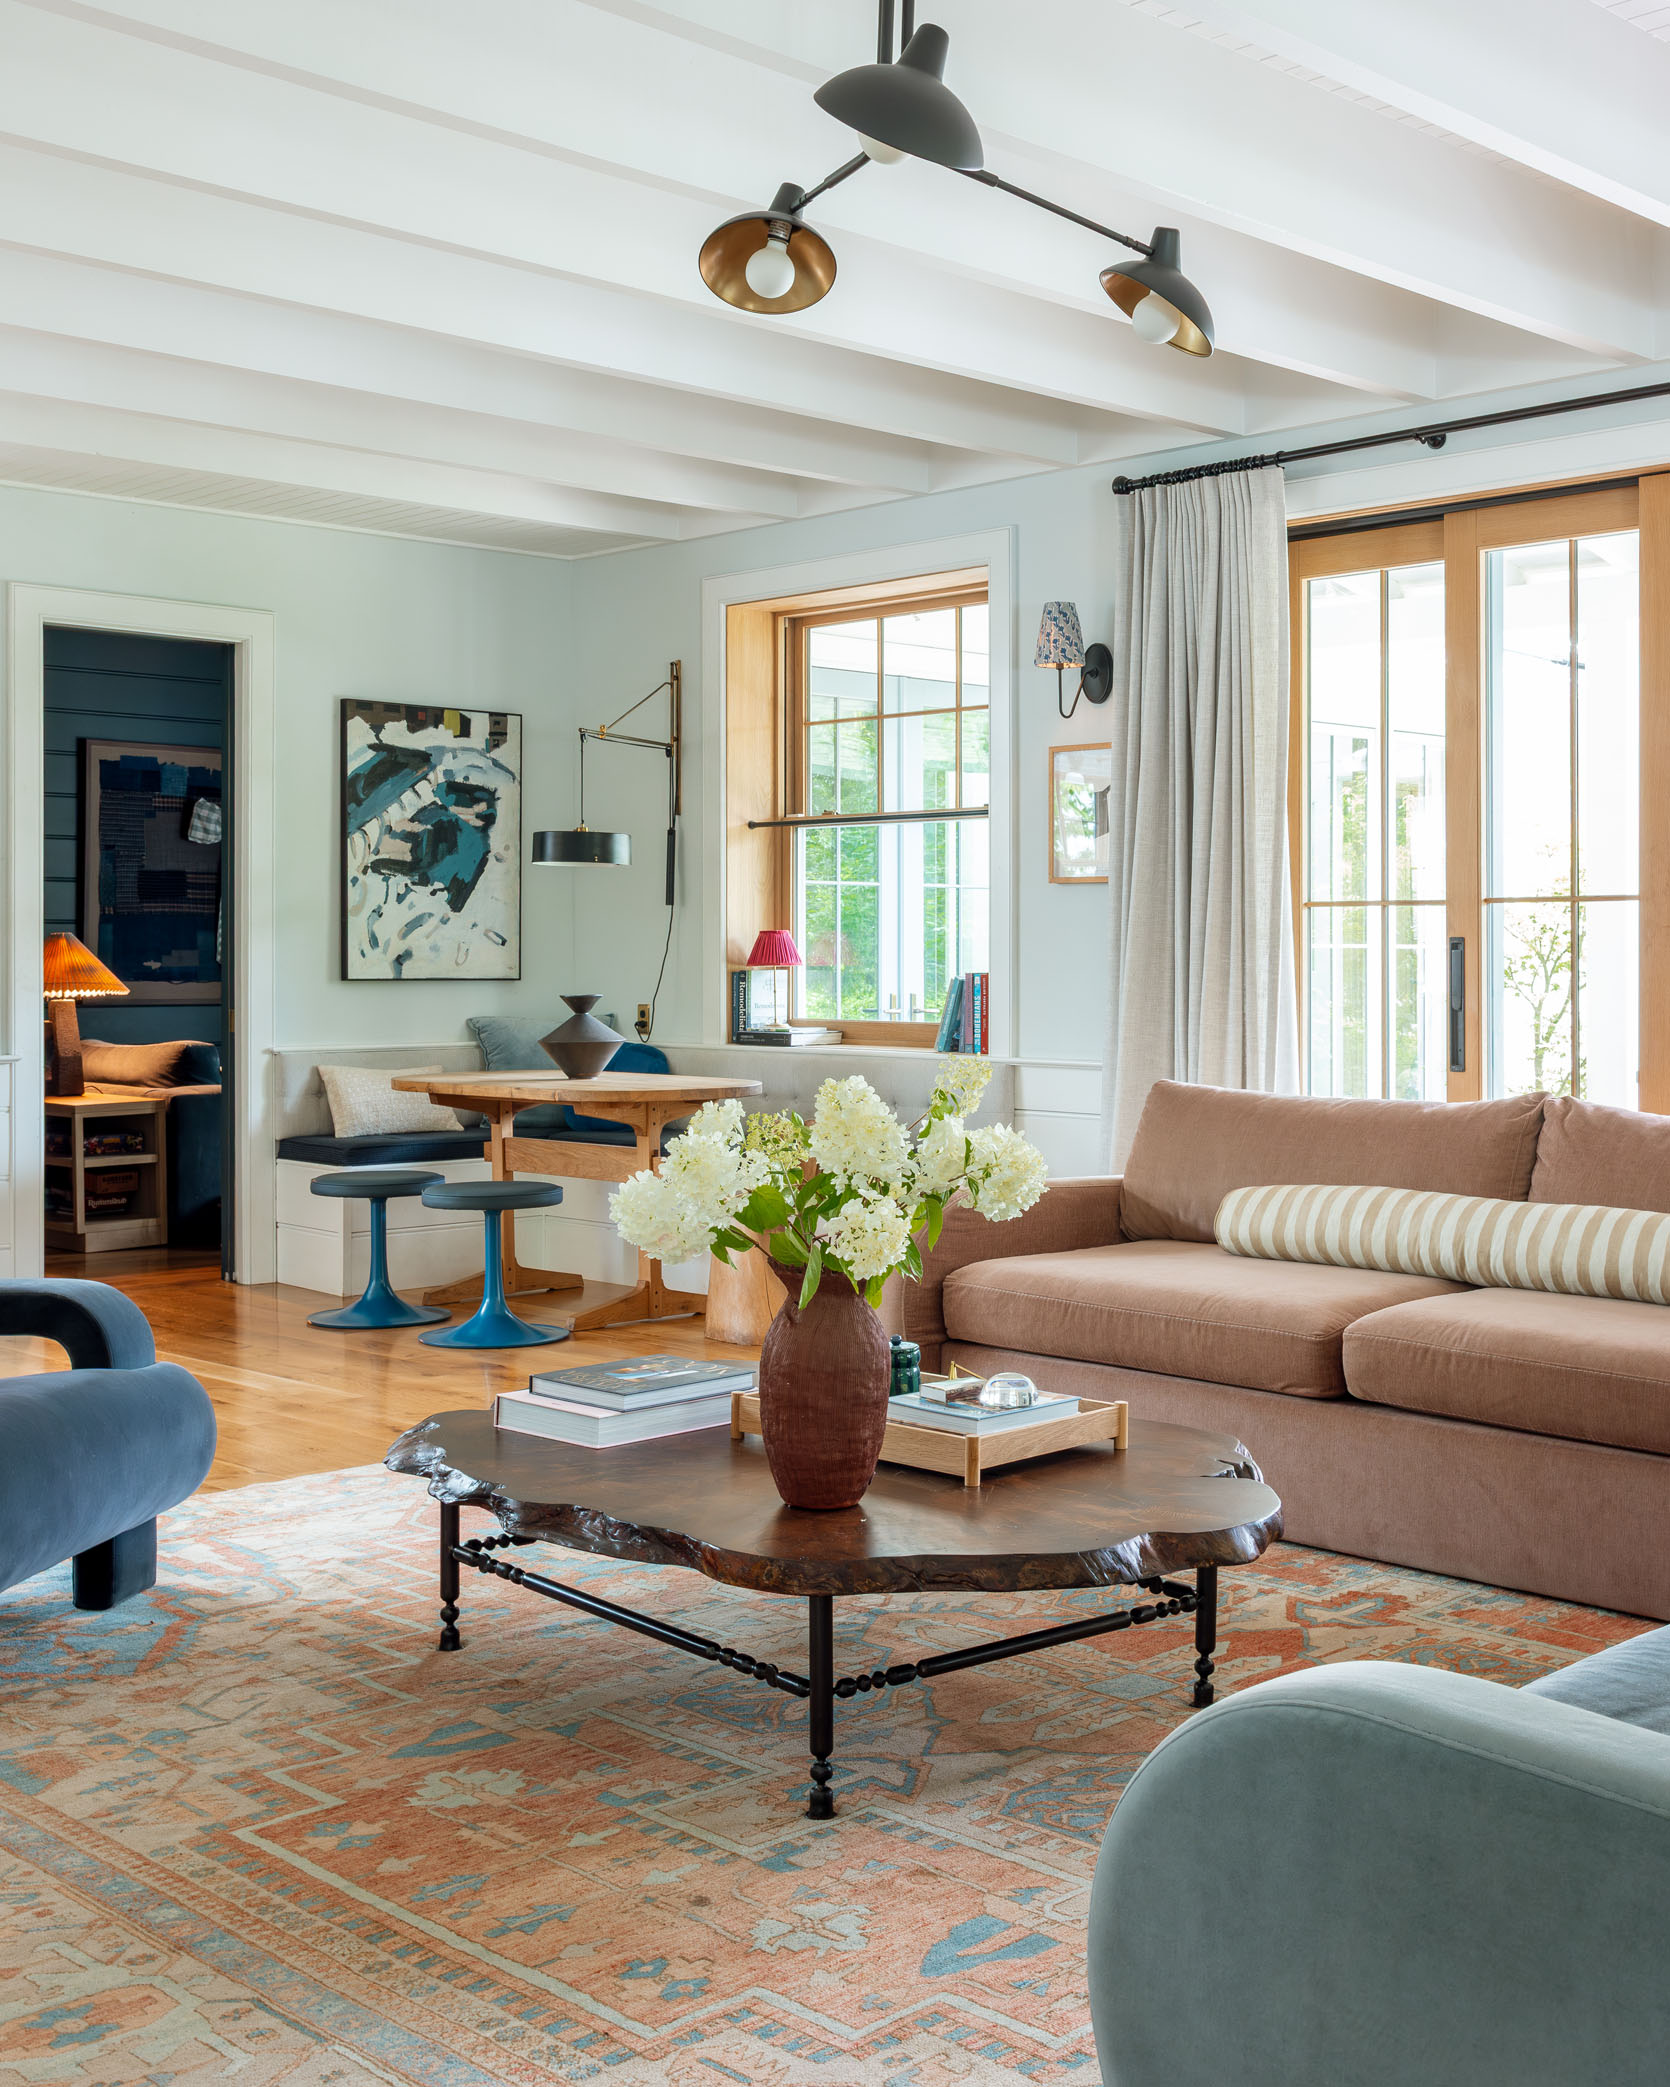
So next steps are that I’m trying to make it work with potential new sofas that are designed for this room (not just ones I rushed into that don’t work with the dogs or are part of my line that has a lot of limitations). I wish SO BAD that I could have our Oscar sofas in here – they are SO comfortable!!! But I know that our dogs will get on top of those more squishy cushions and do the same thing that thy did on the OG green sofas. And no, they only sometimes sit on the back of these cushions since they are a little firmer and higher.
If you are wondering why I don’t just design a sofa and add it to the line, join the club. I showed our manufacturer what I want and they said that it would be too expensive to be at the price point that we need to sell at scale. To sell on Wayfair, which is the only place that they are carrying them, the price point has a threshold (like $2k) so it just creates so many limitations in size, fabric and shape. But I still might try – it’s not off the table. I also might just modify the Alice design to have more colors available and perhaps change the seat so it’s not a tight seat, but a cushioned seat (the Barbs and Oscar are more comfortable because of the loose seat and back just by nature of construction).
Here’s the working moodboard that is basically my Saturday morning hobby while drinking coffee:
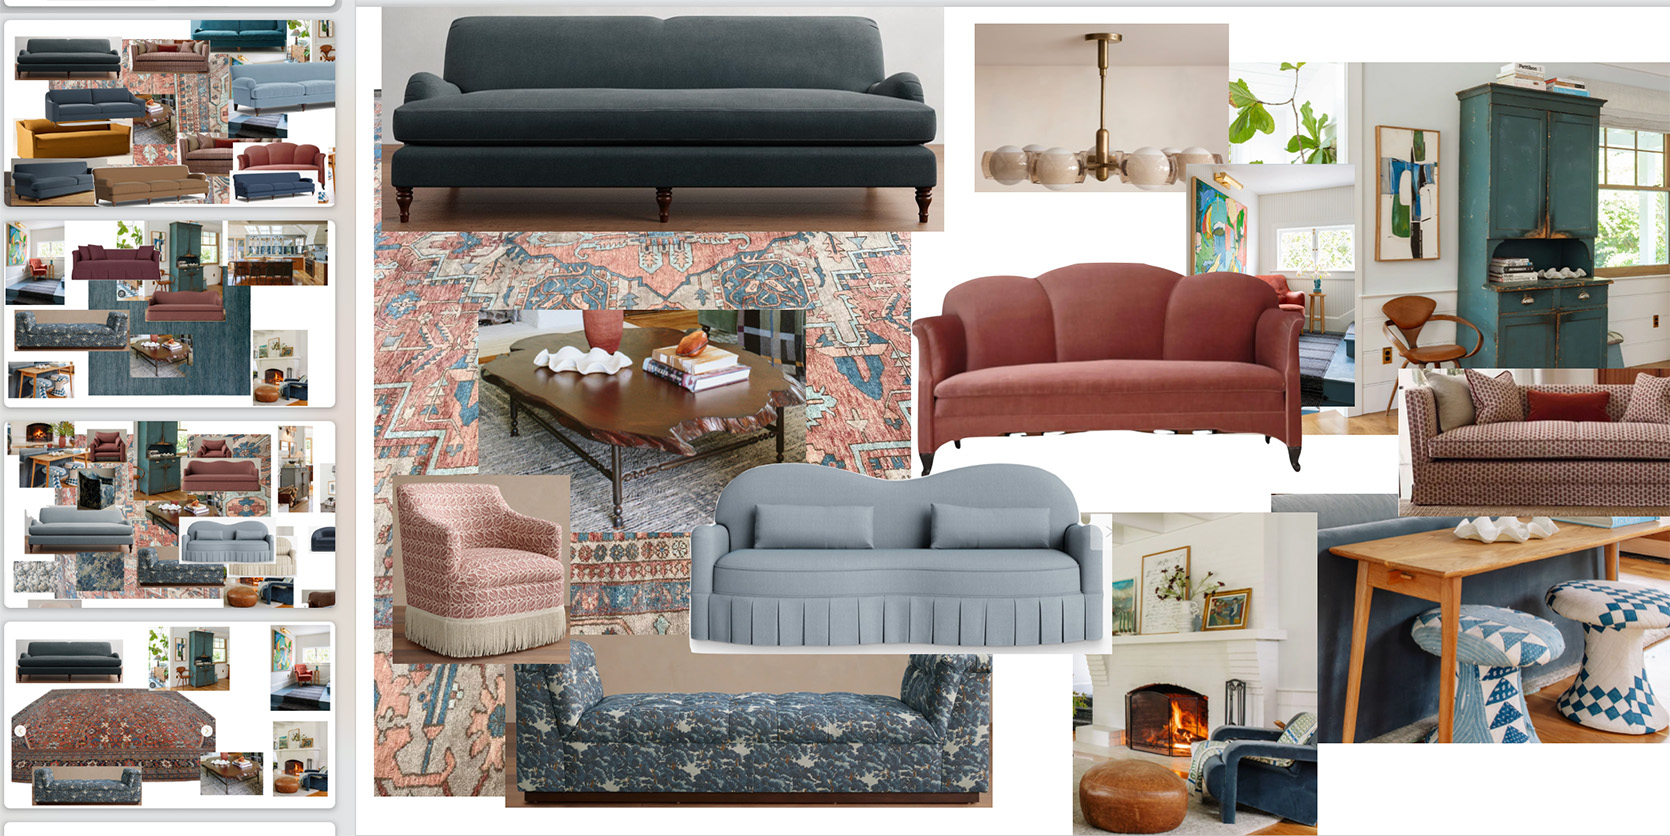
I have so many fabric swatches on the way with some ready-made sofas on the market that I love, and I’m dabbling with custom patterns and shapes. But I’m also open to this 12×15 vintage rug going out in the guest cottage if it’s not going to work with the ultimate design of this living room. This room is not a huge priority in my life and yet it’s the one that we spend the most time in and man it’s been challenging. It’s just so open to so many other rooms that it has to look good within – the kitchen, the sunroom, the entry, the landing, the family room, the dining nook and so many doorways!!! It’s a pass through room, that is really big with with a central focal point that makes it hard to create multiple zones. If you have a living room in a house that is just a room off an entry, with a single entrance/doorway, consider yourself lucky – they are so much easier to design. I don’t regret having our home be so open and I love that the living room and kitchen are so connected, but it certainly complicates the design. I just want to get to the point where I’m like ‘I LOVE THIS ROOM SO MUCH” just like I have with the family room, kitchen, sunroom, the mudroom, all the bathrooms, and even our bedroom now. This is my problem child forever 🙂 If you are like ‘hey lady, just calm down and stop tweaking your perfectly good room in your pretty house’, you are so right and join the club – I ALSO wish I could just pretend that the box is checked. But it’s not. I look at my brother’s living room, Nicole’s living room, Robyn’s living room – all so good and so well designed. So I just want mine to be part of that club, while also recognizing that this might be some sort of undiagnosed neurosis 🙂 Luckily, I’m in no real rush and can try to enjoy the process. xx
*Photos by Kaitlin Green
]]>Summer in Oregon is unbeatable (try). My “favorite things to do near Portland” post is coming up soon (I’m such a tourist!), but hanging in our backyard with friends and family is certainly one of them. We are hosting so many parties and school events this summer, which brings me 10/10 on the joy scale. Like any project, we continue to make some tweaks and updates based on our needs, how we are using it, and what was working (or just old and dirty and needed replacing). I bought a few things (from Wayfair) for a little pool update, which came so fast, so let’s take a new tour.

I know I need to prune those flowers (and did), but look how gorgeous and lush it is. The rain and sun really do their job so well up here.

We replaced our umbrellas, which were three years old and, despite my power-washing skills, were pretty dirty. These were on sale when I bought them for a little over $100 each, and they are made of polyester or something much easier to wash.

Adirondack Chair | Striped Towel | Solar Lamp
The double-scallop trim is so cute, and the hit of black gives it a nice definition. What I am in the market for now is umbrella stands on wheels that won’t rust after one summer and then become wonky (it was impossible to make them straight!). Those solar lamps up there are awesome, BTW. They cast the coolest shadow pattern on the ground and turn on automatically when the sun goes down.


Side Table | Chaise Lounger | Bolster (old) | Green Cup
For this partnership, I could have done some product boards or just shown all the Wayfair stuff we have, but I needed those umbrellas and the side table, and y’all, they showed up within a week. So impressive. The side table is cement with a glaze, so it should handle the PNW rain (they usually can). The chaise lounge is from Neighbor, via Wayfair, and it’s teak and has patina’d so nicely (but I probably should oil it).

The floaties are so cute and fun (and I love the tab so you can hang them up should you need), but I was so surprised by how small they are until… I realized there are two sizes, ah. This is the bigger one!

Wicker Chair | Sectional | Coffee Table | Wicker Lamp
That seating area is finally dialed in, and I just love how it looks. The sectional is teak, and the outdoor resin wicker holds up perfectly in the weather. The new landscaping hasn’t fully grown in yet, but I think in a month it’s going to be so beautiful. I loved the wildness of what we originally planted (that was meant for year one show-ness for our pool partner), but some of the flowering grasses had gotten to be 4′ tall and were so messy, so we planted around the pool to match the rest of the yard. It will still be full and casual, but a little more curated (the grasses blocked the view from the seating area to the pool).

The Soake Pool really is the absolute best. I know we could have fit a large pool on our property, but the fact that you can use it so often in the fall, winter, and spring as a hot tub is so incredible. It cools down overnight (unless it’s 90 degrees out) and remains in the 60s and 70s during the day in the summer. I’ve been in at least twice a week since the landscaping was finished.

So this is your official reminder that Wayfair has a lot of awesome stuff that can arrive really fast. Their inventory is massive (daunting at times), so we curated a bunch of our favorites for you:
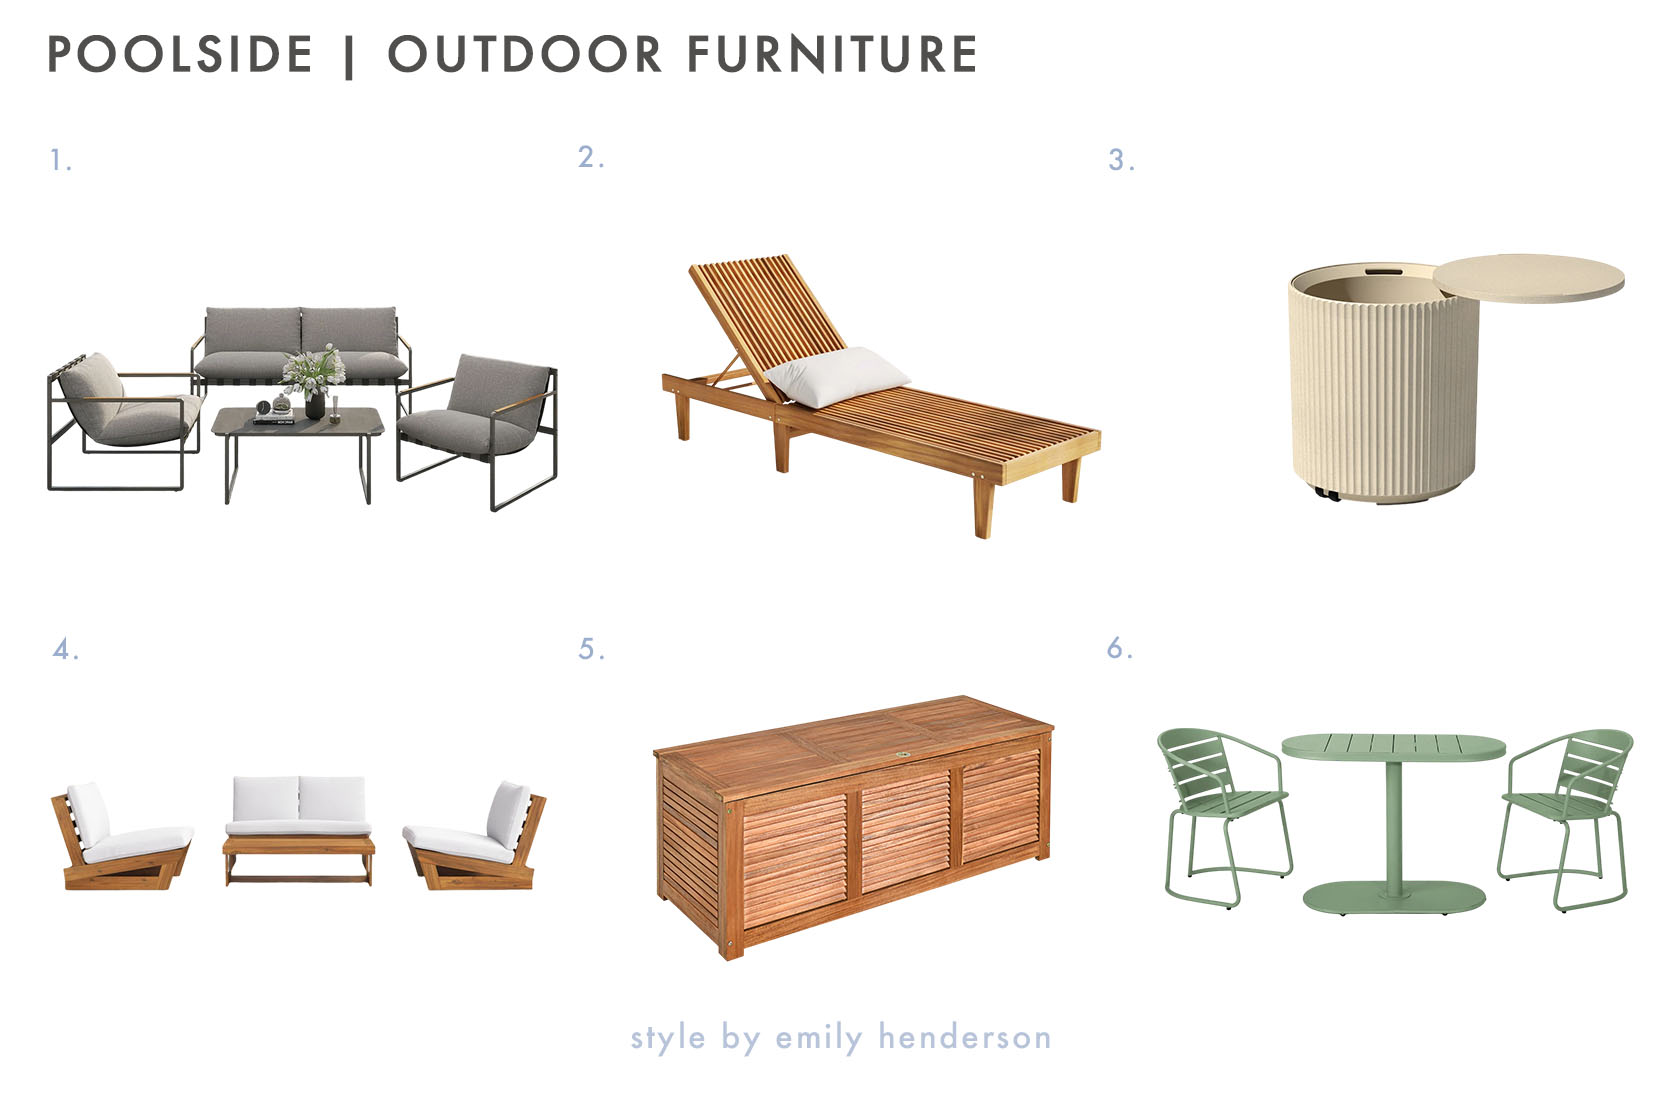
1. Modular Gray All-Steel Webbing Sofa (Set Of 4-Piece) | 2. Cadain Long Reclining Chaise | 3. Veradek Chill Side Table | 4. Louise Patio Conversation Set | 5. Costway Storage Bench | 6. Gunner Oval Metal Folding Bistro Set

1. Pedrick 100.8” Tilt Market Umbrella | 2. Tonquin 78” Beach Umbrella | 3. Collins 9 ft. Bohemian Fringe Outdoor Patio Umbrella with Crank Lift and Tilt

1. Lani Sunbrella® Indoor/Outdoor Throw Pillow | 2. Amala Sunbrella® Indoor/Outdoor Kidney Throw Pillow | 3. Outdoor Pillow Collection Pillow | 4. Gingham Indoor Outdoor Decorative Lumbar Pillow (Set of 2) | 5. Jaclyn Corded Outdoor Square Pillow (Set of 2) | 6. Cabana Stripe UV Protected Outdoor Pillow
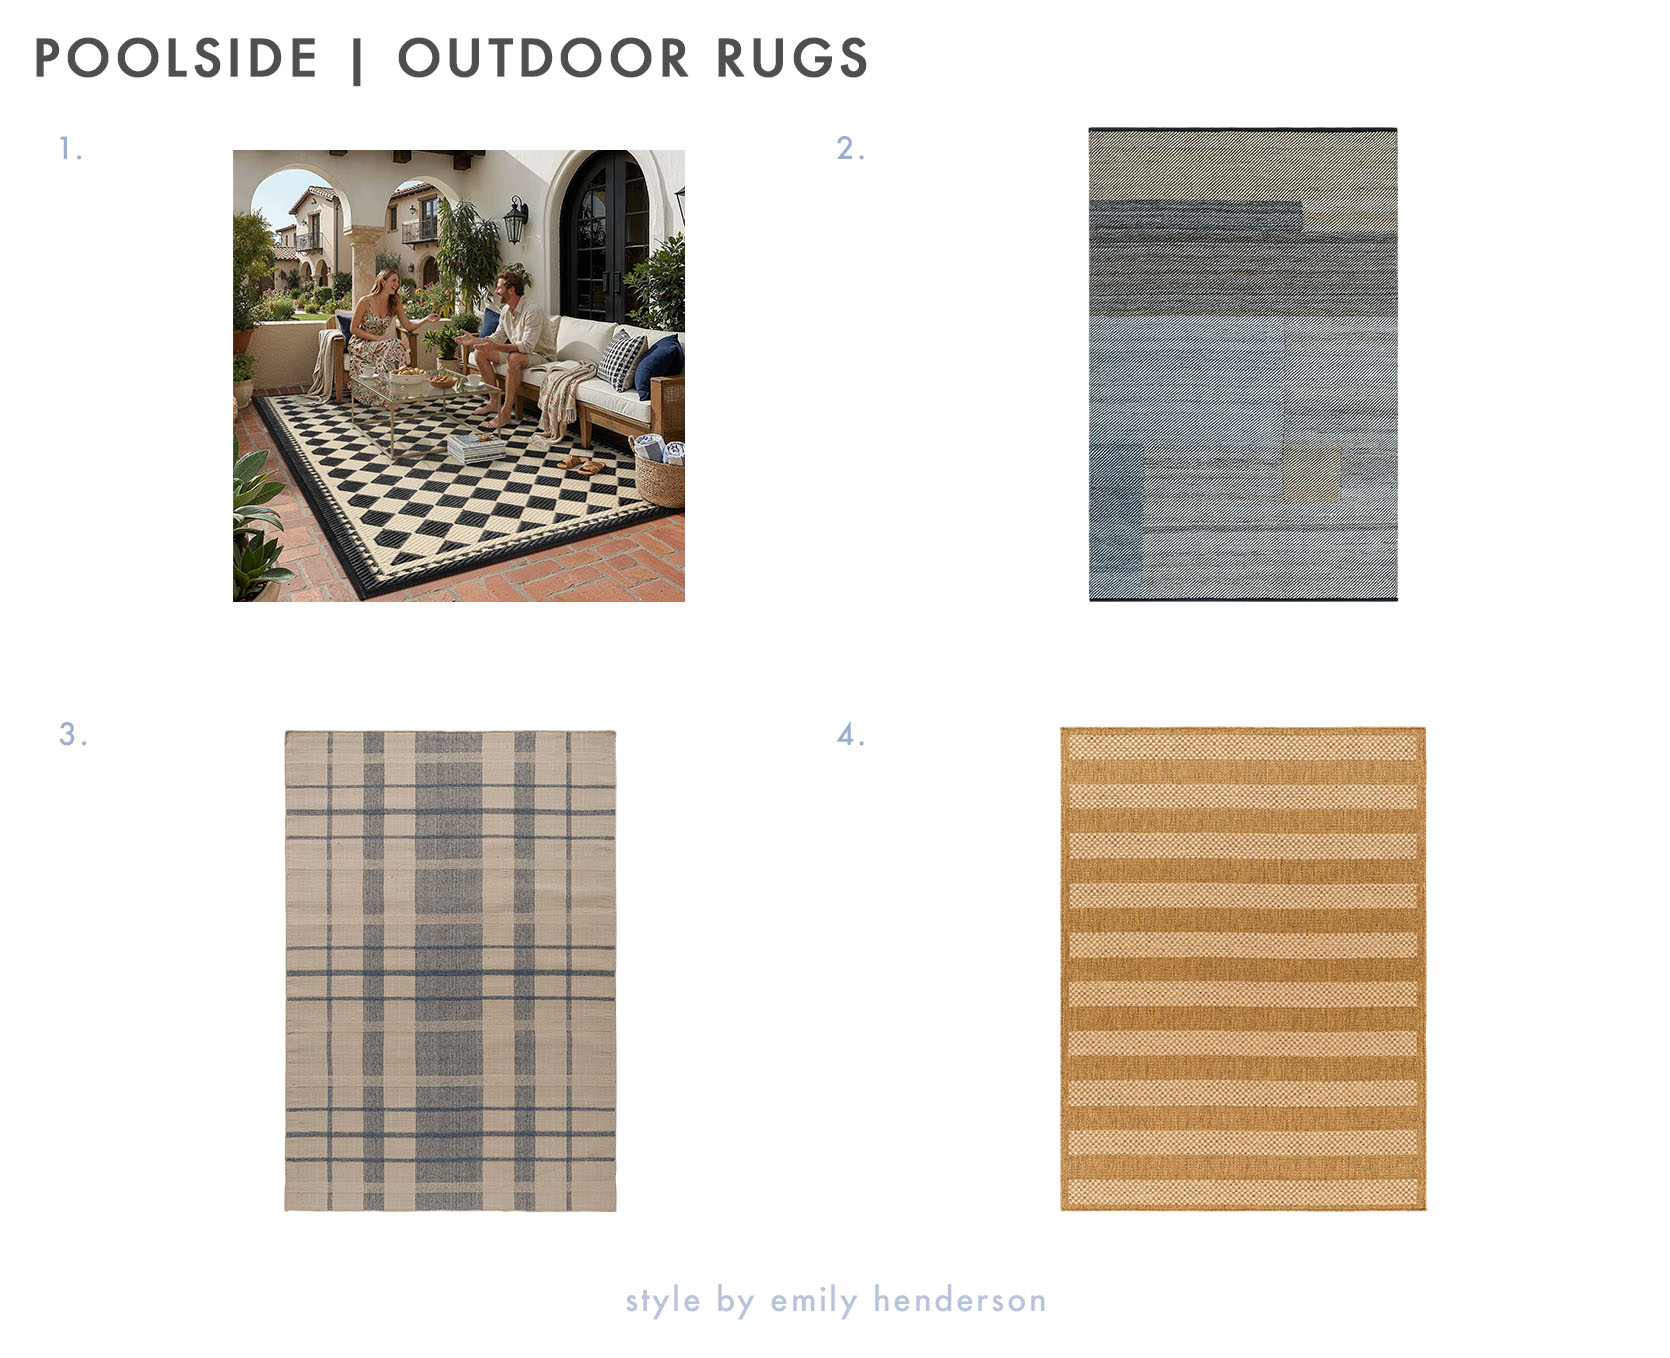
1. Enzo Geometric Checkered Waterproof Reversible Outdoor Rug | 2. Campbelle Patchwork Hand Woven Flatweave Recycled P.E.T. Indoor/Outdoor Area Rug | 3. Zona Plaid Indoor / Outdoor Rug | 4. Syretha Striped Indoor / Outdoor Rug

1. Lux Bali Sling Pool Float | 2. Large Floating Tray for Pool | 3. Fruit Slice Pool Lounger
Happy swimming! xx
*Thank you to Wayfair for partnering with us on this blog post.
*Photos by Kaitlin Green
]]>The guest room famously gets the leftover furniture, which is kinda fine, as it’s a great place to put the stuff you like that might just not work in other rooms that you care about more. So this room is still a work in progress, but there was enough newness to show you. Close to four years ago, when we first moved in (WHAT IS TIME), it looked like this (and it was so sweet).
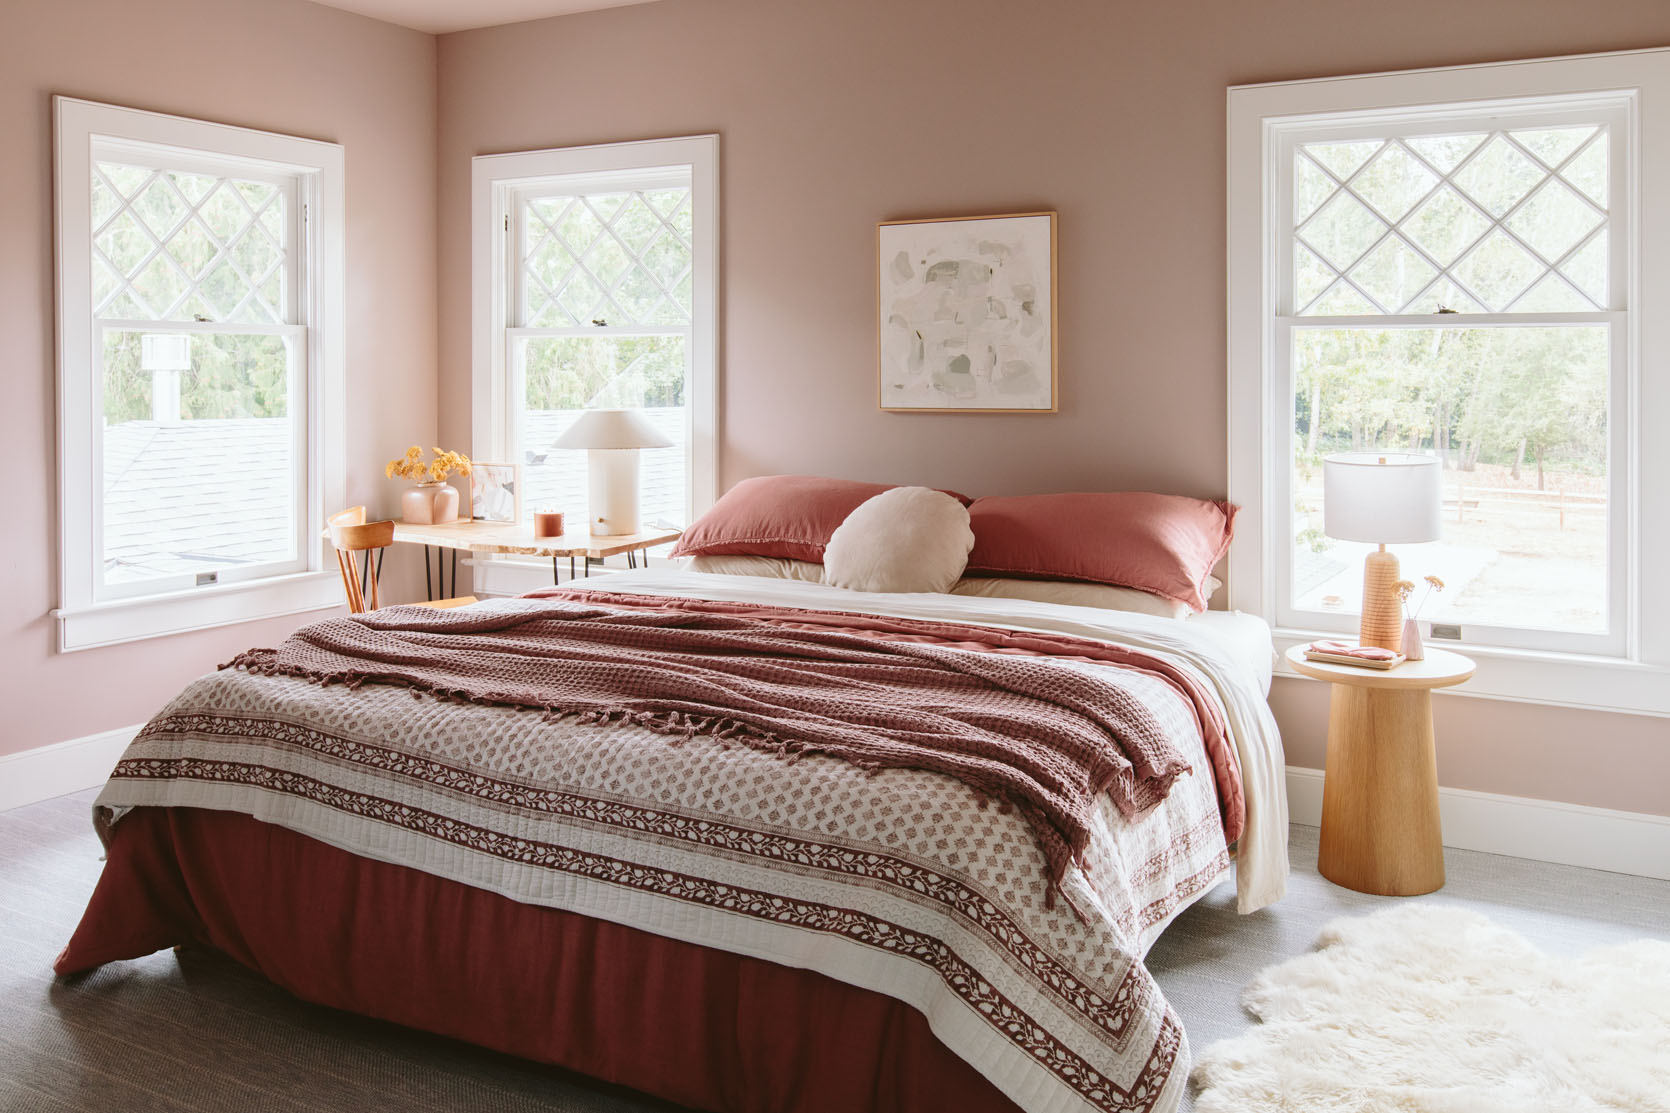
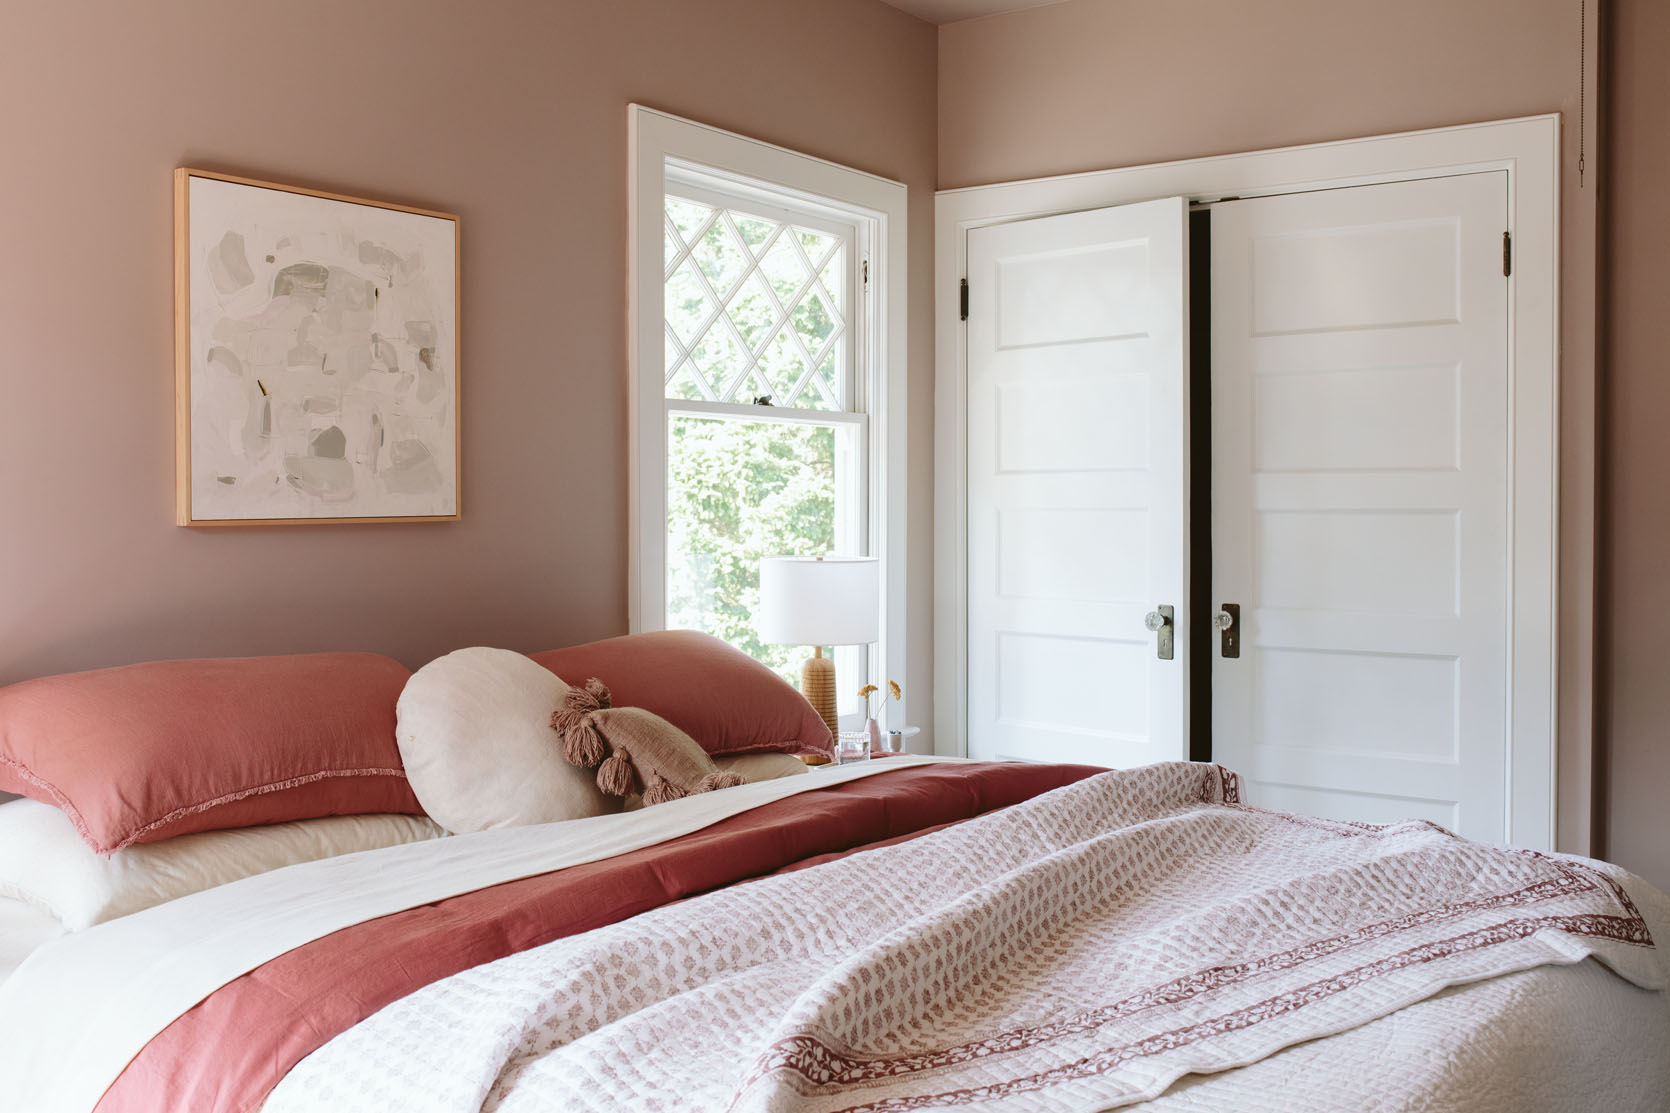


It didn’t have a bed or much really, but some leftover furniture and lamps that I think actually looked pretty great. It was cozy and soft, and everyone who slept in there loved it.

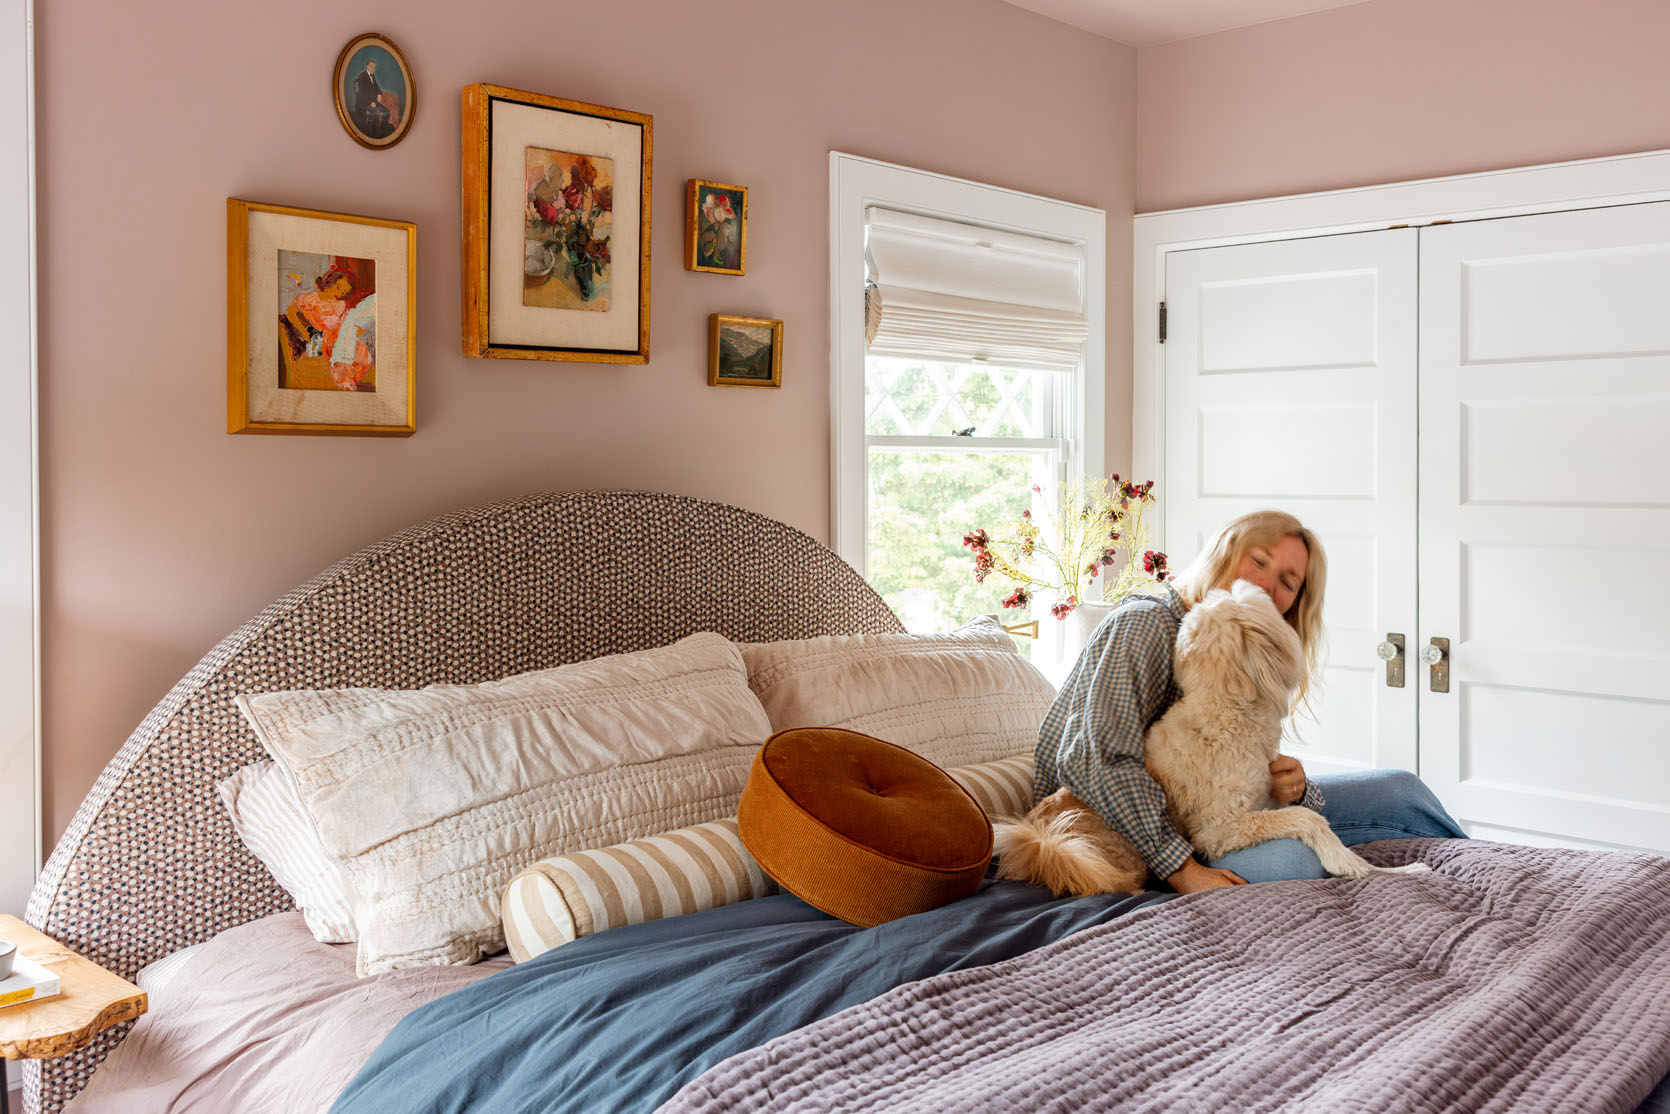
But for whatever reason, I designed a custom bed for in here to fit right in the middle of the windows (at the time, I was like “king beds and only king beds forever”). It’s upholstered in this sweet print by Rebecca Atwood that I thought would just add a texture and slight pattern, without being too bold. But we had to pivot. You know the story – the bed I had ordered for our bedroom didn’t arrive in time for our big Real Simple shoot, but this one was about to be delivered, so we put it in our bedroom. And since it’s so crazy heavy, and we’d already assembled it, we left it there for years. But it always was meant to be up here.
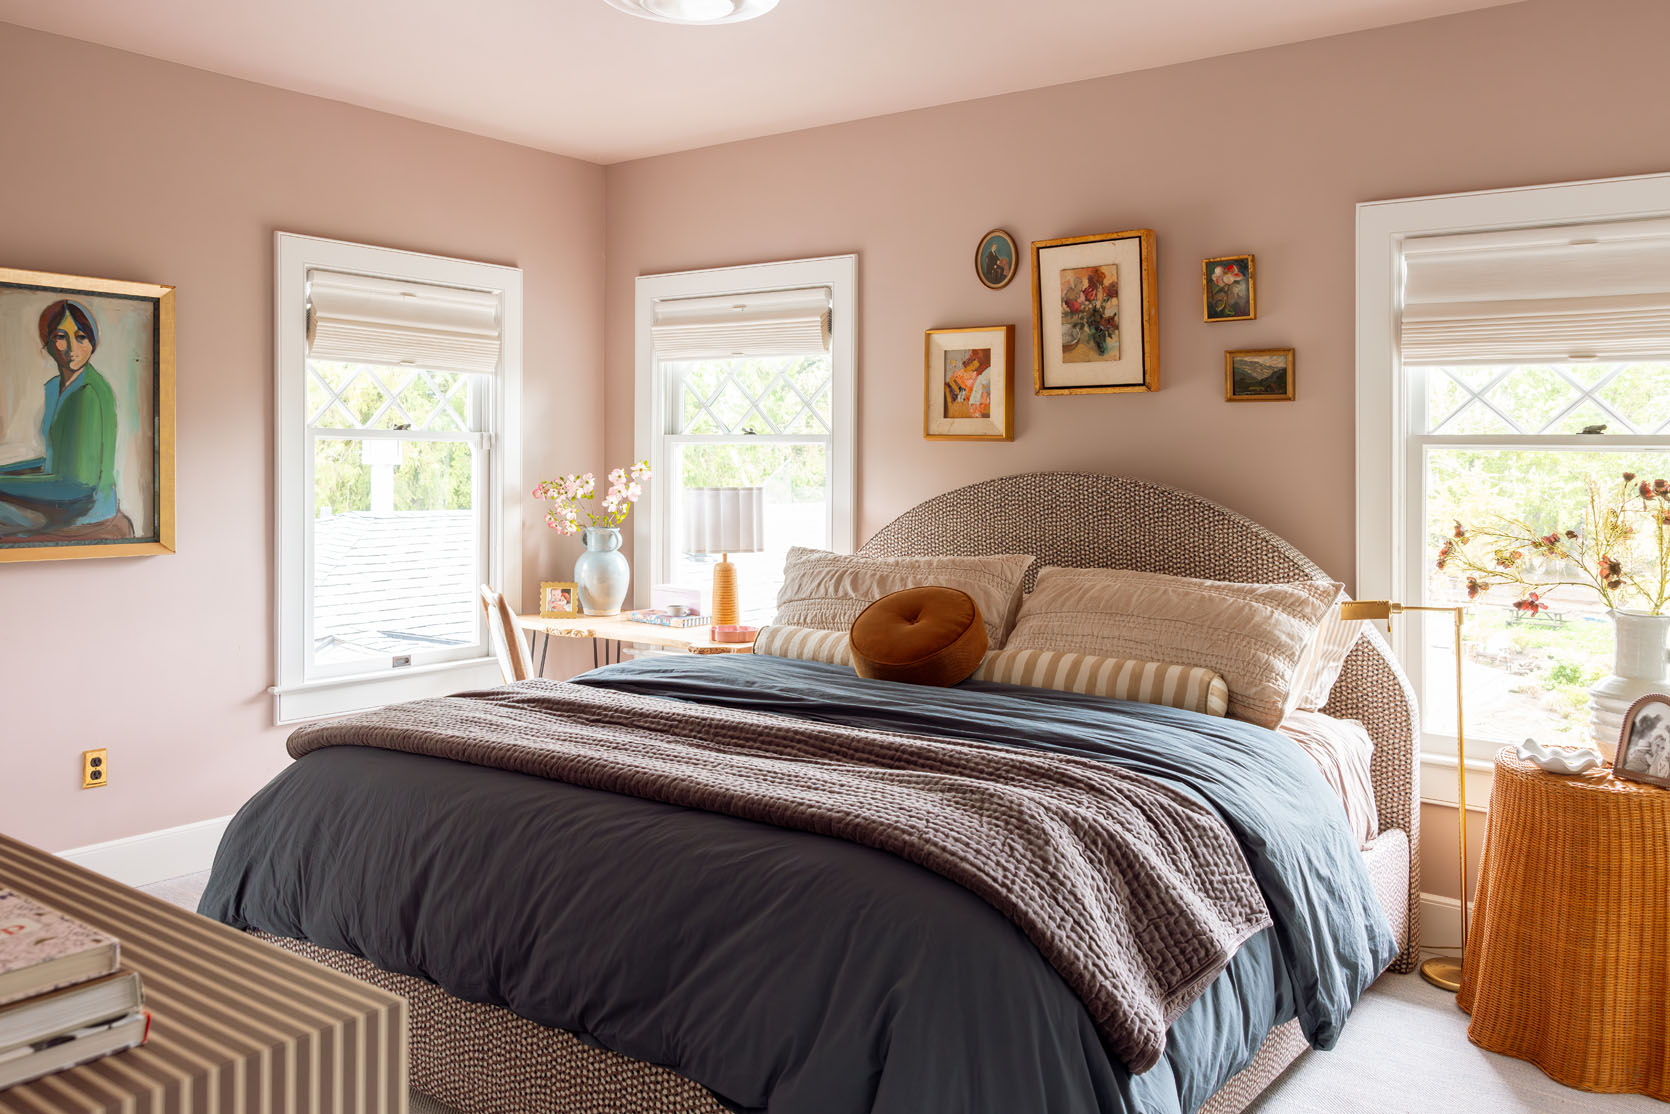
Wall Color | Trim and Ceiling Color | Art (vintage) | Bed (custom) | Bed Fabric | Shams | Bolster | Disc Pillow | Duvet Cover | Quilt
So we finally moved the bed up here, and I like it so much, but it’s not a total slam dunk. She’s big, but it could be that I’m not used to it? I’m the one who wanted the king bed in here, which is admittedly really cozy for guests. It’s not that it doesn’t fit, and the old mattress on the simple base was also a king, but this one is higher, and the bed frame and headboard themselves add volume. And it feels slightly crammed in the window, but not criminal.

Floor Lamp (vintage + similar) | Side Table (vintage + similar) | Vase | Dish | Frame | Roman Shade
I do love that I finally found a place for my vintage wicker ghost table (shout out to Shop Wilma in town). I think it gives “quirky bed and breakfast,” and it still allows the linen closet to open for the most part (or is at least lightweight).
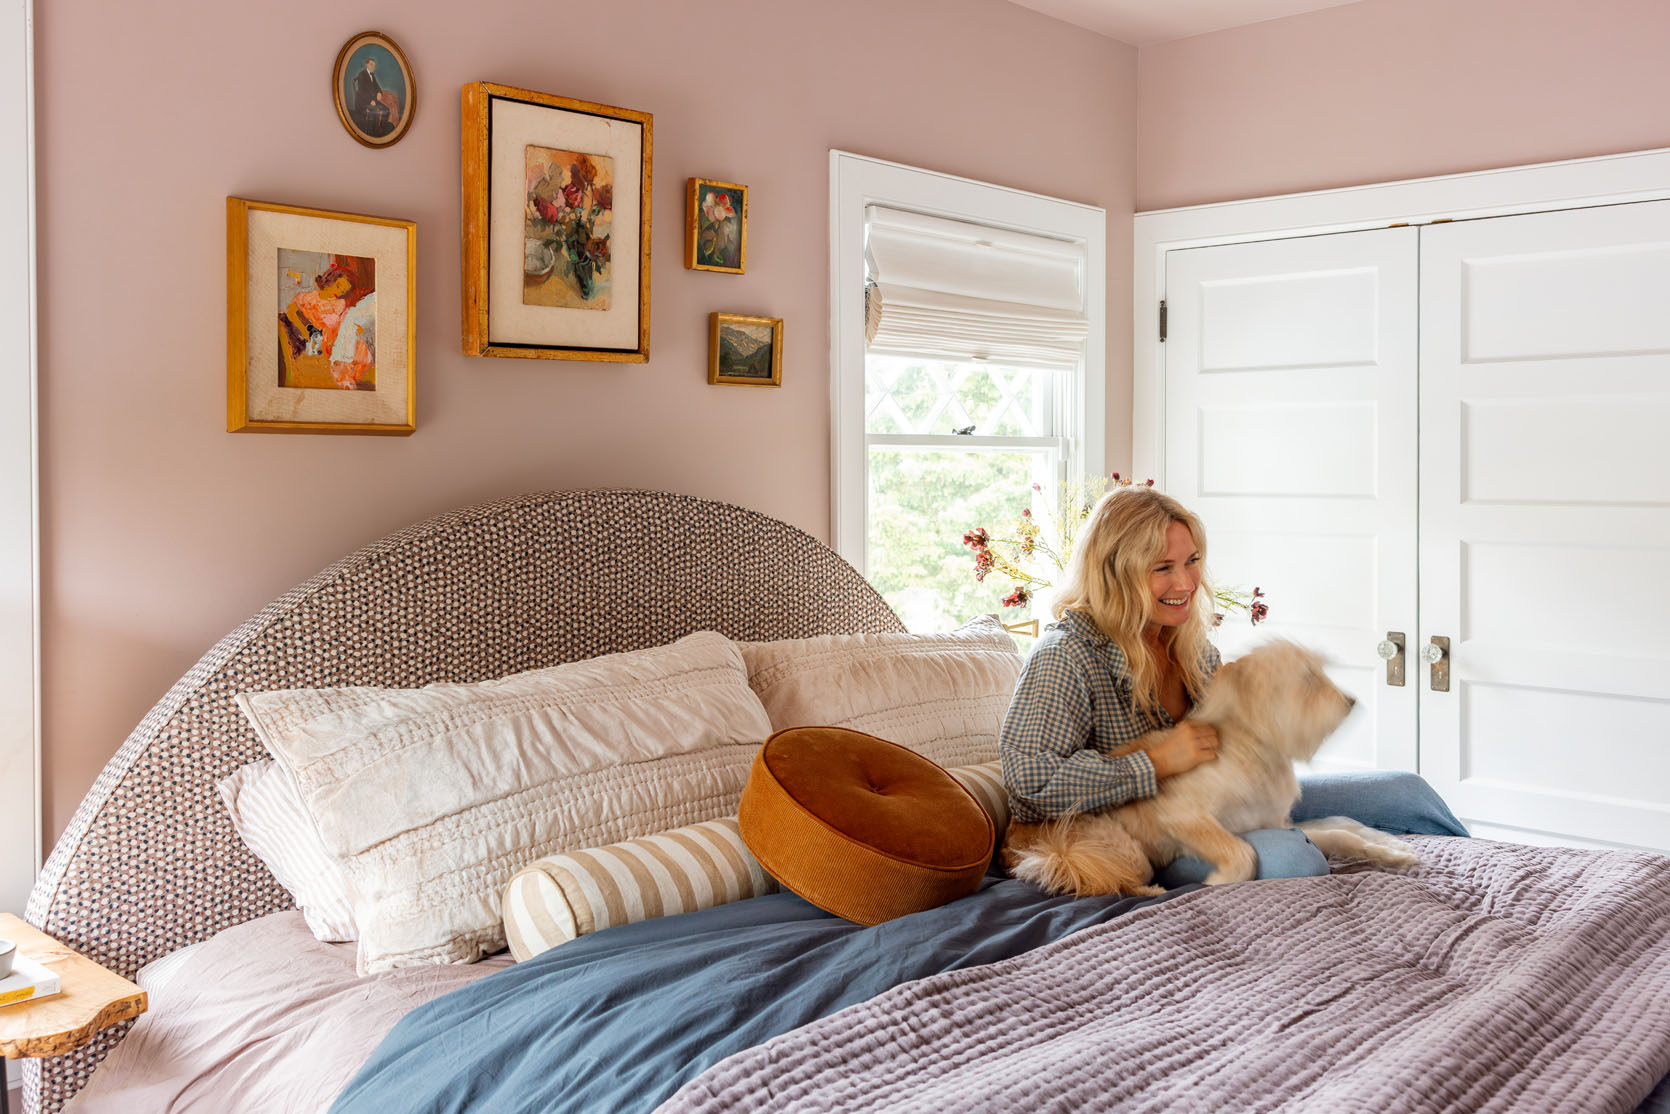
I hung a small gallery wall above the bed with pieces I already had, which I like, but the small ones feel too small in this room (maybe because the bed is so big!). I didn’t really have an alternative, so I left them, and they are cute, for sure, but not there yet.
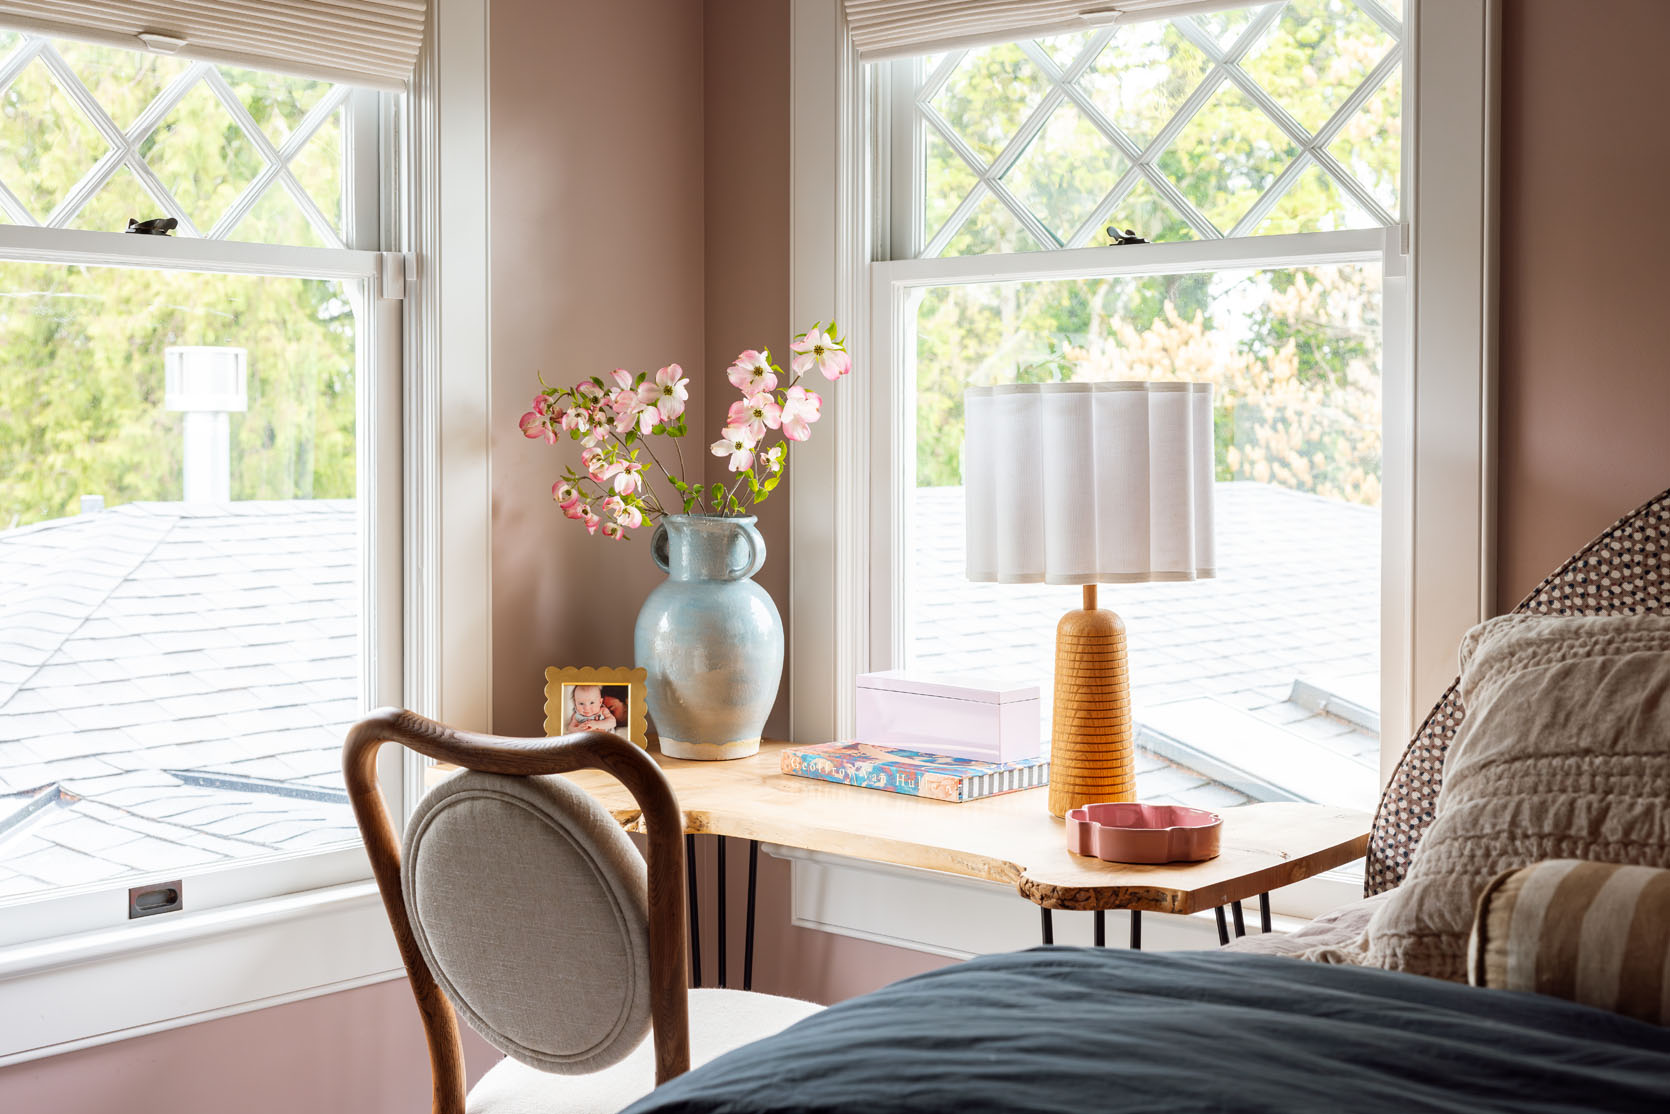
Desk (unavailable) | Picture Frame | Pink Box | Vase | Lamp | Dish
I tried no less than 6 pieces here – the blue demilune, Elliot’s blue vanity, the ghost table, but ultimately, this desk is the best scale and function for this corner. The desk chair was borrowed from Anthropologie (and I might order it), which adds such a nice softness through the shape and the fabric. Brian still sits up here to take his therapy call and work from home when he can’t get to his office to write. So the desk actually gets a ton of use.

I bought the desk from a local maker who turns slabs into furniture, and I like it, but it doesn’t fit the style of the room at all. But I’m just not that motivated to find the perfect desk or piece that fits here (that doesn’t stop me from looking on FBMP most Saturday mornings). It works well enough!
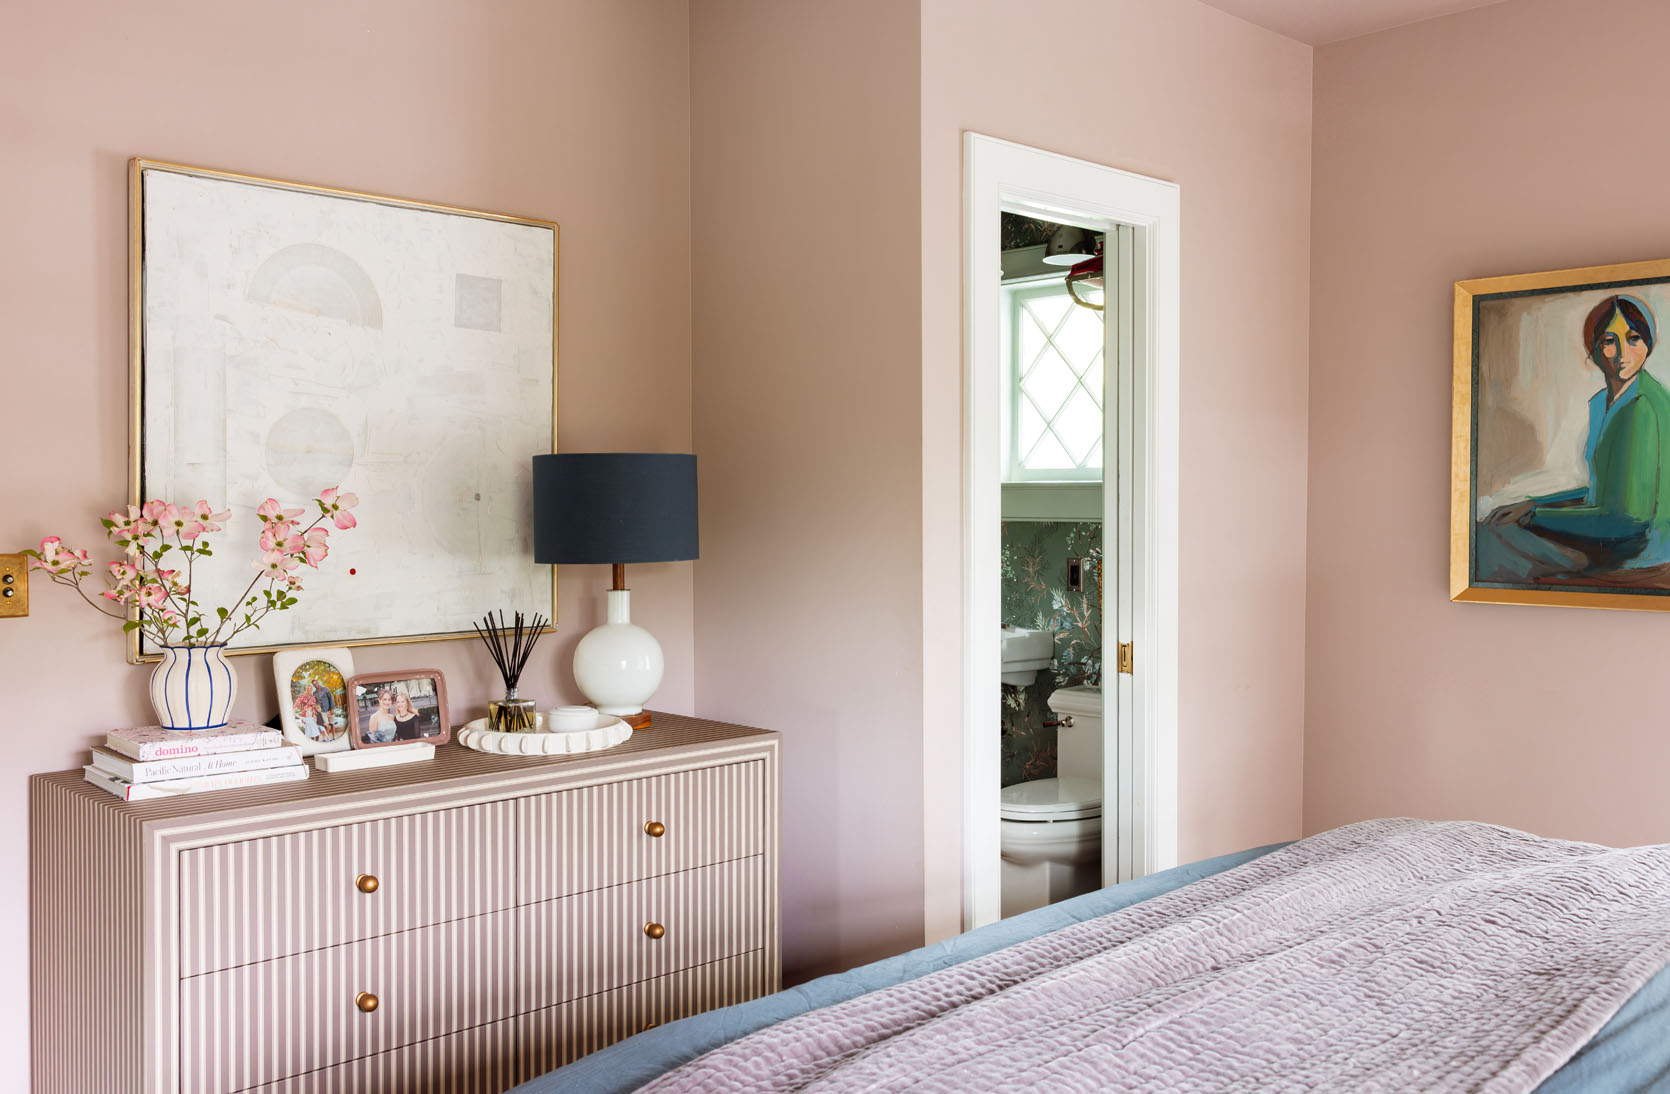
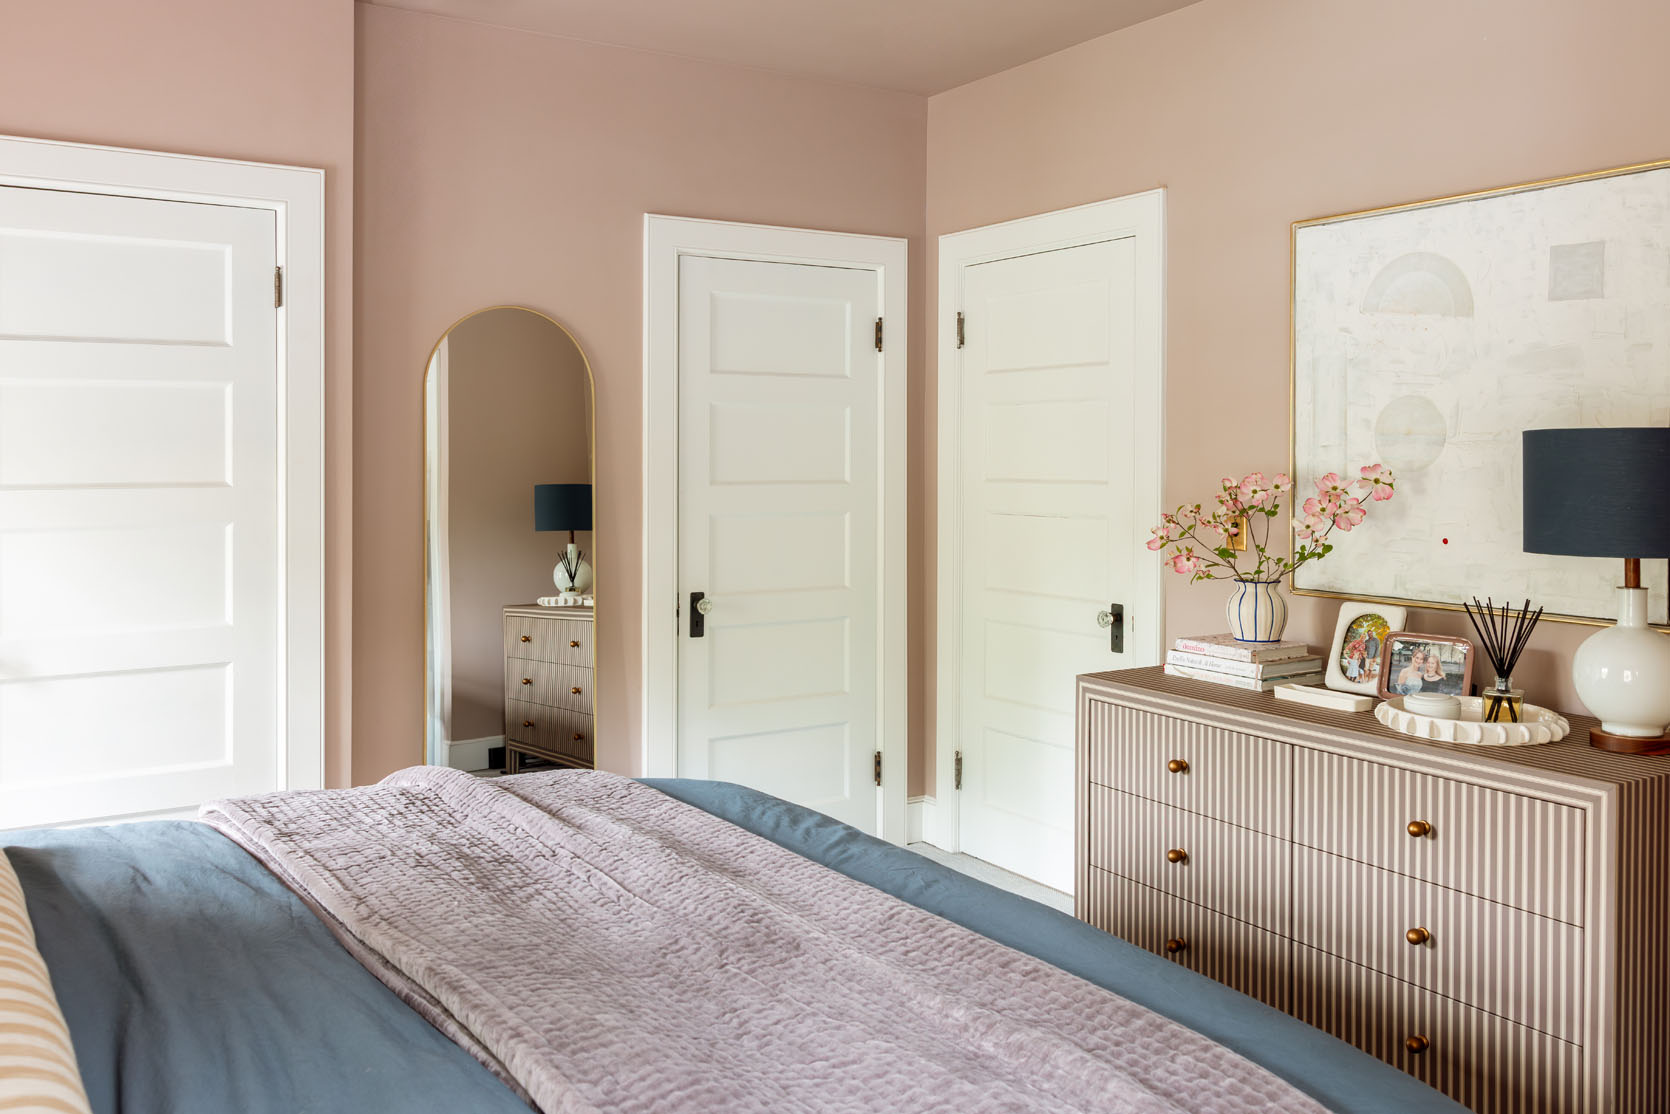
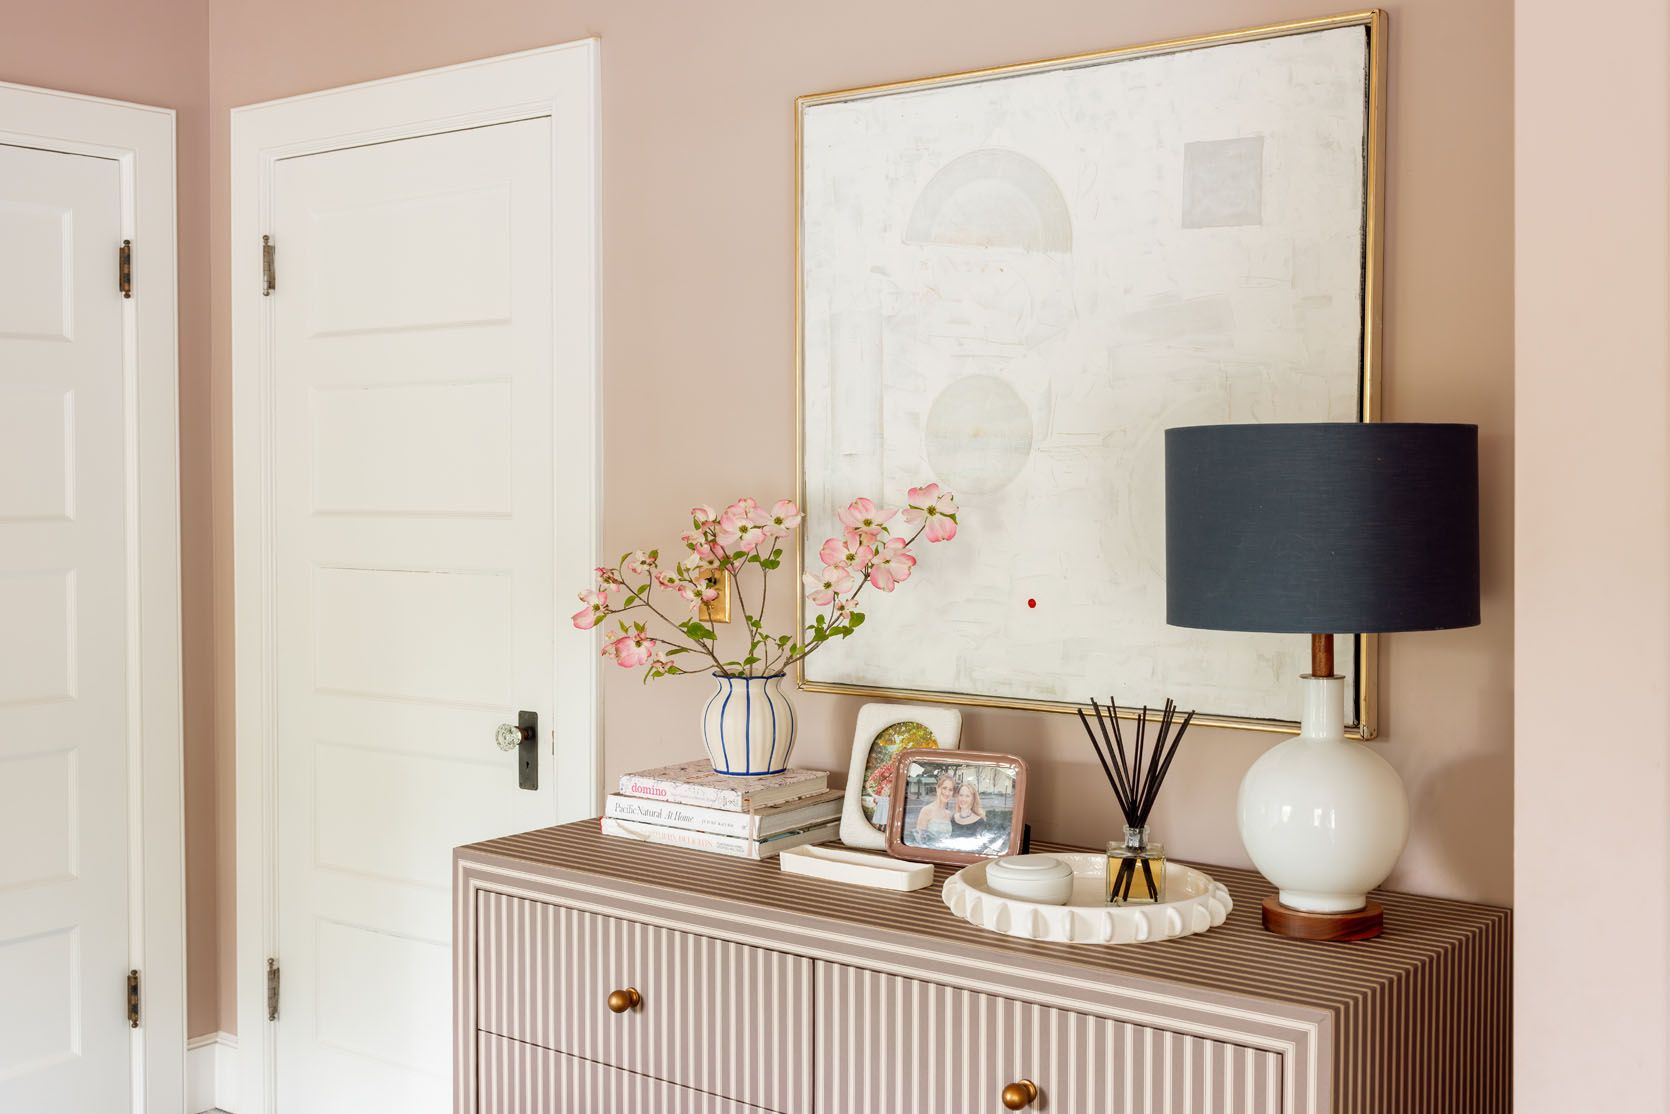
Now, the corner of the room that is working really well is this new dresser vignette. It looks tight with the bed, but there is a solid 2 1/2 feet of clearance, I promise. The colors are perfect (it’s called a brown stripe, but it’s definitely giving a taupey-pink). I love that white painting here (but the kids are begging for the massive TV back, so I need to figure out a solve there). I also hung my lady painting in here, which I love, with the bathroom wallpaper. I removed the pink chair because it was feeling like just so much furniture, but I’ve since brought it back so I could put all our clean laundry on it, lol (we have two of them – one on the bottom landing and one here).

Wall Art | Dresser | Blue Bordered Vase | Vertical Picture Frame (similar) | Horizontal Picture Frame | Oil Diffuser | Round Tray | Lamp (unavilable)
The scale of the dresser is perfect in here, and it adds nice storage. Before we had this really low bench that was a placeholder, with the world’s biggest TV on it (which we all got used to using). I’ve had that Schoolhouse lamp forever, and then collected a new things from Anthropologie (that new vase and tray are both awesome). And yes, those are our dogwood branches from my tree 🙂
I swear there is enough space, but it looks so crowded in the photo. I stayed up here the night before my colonoscopy, and it was extremely cozy and comfortable (the Leesa Sapira Hybrid chill mattress certainly helps – my goodness, these mattresses are so soft).
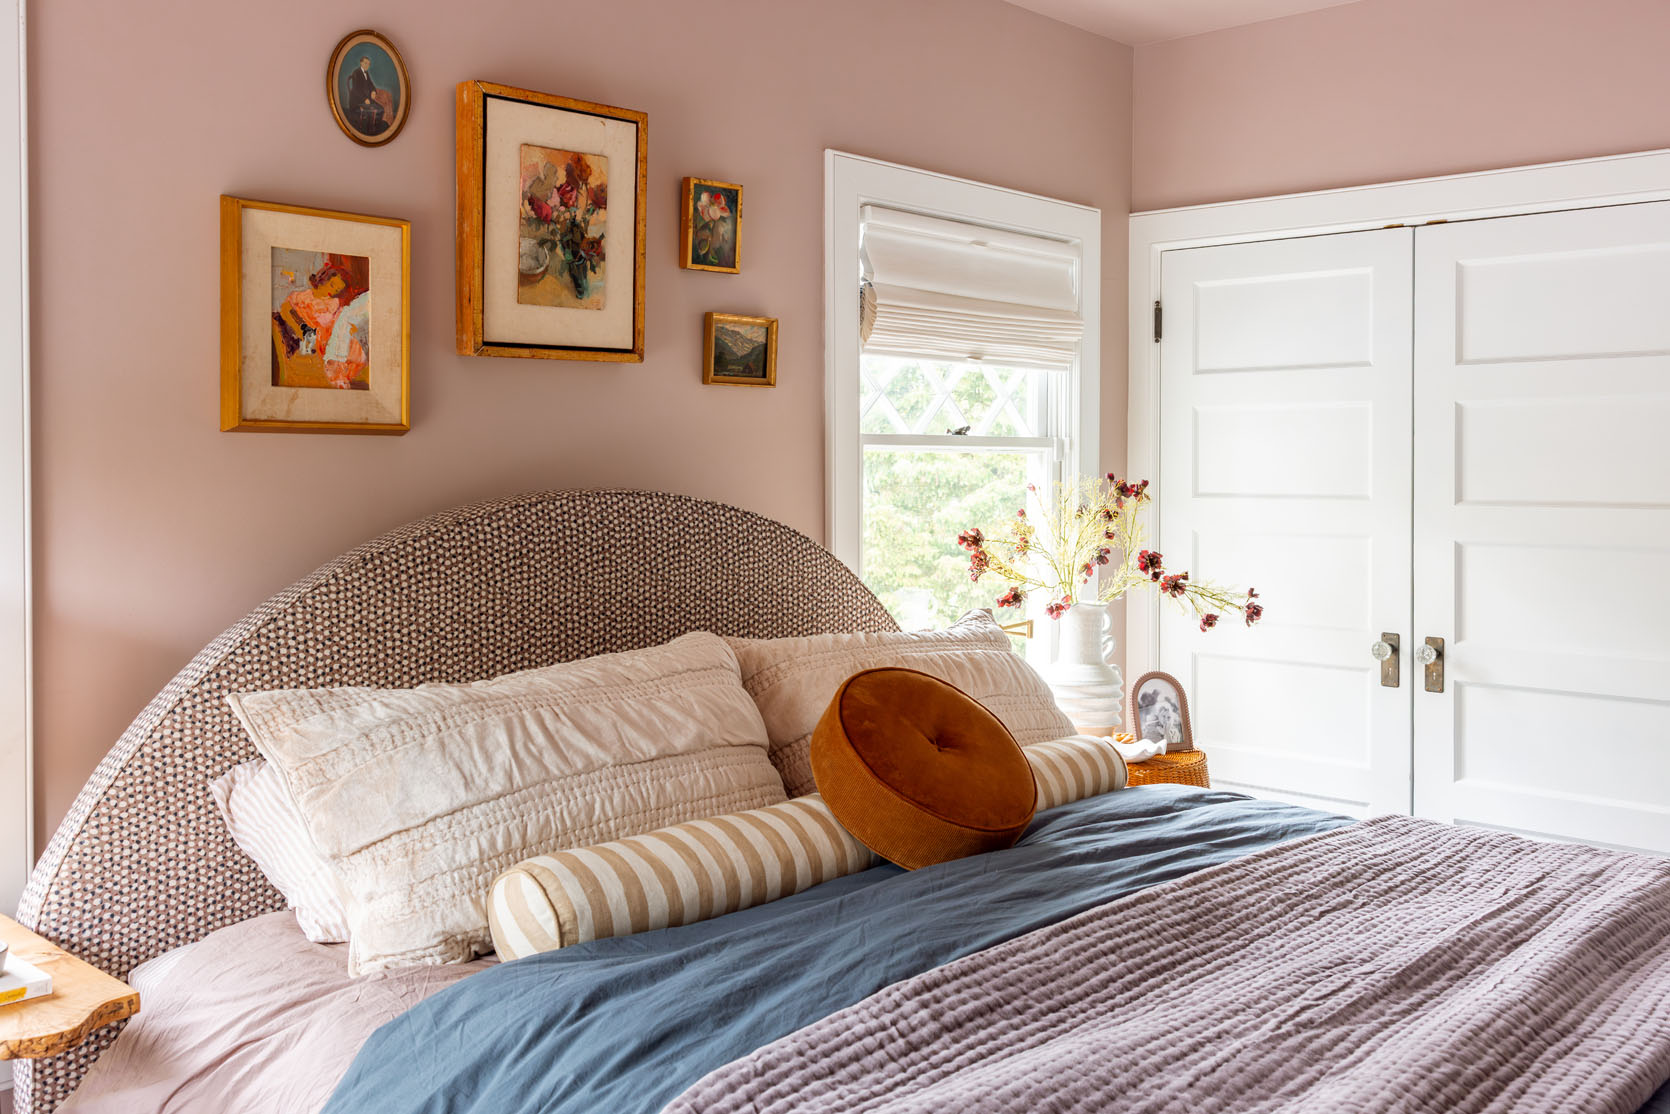
I layered bedding I already had in what no one can deny is my color palette du jour (or du decade). It’s the same as my bedroom, living room, and powder bath. Unintentional, I promise. These are just my comfort colors.

So that’s the update! Part of me thinks that nothing should go above the bed and that the art is what is making it feel too busy, and then making the bed look too big? Then I wondered if this room needs curtains to add some more visual interest and texture, but it also might be a lot, and we don’t need them (the shades are blackout, top down/bottom up, and just functionally incredible). I feel like you guys have good, fresh eyes with this stuff. I also have zero stress about it all because I know that for a guest room, she is dialed in 🙂
*Photos by Kaitlin Green
]]>One of the least popular rooms I’ve ever finished/published was the first iteration of my primary bedroom, and I get it – I wasn’t fully happy with it either. It was more “put together” than “designed” per se, and when you have so many rooms to finish at the same time, some get neglected, which is fine. I always resist “yucking my own yum” because, honestly, having a bedroom like this in any form is so wonderful that missing a few design marks just feels petty to point out to you all.
As a reminder…
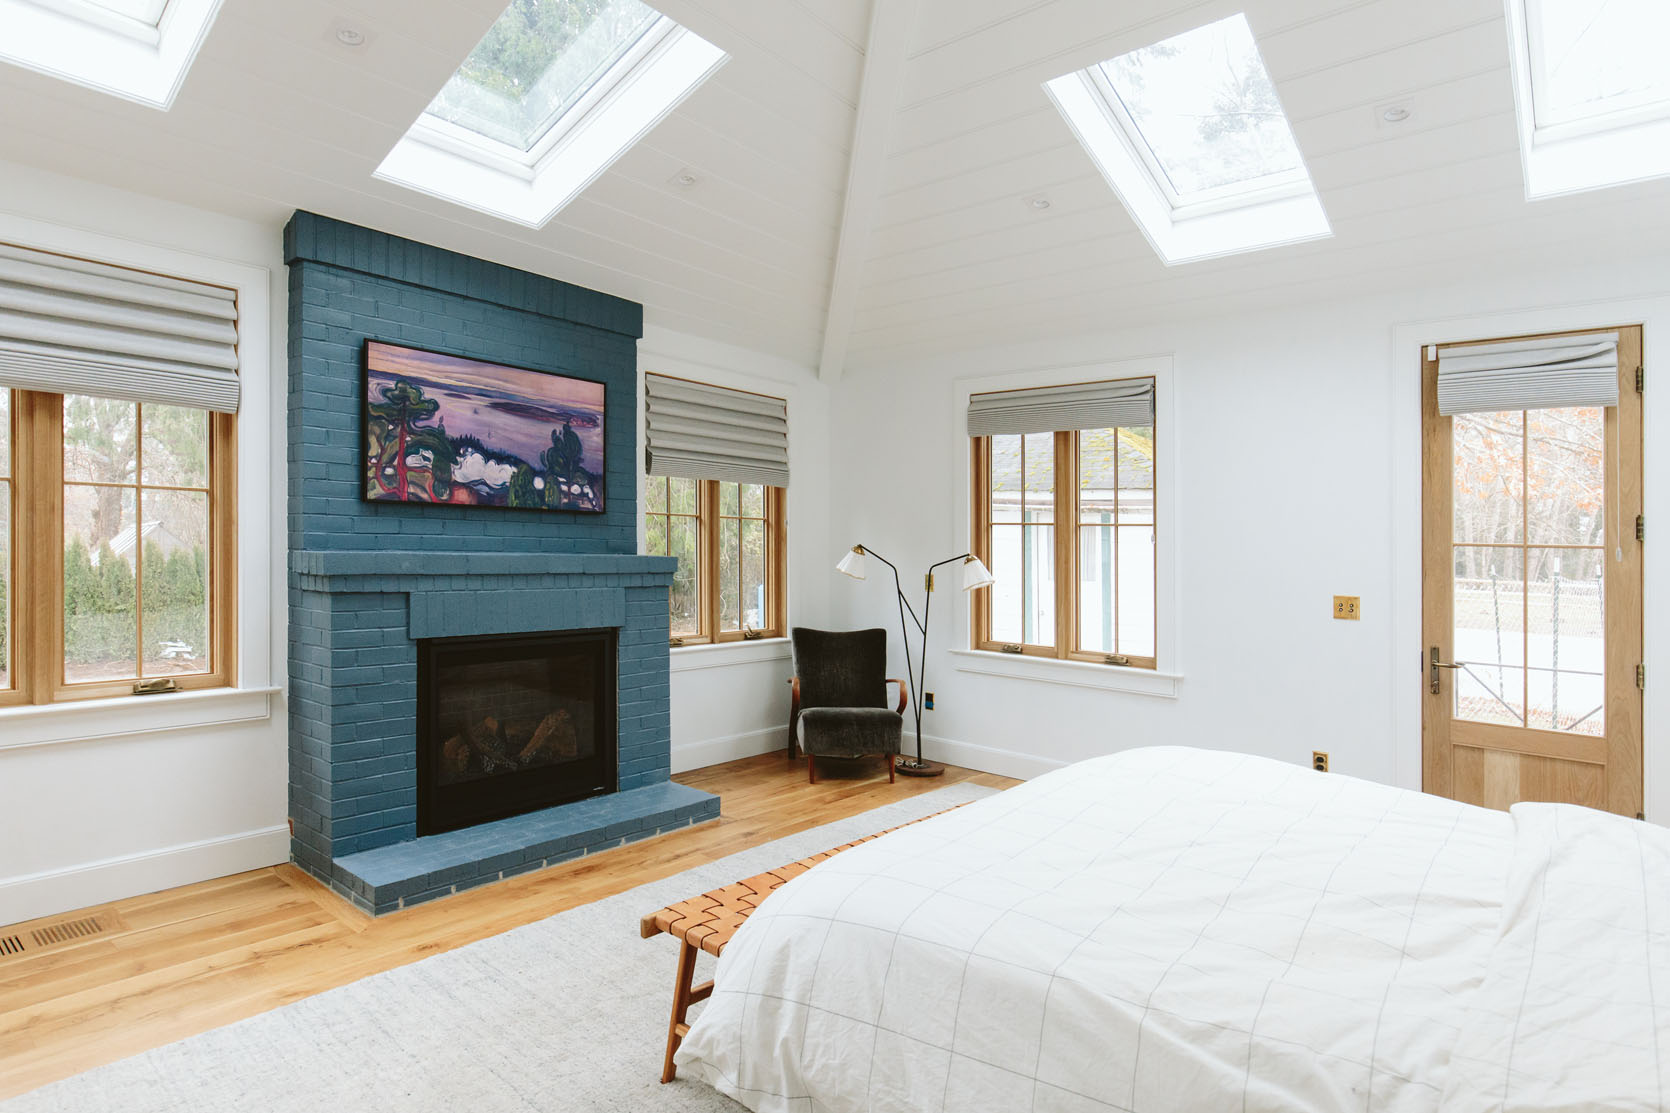
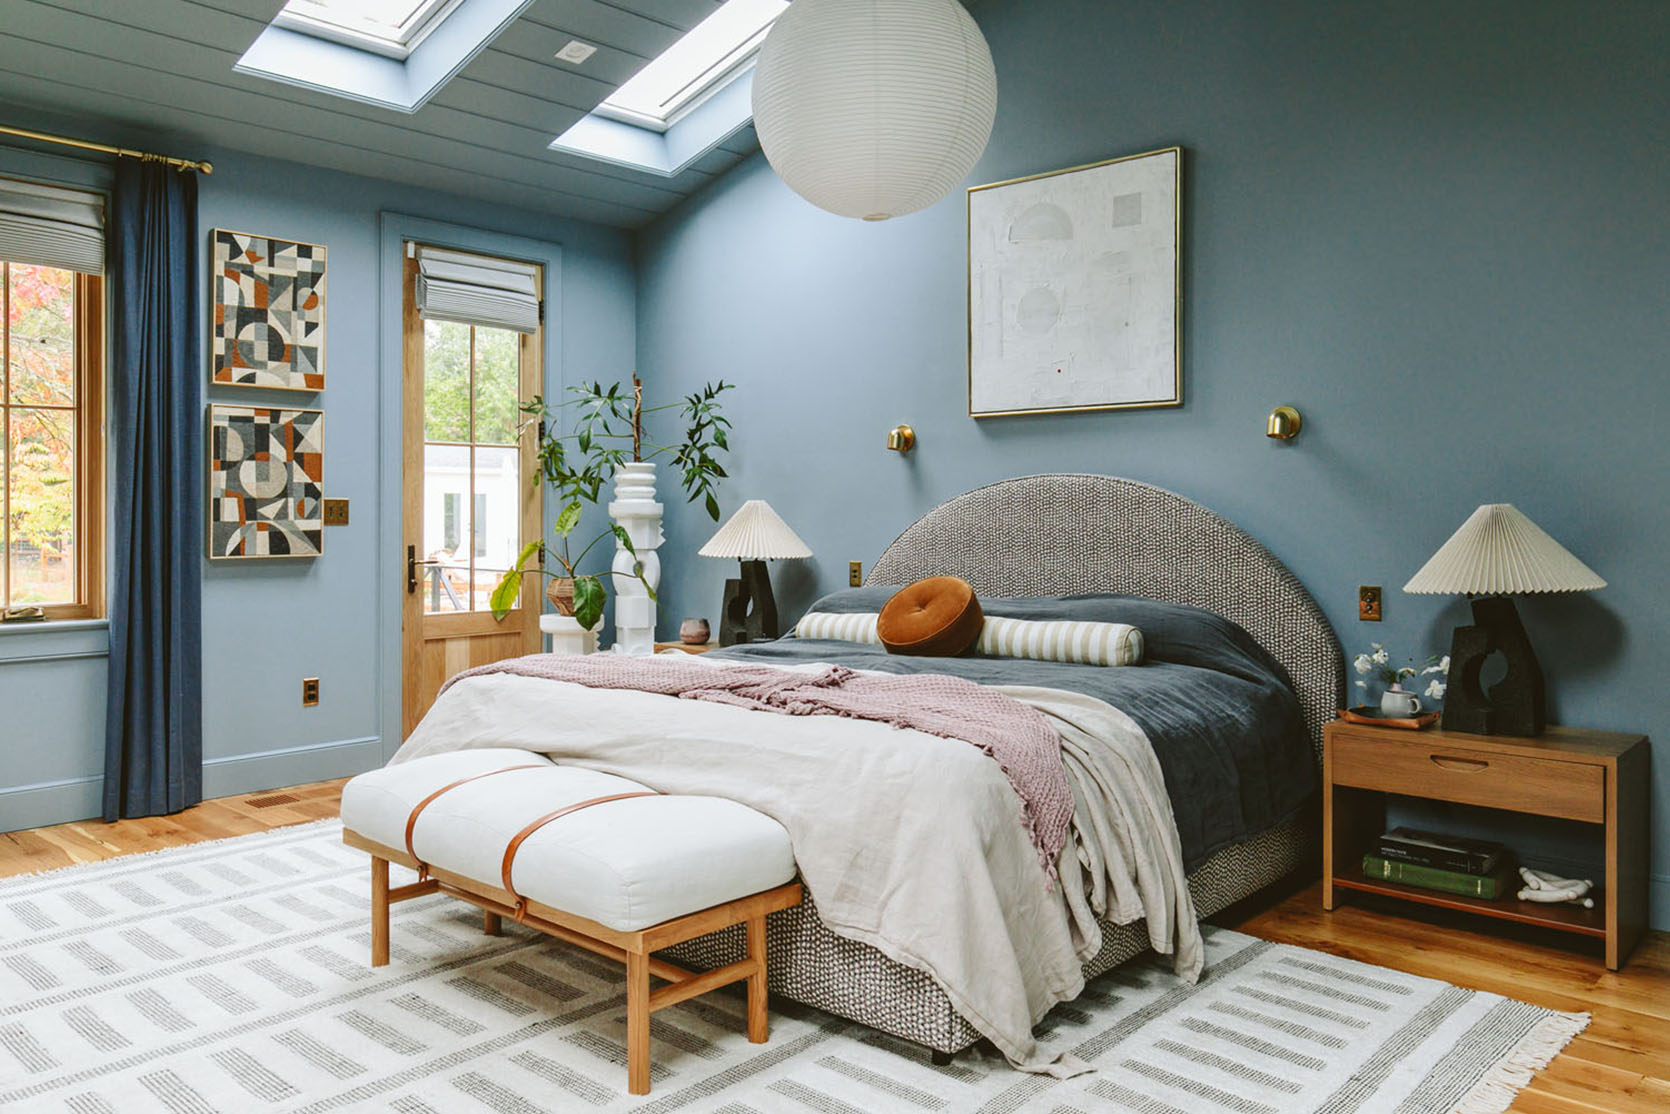
We started with a white box when we moved in. Now I like a bright white airy room (despite its current unpopularity), but admittedly, this felt like a missed opportunity. So, as the big reveal shoot of our house was impending, I made some quick decisions to see how I could create a cozy but still really simple and minimal bedroom.
I painted the room Debonaire, which is so pretty, and yet when the room is super bright in the summer, and during the day, it can be too bright for me. Brian loves it, and no one else really has a negative thing to say about it, but in the name of transparency, if I could snap my fingers, I would paint it Eventide, which is a much softer powder blue. In the morning and at night, Debonaire is just so cozy and pretty, and repainting it is so expensive and annoying (so much trim and ceiling). My first quote was $6k and would take 3 days, which I thought was a lot of time, but maybe it’s not. Regardless, I’m not motivated to do it because I like it; I just don’t love it. But this is where I had to learn the lesson (again) that I don’t like when I paint rooms with a ton of natural light, dark (you can paint light rooms light or medium but the contrast between the darkness and the bright sun picks up the pigment in the paint that can make it feel intense for me, rather than moody and cozy). Similarly, I’d suggest painting dark rooms medium or dark (not light). ANYWAY, it only barely bothers me in this situation since it’s not a dark color (it’s a medium tone) and the cost and disruption to our lives doesn’t feel worth it for a slight upgrade.
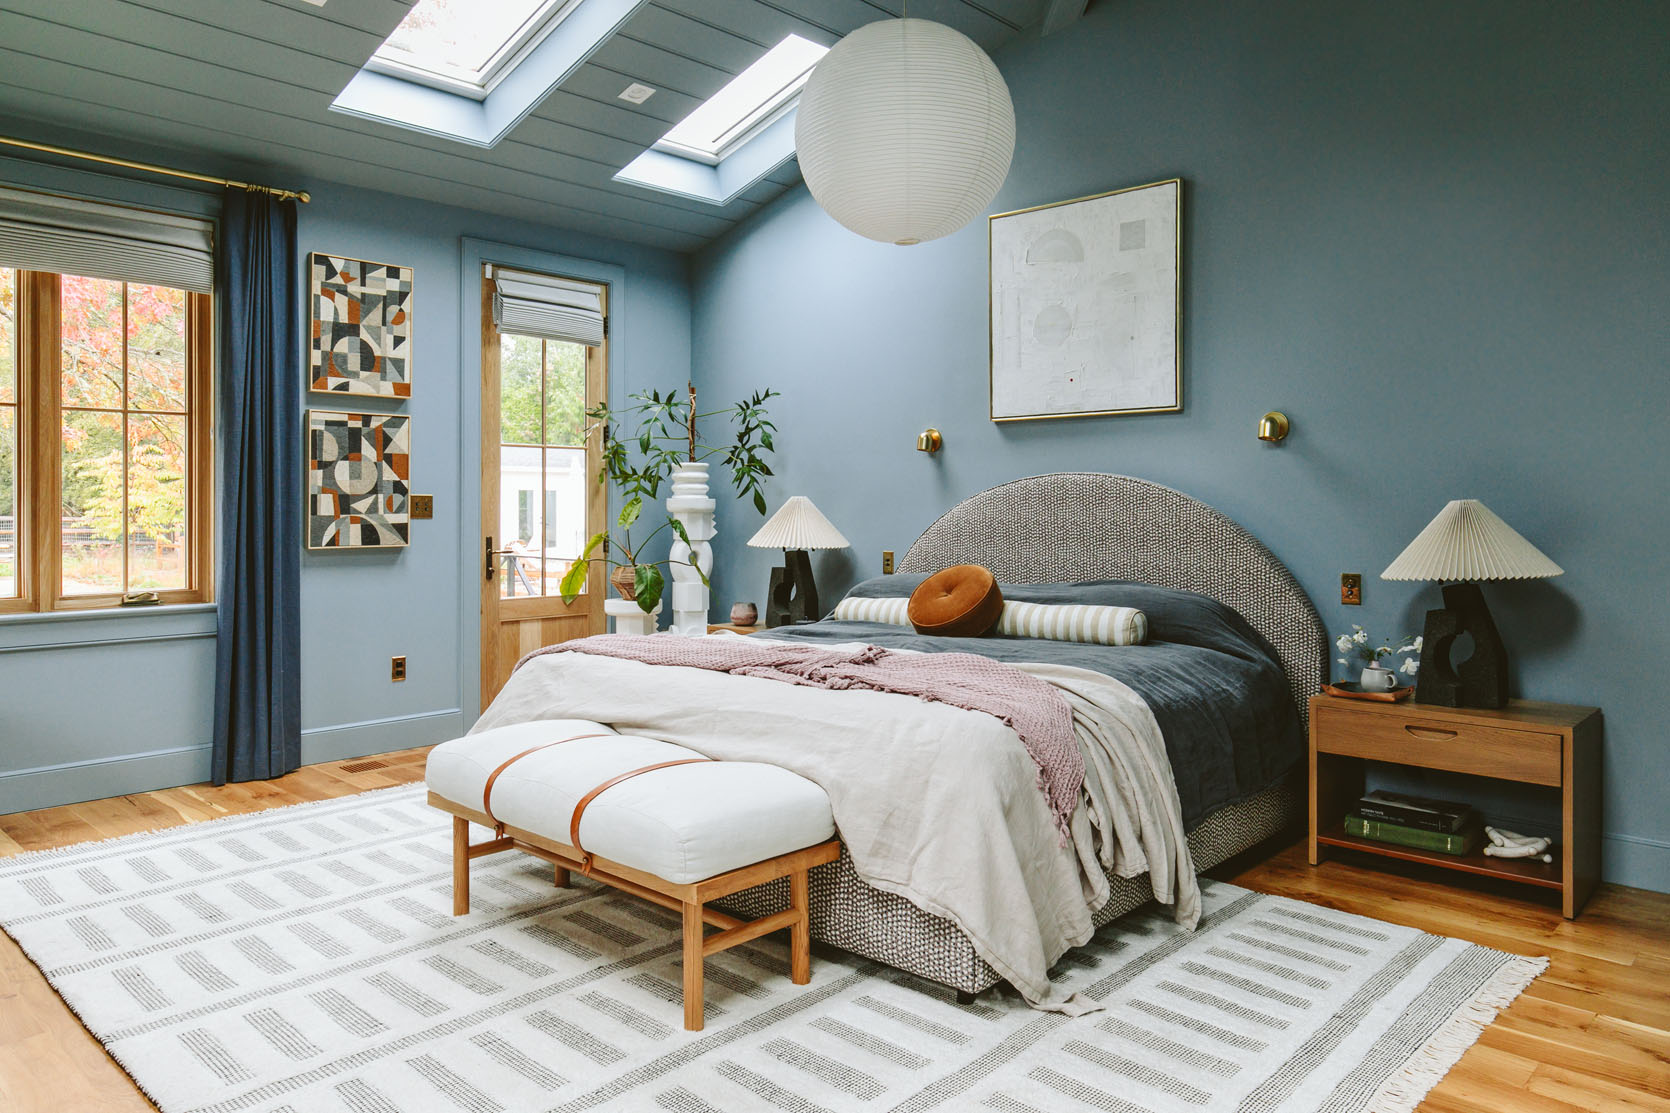
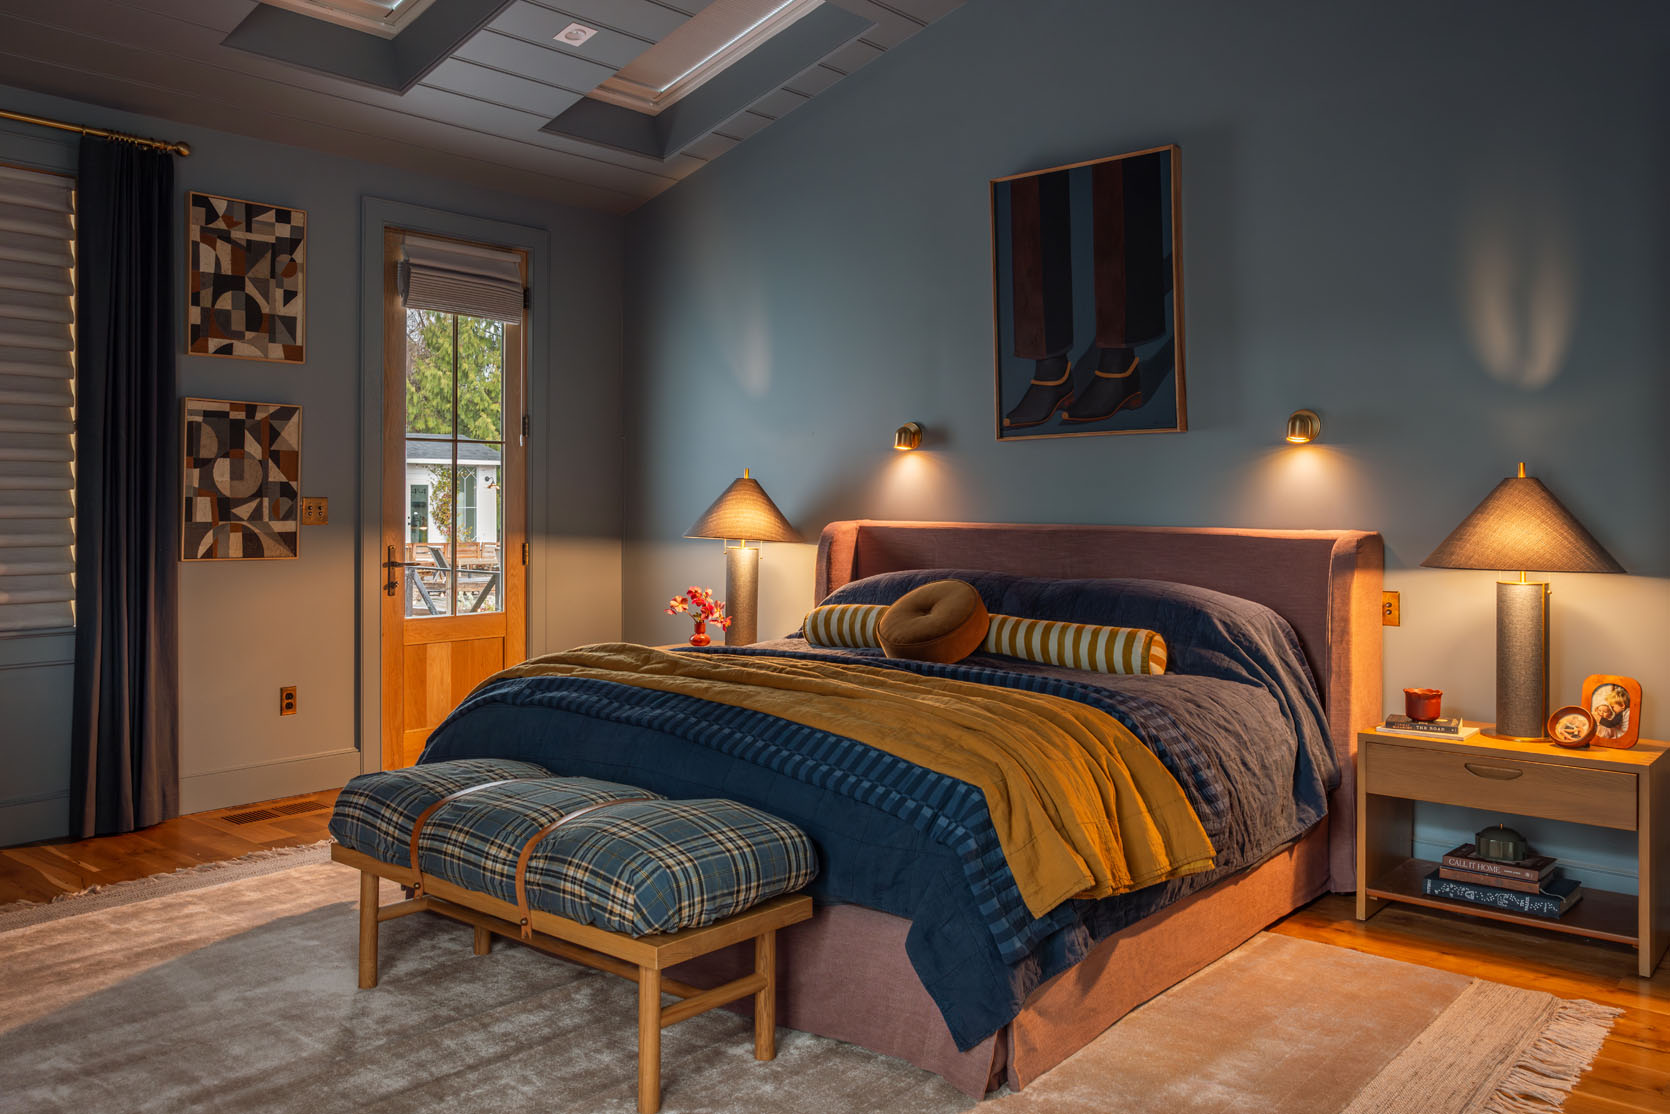
This bed was always designed for our guest room (which doesn’t 100% work there either, hilariously), but the week before the shoot, when my Jake Arnold for Crate & Barrel bed didn’t arrive (that’s the really pretty caramel velvet with a wood curved top, but apparently no longer available), we had this room assembled in here instead. And I liked it, but just didn’t love it. I really liked the scale and the shape, but the small print got lost in such a big room, and it was meant to go in the rosy room, where it would just be a quiet texture.
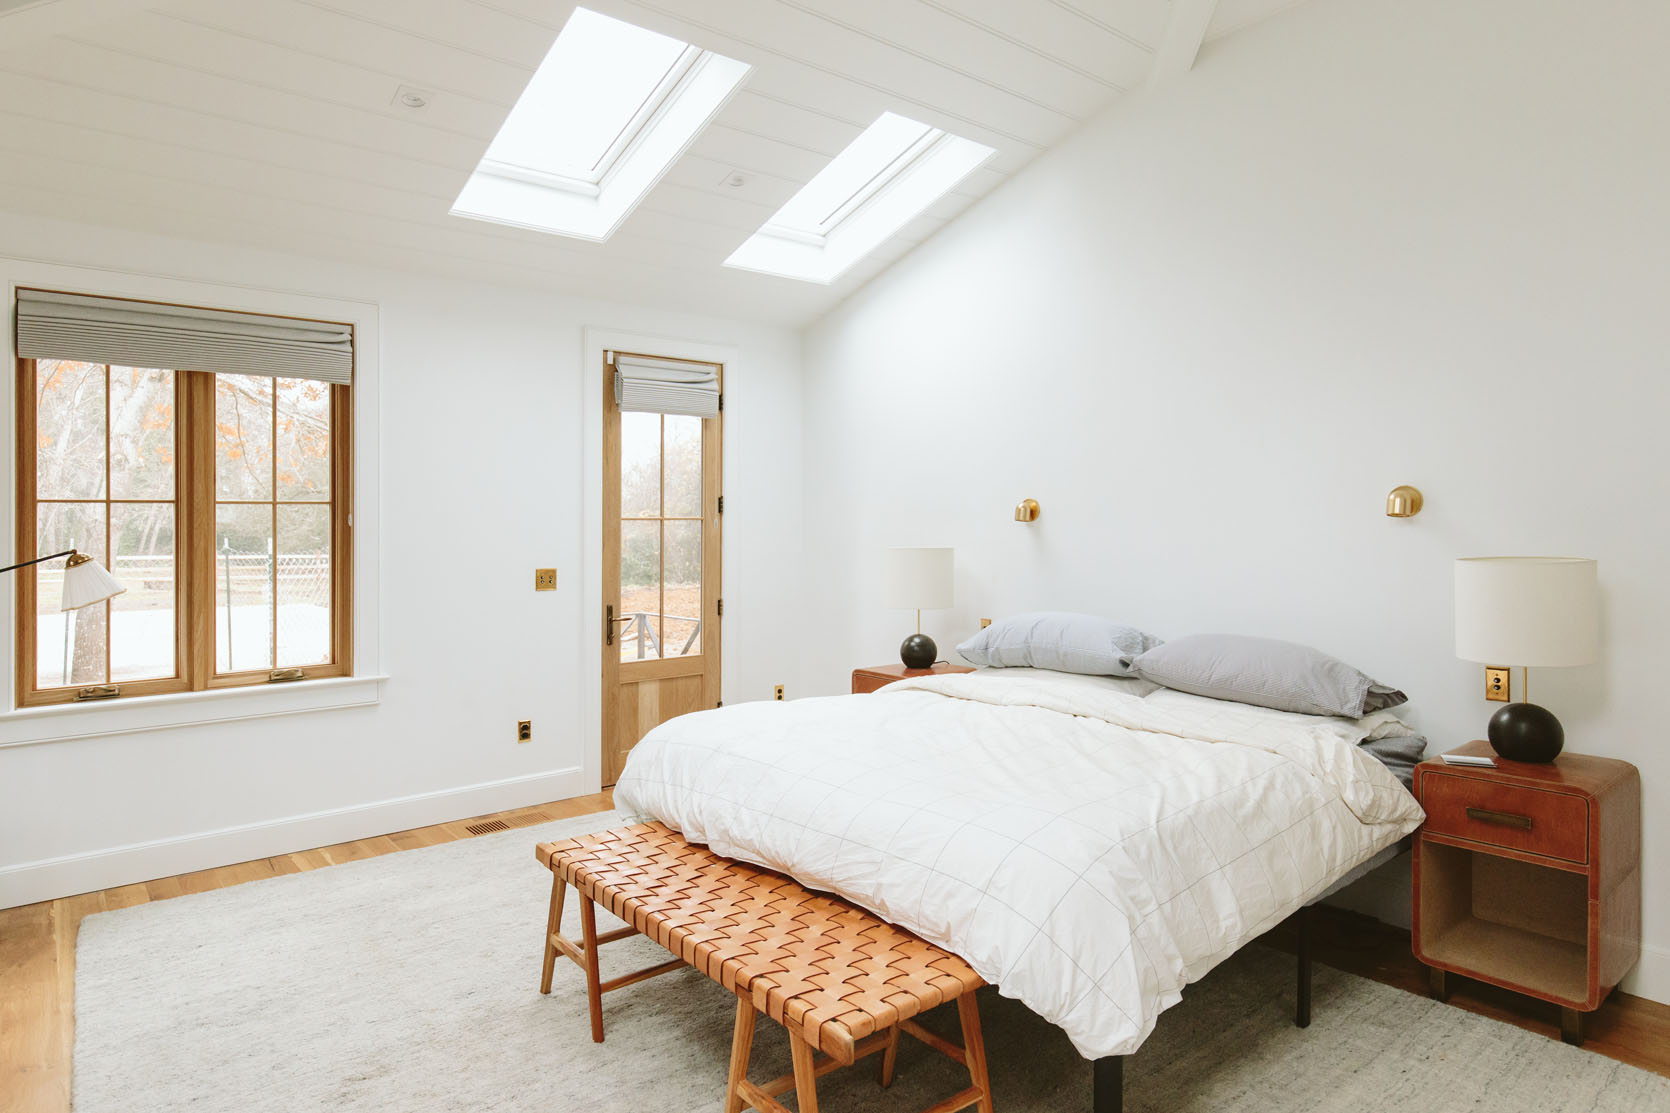
I can’t quit this rug because it’s the plushiest, softest, and most stain-hiding rug ever. While I’m not that motivated to do another rug line (mostly because of time/bandwidth), if someone could guarantee me that I could just make this rug in many different colors, I would do it as a public service to the world. I can’t even link it up. But it’s not my favorite color – a light gray with blue flecks in it, and it can just read a little sad in here.

When my rug line came out, I shot and left this Merrick rug in here, which I really loved, but it was pretty white in a room that was meant to be more tonal/soft. There was just a lot of contrast. Plus, I’ve said it before, I don’t recommend putting white rugs on your first floor, with the most foot traffic, in Oregon (better for second-floor bedrooms). It held up far better than I thought it would (we are mostly shoes off), but I used this partnership with Anthropologie to choose this super pretty taupey-pink rug.
I think Brian and I intentionally chose not to have a hanging pendant or chandelier because we didn’t want the distraction on the ceiling (something we loved in our mountain house bedroom). If I could go back in time, I would get rid of the cans (that we almost never use) and put in a J-box for a ceiling fixture. I still don’t love a chandelier in a bedroom over a bed (feels a bit fancy for me, but I have no idea why), but I liked the big Japanese lantern for its low-key simplicity. Of course, it was just a sculpture, a shape, and wasn’t wired.
I really loved the curtains, the cozy ottoman chair (which I love against the blue paint color in that darker corner), the hits of brass, the fireplace, the huge mirror, and the paintings. It was a good room, just not great. And I still don’t know if it’s there yet, but I like it so much better!!!
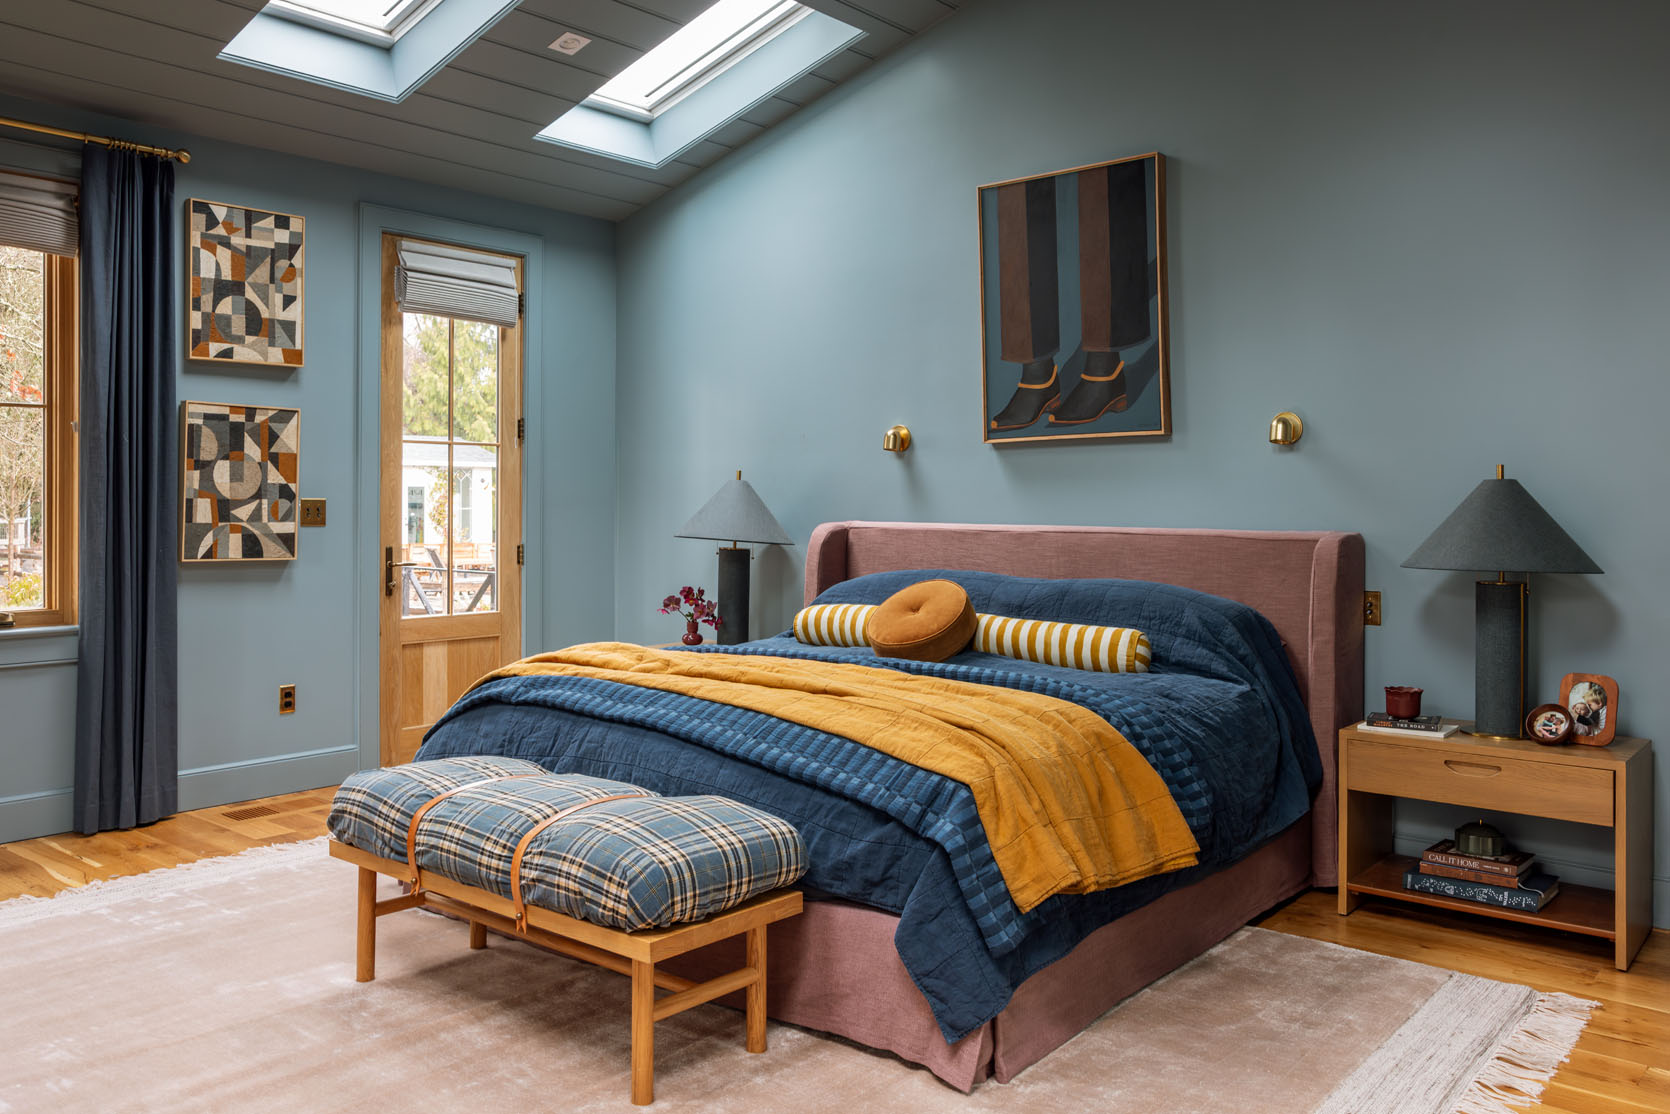
Art Above Bed | Bed | Solid Quilts | Broken Stripe Blanket | Bloster Pillow | Disc Pillow | Table Lamps | Nightstands (no longer available) | Bench | Bench Fabric (vintage) | Rug

After going round and round about what bed to get, I landed on this pretty rose linen slipcover bed, in a super classic shape. I cancelled the Crate bed because it wasn’t going to arrive for a while, and I wanted to live with the other one for a bit. I had a partnership with Anthropologie and figured it was a good opportunity to see if I could make this room better (this post isn’t sponsored by them, just some social was). So I ordered the bed and rug, and they both came so fast, with full white glove service. I really, really love it in here.
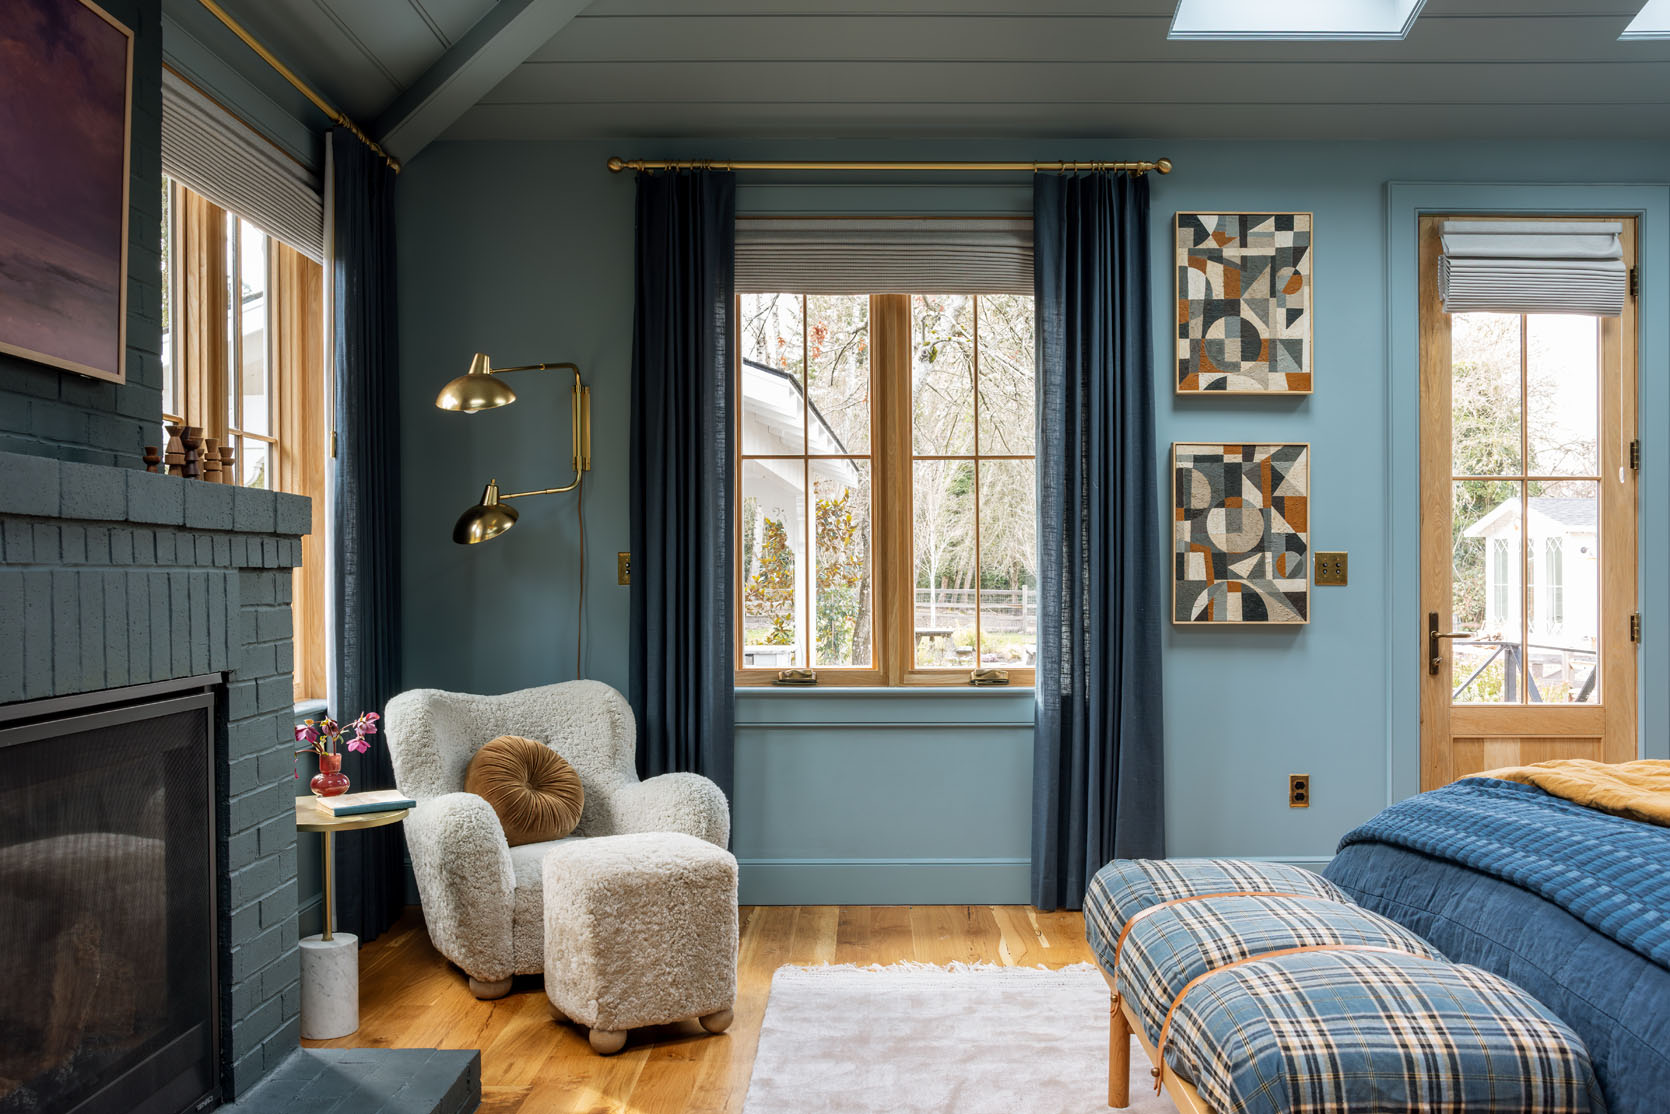
Now I’m trying to figure out why I love this shot so much. There is a soft coziness about it that I love. Oh, I put one of my plaid boro fabrics on my Katy Skelton bench (just folded it over and secured it with the leather straps), and I love how it looks in here (and brings in that bit of farmhouse that feels good).
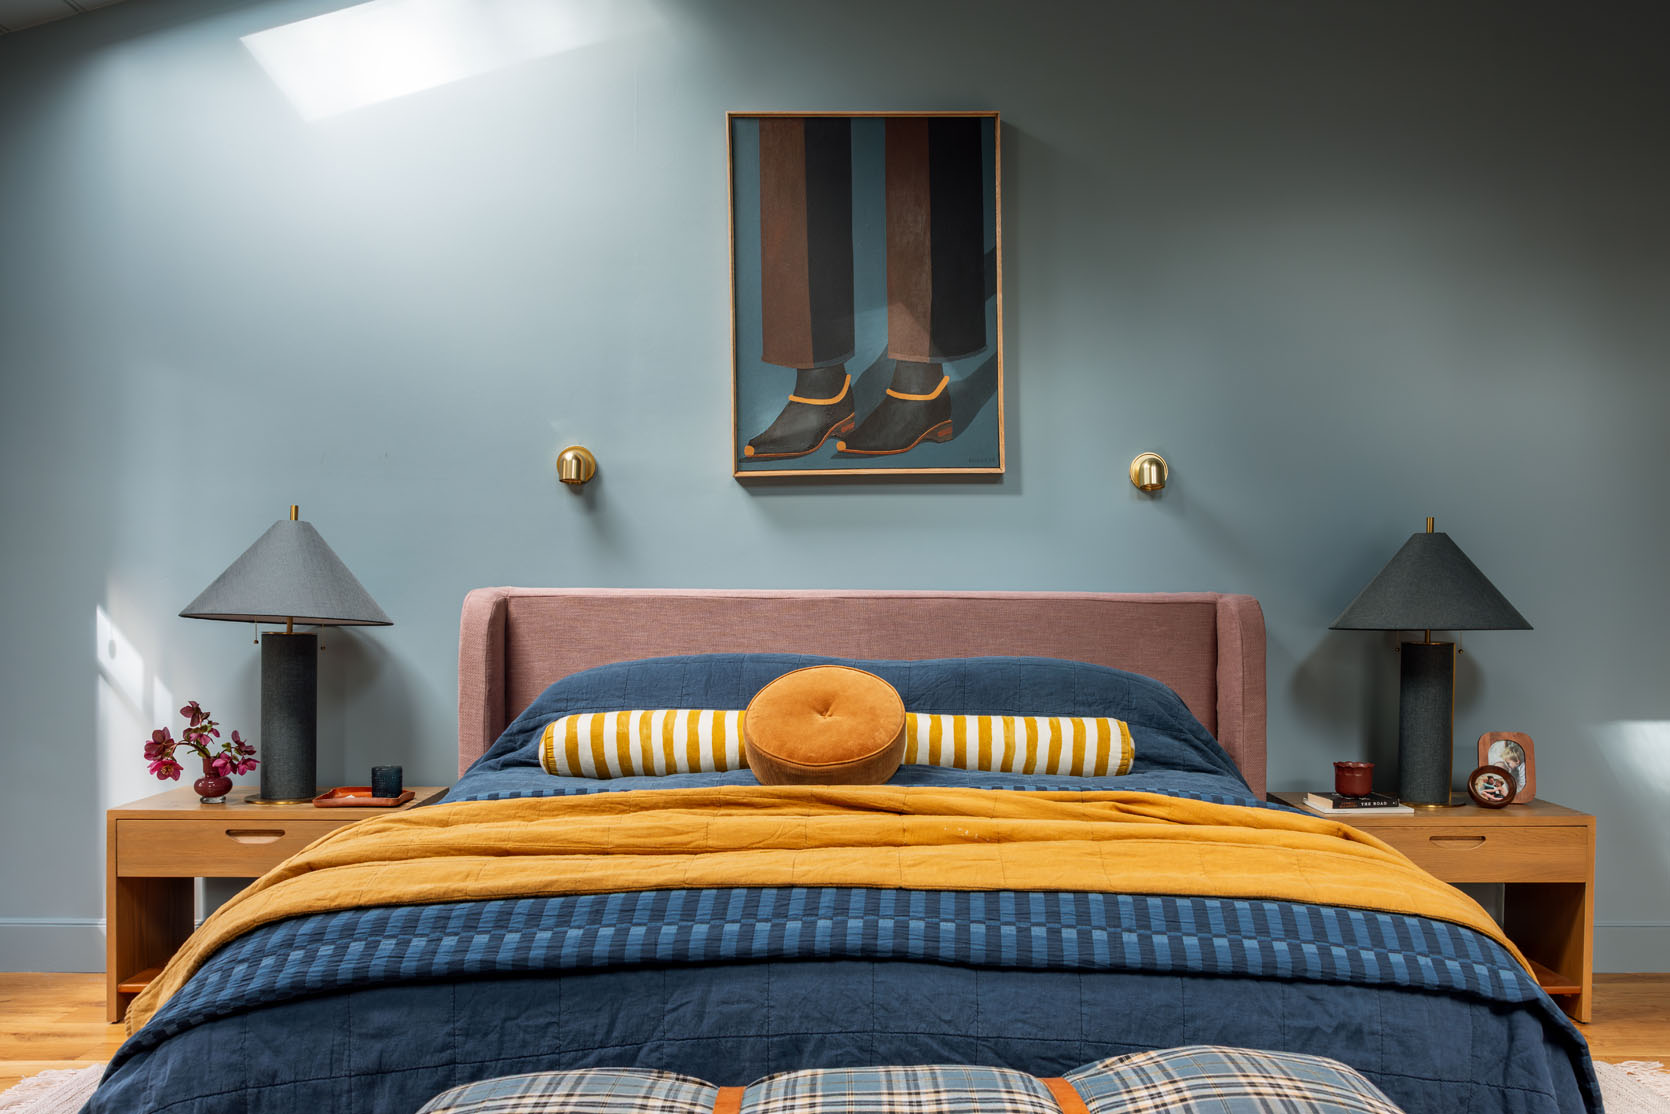
As I’m staring at this shot, I’m wondering now if the mustard is just way too intense. We actually don’t live with it on our bed, but when I was styling/shooting, I thought it needed to be punched up.

I wish we had just taken a photo without the yellow pieces to see, but here is a tonal edited version to see the difference.

I was so excited to find a spot for my new favorite painting by Brooks Burns that works so well in here, color-wise. Some of you might be concerned about the idea that I’m sleeping underneath feet or shoes, and maybe you are right, but it’s here for now, and I’m loving it (and I loved that white painting, but it was rather stark and looks better in the pink guest room right now). I should give that painting to my new website designer, actually – the color palette makes me incredibly happy.

I liked the lamps before, but I LOVE these lamps in here more. They weren’t working in our TV room as the height of bulb is right at our eye level when we sat on the sofa, so we always turned them off. But they are so pretty, so I put them in here and love the color, scale, and shape (and we read from Kindles, so it’s less annoying in here). This is why drum shades are functionally better than the tapered shade – it blocks more of the direct bulb light and creates more of an even ambient light (less directionally downward). I put our old lamps in our family room for now (they are slightly lower/better) and added this IKEA lamp for TV watching. And I still like these nightstands (they are the perfect scale), but I do wish they were slightly richer/darker. Not changing them anytime soon 🙂
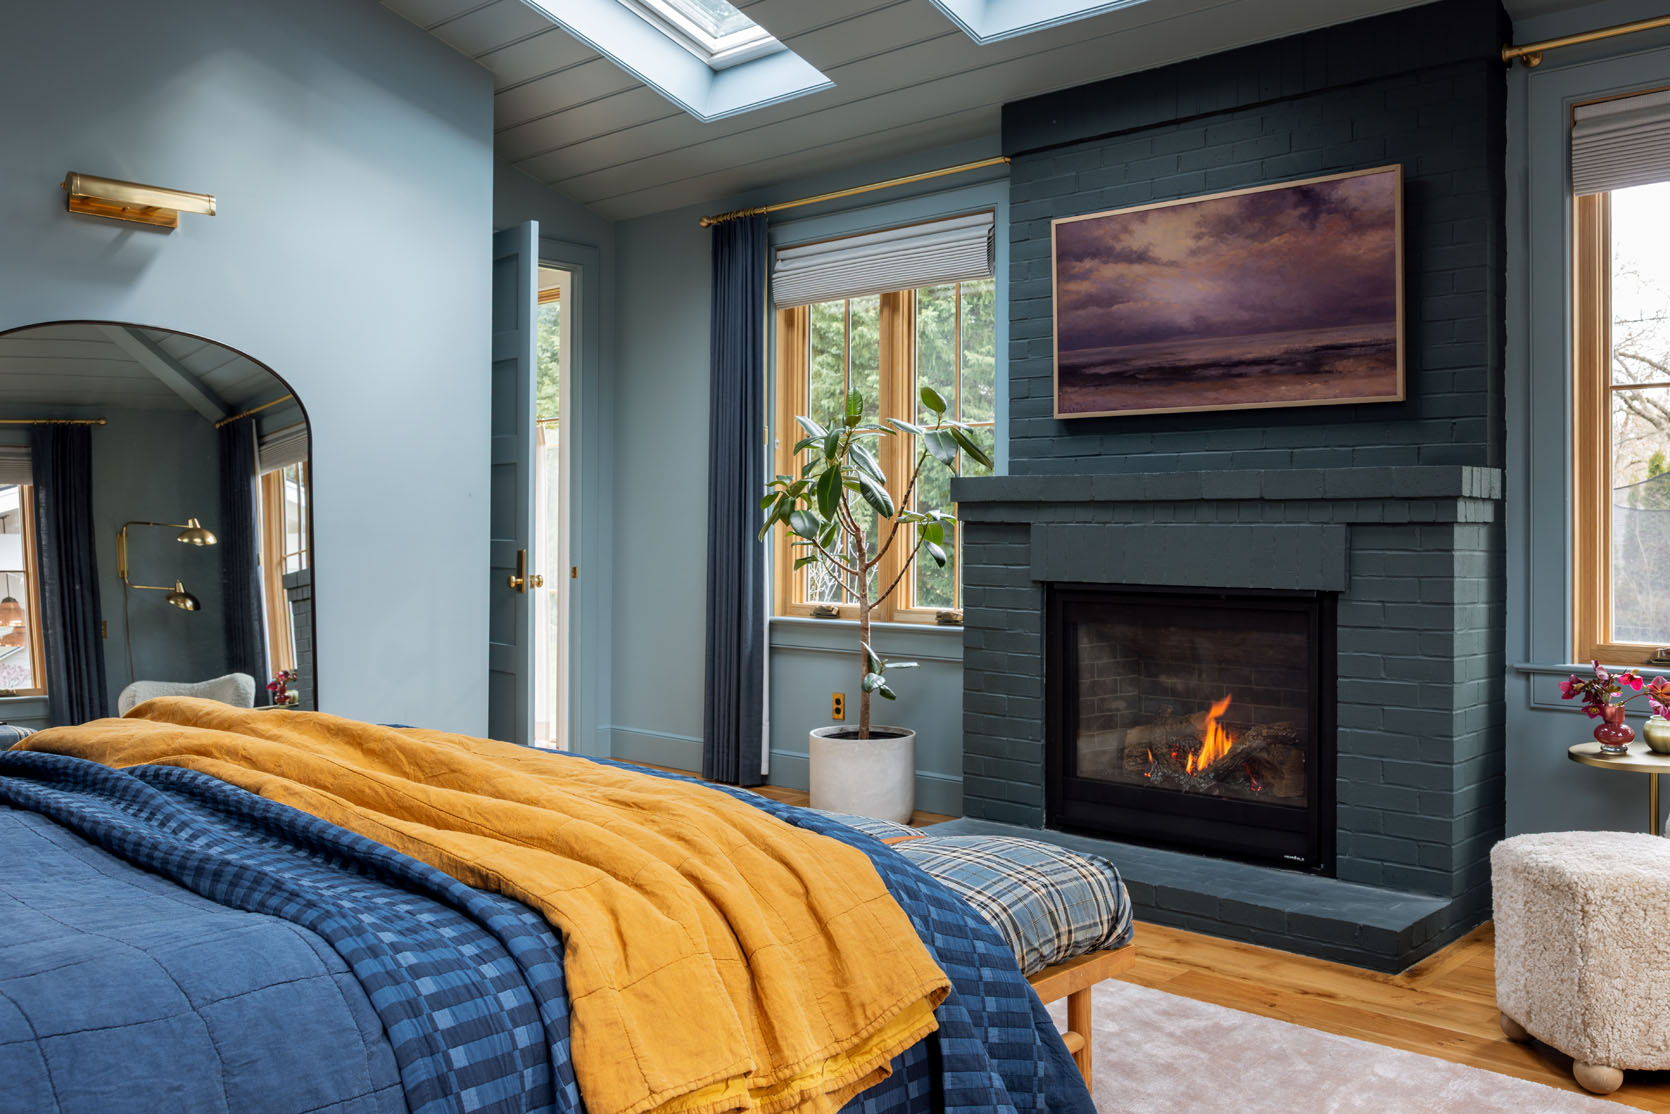
I always love the view of the other side of the room. The fireplace is so cozy. Our heater in our room has been broken for a few weeks, so I’ve been using this fireplace for an hour or so a day to keep the room warm, and it’s just wonderful.
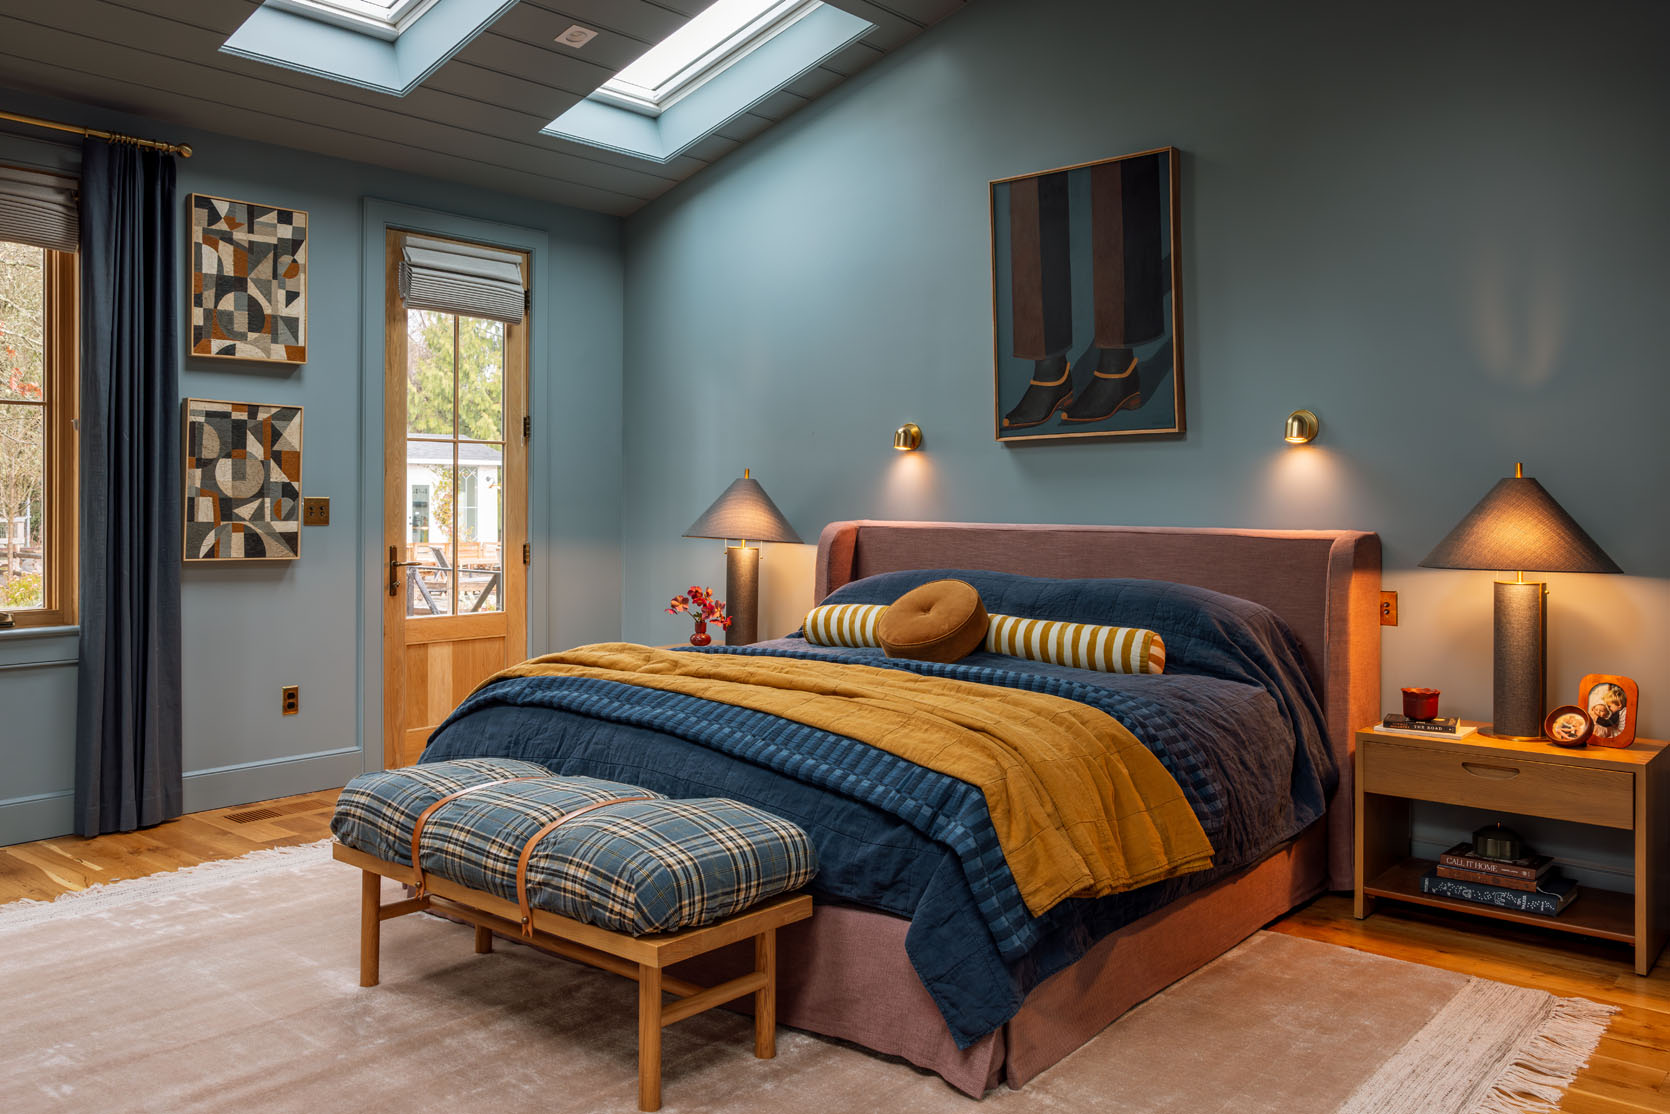
The room really is so cozy and gets better as the day goes on (which is hilarious to write, it’s a better “nighttime” room than a “daytime” room, but maybe that’s good since it’s mostly enjoyed at night?). We rarely shoot with lamps on, but I wanted to show you how the room changes as the light changes.
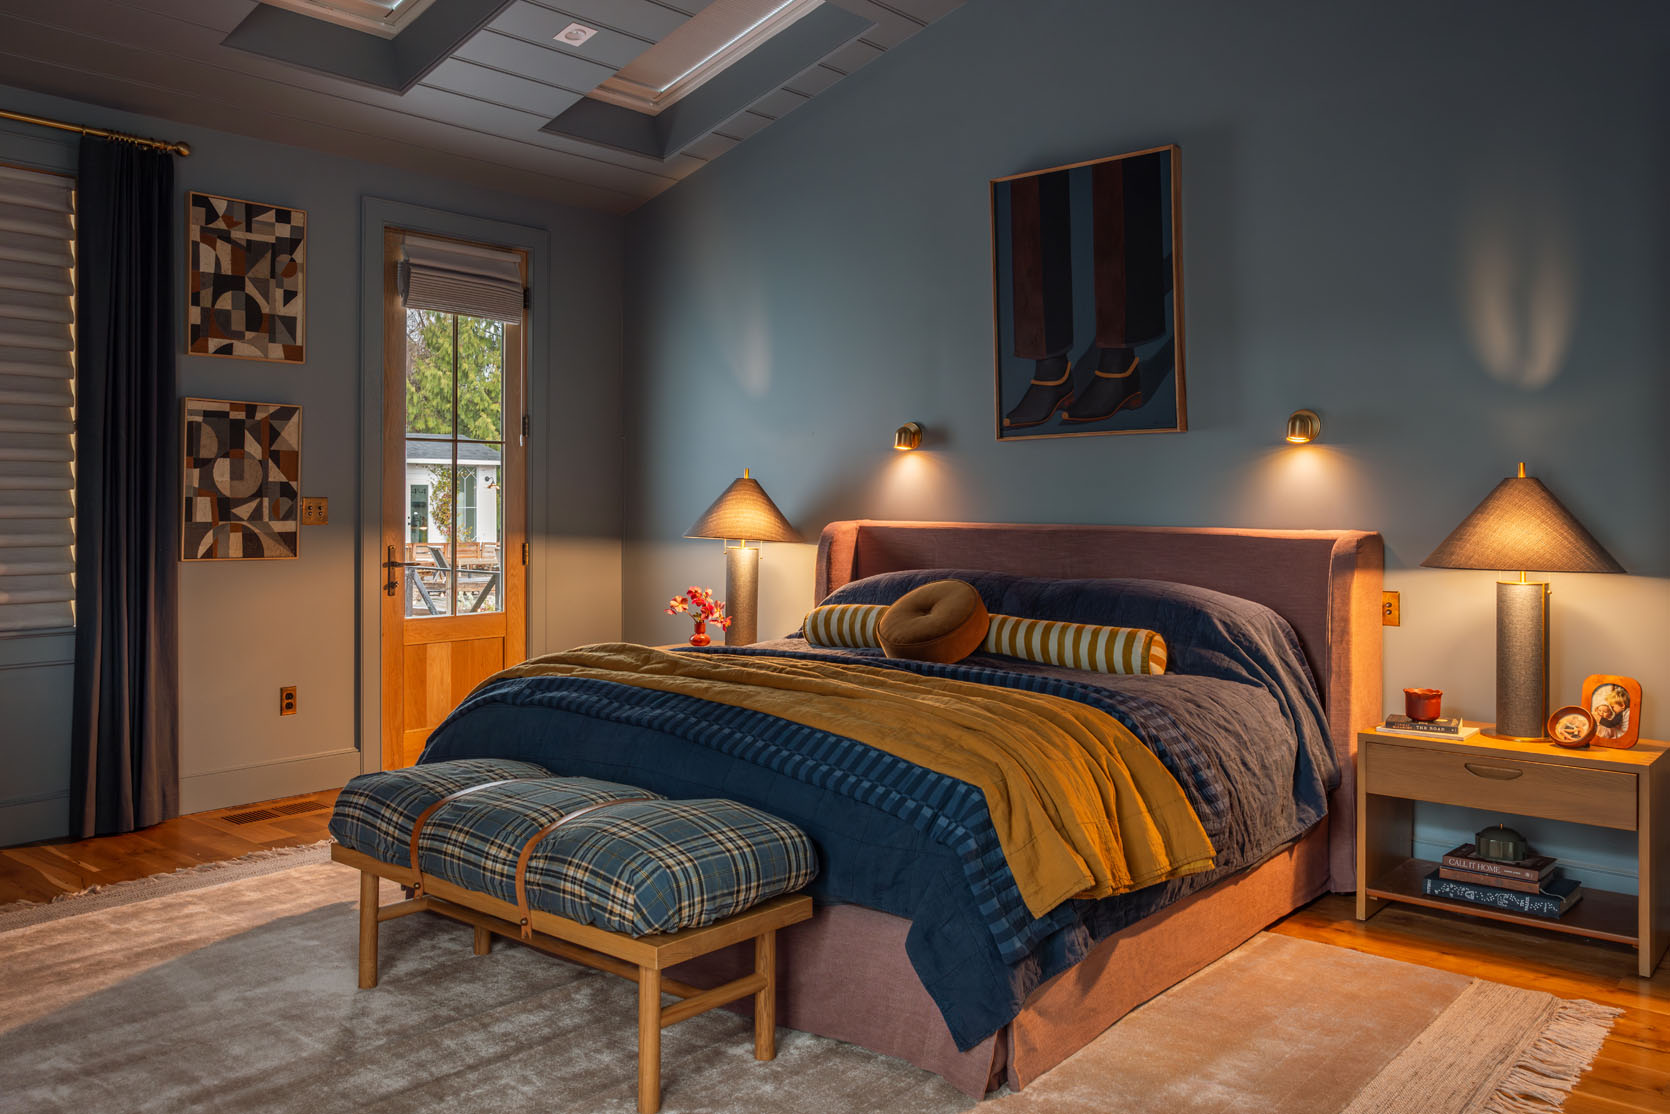
It’s a real retreat at night, and I LOVE getting into bed (a huge reason is also because of my new mattress, BTW, that I LOVE. It’s the Sapira Hybrid Chill, and I got the “plush,” but the “medium firm” is also really soft and cozy. If you like hard mattresses, I’m not your gal, but if you want something soft on top and supportive underneath, it truly is my favorite ever.
Here are some fun sliders!!
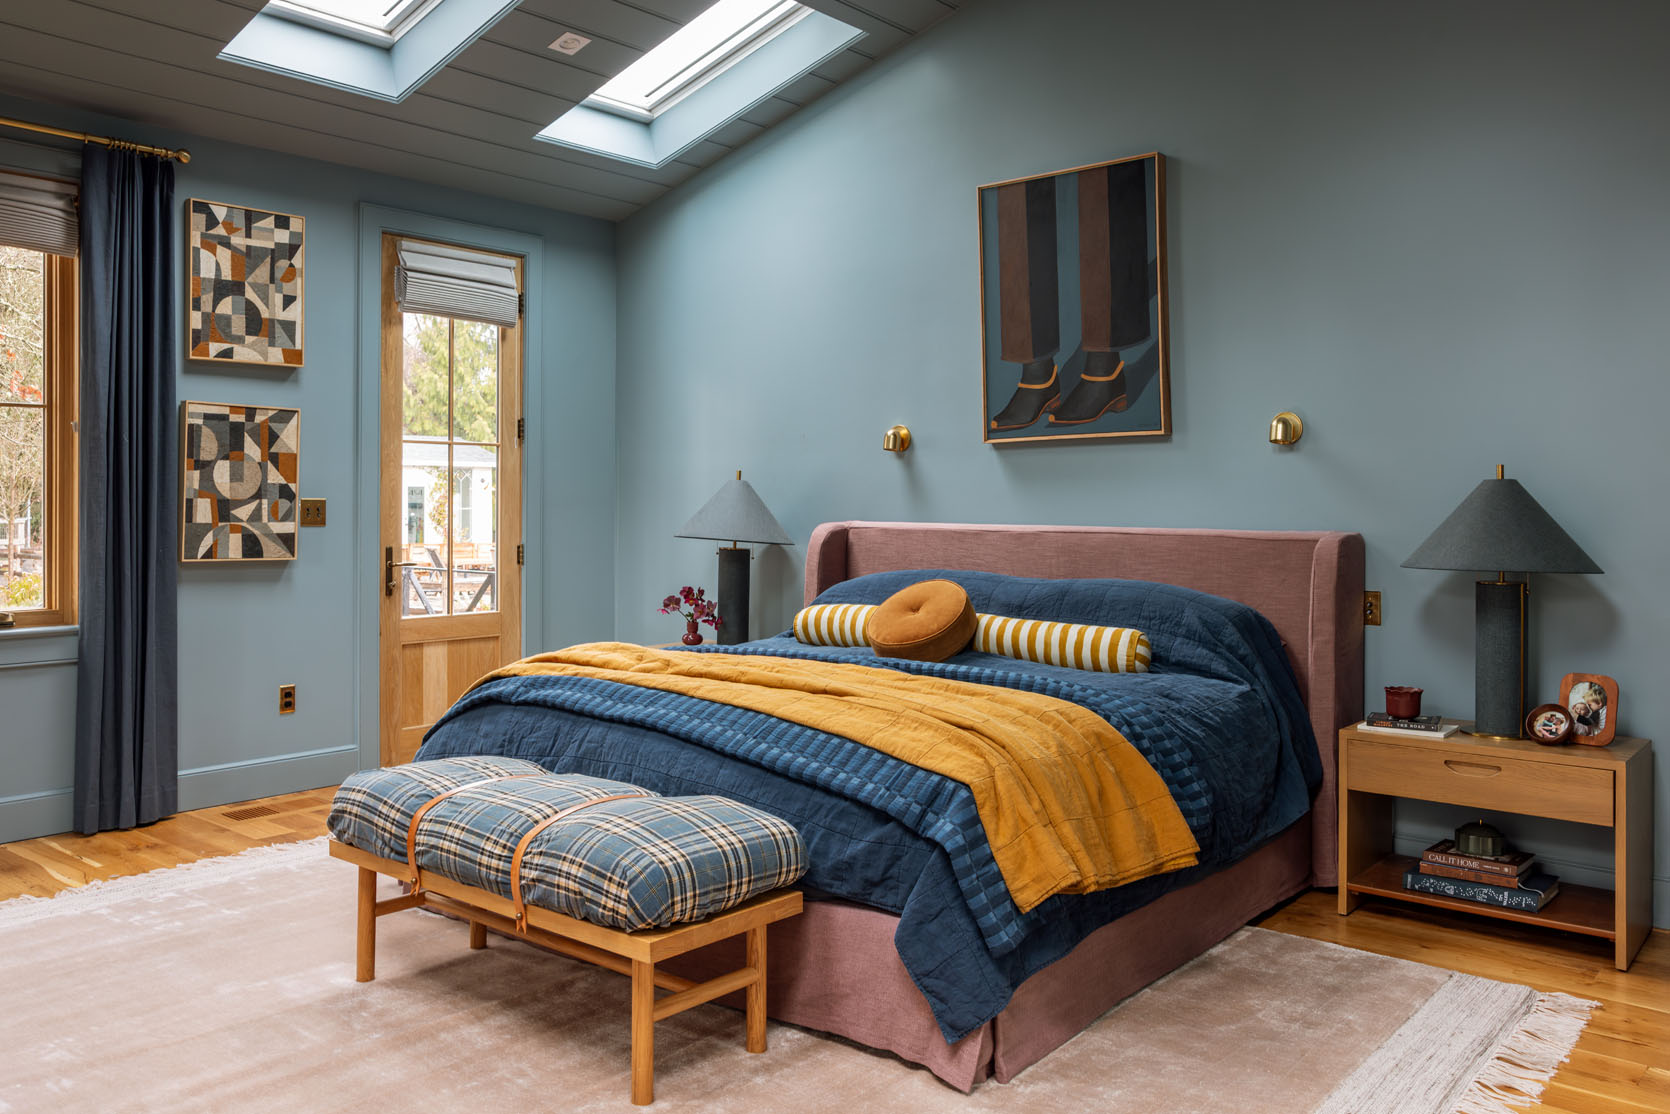


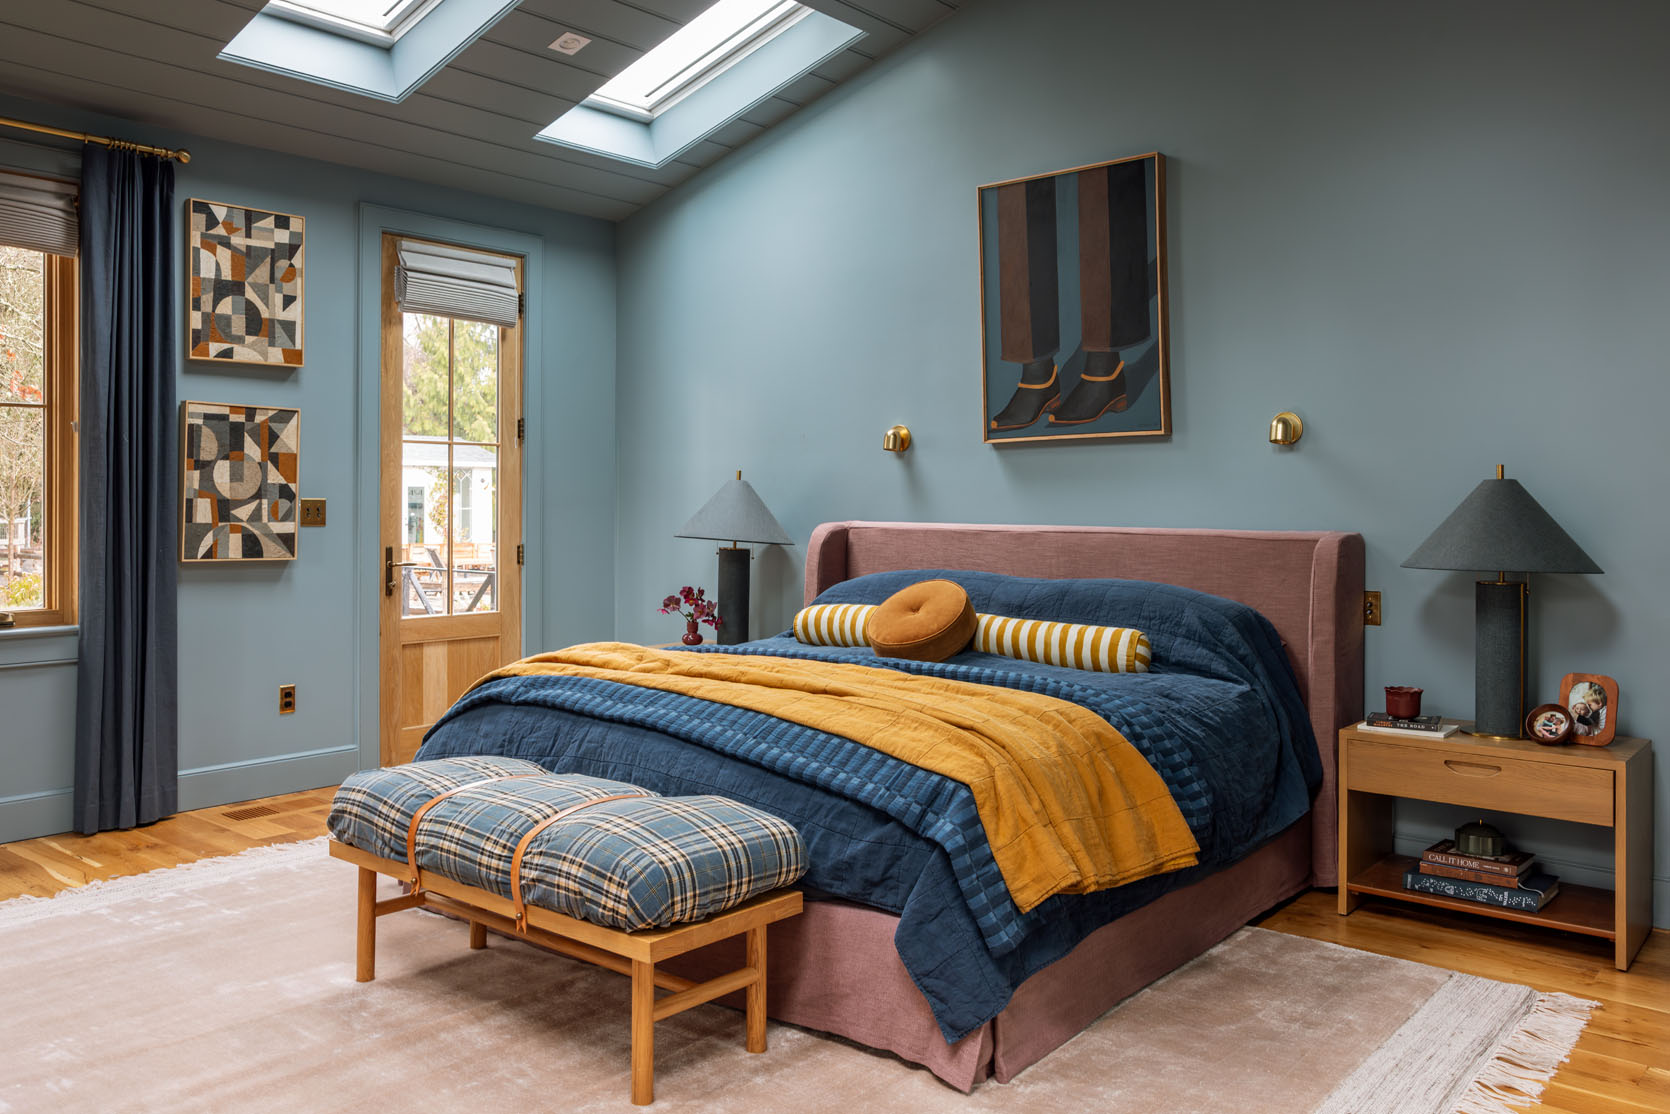
So what do you think??? Do you like the versions we had before better? Or the moodier and cozier new version? I’m team cozy all the way. If I could snap my fingers, I’d love to see the room with a taupe ceiling (but not on the trim) with the current blue or color drenching in Eventide (a softer, lighter blue).
*Photos by Kaitlin Green
]]>I think you’d agree that we don’t get to see enough of the non-perfectly beautiful but super important stuff on the internet that helps inform our design decisions. I had no idea how important having evergreens would be until we lived here through a couple of winters. It’s so gray, wet, and dark in the winter, and if you only have perennials (the showiest flowers, the pretty wildflowers, and generally more my vibe), then the winter looks even sadder. So when Dennis’ 7 Dees reconfigured the sports court and thus added a bunch of landscaping last year, a huge part of the brief was “green, something pretty, year-round”. I was willing to sacrifice and lose some of my favorite varietals for year-round interest. Not like fir trees and boxwood everywhere necessarily, but enough plants that left us with happy visual interest and not just cut-back grasses or lamb’s ears all winter. They agreed, and I trusted them, but it wasn’t until January that I could really see what it would look like, and boy, was I relieved to see that it is indeed so pretty. Now, is it as pretty of a photo tour as summer? Nope. And we didn’t style it at all (or even move our dumb umbrella stands). But I hope it can help you make some decisions, or at least feel seen that you aren’t the only one with a maybe less beautiful yard during the darker months.

Our first summer with the recent update was stunning, and we are even more excited about summer #2. There were a lot of things that I never thought I’d love so much (like these incredible hydrangeas). But with so many flowering bushes, what would we see come February?

Enough green to make me so happy, despite a lot of bare bushes and trees. I know it’s hard to tell with that beautiful southern side light coming in, but when you look out, it still feels full. It should be noted that Dennis’ 7 Dees also maintains our yard, which is not sponsored or discounted, but obviously, having the same company that designed and installed the plants maintain them is a lovely plus. They are super invested in keeping it healthy, and since they know each plant and what the vision is supposed to look like, I barely even need to chat about anything.

It’s real park vibes, for sure, in the summer. I’m so excited for this summer.

Still really lovely in the winter. Things are obviously not in bloom and cut back, but again, still enough green, texture, depth, and even height variations to delight your eye 🙂


Shout out to those folding Adirondack chairs that sit out year-round (and were so affordable). I can’t say they are going to last for 10 years because we don’t store them like we should, but leaving them out just looks really inviting (and they are lightweight and fold down, so when we do mow in the winter, which isn’t very often, they are easy to move).


The Perrennials around the house really pop off in the summer, but admittedly, by year 4, they are getting pretty dang huge and possibly crowded. I still really love them, though. But winter it’s a different look:
So around the house is indeed a lot less full, which should bum me out, but our view is typically from the house looking out, less from the yard looking back. If I could snap my fingers, I’d add some more evergreens around the house (like near the sunroom), but it’s so dang pretty in the summer and we have other areas we want to spend our budget on, so it’s good enough.


I’m sure if we didn’t have help maintaining it, it would absolutely be messy regardless of the plantings. But I really like how it looks, there is a lot of variation, and enough winter-flowering plants.

When we did the area around the pool three years ago, I asked Cali for a plant plan that would show the first summer (because we needed to reveal our Soake pool, so we needed instant prettiness), and I LOVE these wildflowers (I forget what they are called). But we always knew that by year 3/4, they would become super tall and potentially messy (which they were last summer). It looks dreamy in this shot, but compared to the rest of the yard, it feels like a different vibe now. And yet in the winter, they are super cut back.

Now this looks totally fine, but in person, it’s mostly just brown. So I am going to pull out some of the unruly tall grasses and put in more manageable plants (ideally some that are evergreen). Honestly, I just want what Eric put in the newer yard, everywhere. Can someone please edit out those umbrella stands? Oh dear. I basically told Kaitlin to go out and take handheld shots to show you the reality of it all.

Here’s where you can really see the difference between the seasons:


One of the flowering winter plants that I’m most pleased with is this one (Laurustinus). We have a lot of Helleborus, which are hard to see in the photos, honestly, but these are still pretty showy (and great for winter flower arrangements). I don’t even remember what they look like in the summer, but I’ll take them for their winter blooms.


One of the biggest lessons I’ve learned (of so many) is to forget what you “like” or what you think is “cool” and listen to the experts. I mean, sure, you want the look/feel/vibe/style that represents you and works with the design of your home (ours is casual, wild, natural, colorful, not fussy, not formal, etc), but then lean into what the experts say will THRIVE in your region. Even asking the salespeople at the nursery (if you are in Portland, I seriously am so impressed with Dennis’ 7 Dees). If you have a gardener or landscaper, it doesn’t matter if you jive stylistically; ask them and trust them. I had to learn this the hard way with things like tile installation or even paint, thinking I knew my design and aesthetics and needed to make the decisions. But y’all, they are inherently experts because it’s all. they. do.

Another lesson. Cali (our original landscape designer, who I loved from Studio Campo, who mostly lives in Colorado now) said to us early on that landscape is a living design that evolves a lot. You can’t guarantee how plants will grow or thrive for four seasons. It’s not like furniture in that sense. Even the experts might realize, hmm, this isn’t working a year later and need to tweak. For instance, our lamb’s ear looks great in the summer, but my goodness, it looks like extra garbage in the winter (worse than all our neighbors). So we’ll be making some of those tweaks, too…


Remember when I wrote that big love letter to picnic tables? I still love them (and look how good they look in our yard – so simple, natural, and graphic). But last summer, when we had a bunch of school parties with neighbors who didn’t know each other that well, no one sat at them. I think they felt like it was such a commitment to get into, and then you were locked in. People would stand around them and mingle, but no one sat down, and I was so bummed that people weren’t relaxing. So we brought our loveseat and chairs from the back porch down there, and then people plopped down. So this spring I want to move two of the picnic sets along the paddock fence line (for the kids) and create some more casual seating groups for grownups. I’m thinking a firepit area (we used our Solo Stove so many nights last summer) and a lounge set – like two love seats or a small sofa + 2 chairs. Now designing it is proving to be quite the challenge because while I don’t want them all to be matchy, matchy, I really don’t want it to look junky and busy. I also love the wood out here and don’t want a lot of color since the green is the main color, but I don’t want it to be boring either!! Oh, and lastly, yes, I want to be able to leave out at least the frames, ideally not covering them. So getting something high-quality that is really weather-proof is crucial (good luck).


This year, I want to be better about shooting the yard all four seasons – it does change a lot, and Eric, our designer at Dennis’ 7 Dees, did such a great job at selecting plants that thrive year-round. It’s just harder to organize since the weather is unpredictable up here, and only certain times of the day make sense to shoot the yard. I want to make some tweaks near the covered walkway and the kitchen door area (which is our front door basically), so stay tuned on that. But I think they are going to mostly just take what is working back here and plant the same varietals since we know they work and look so good here.
*Photos by Kailtin Green
]]>From Emily: We know that the news cycle is very much all-consuming right now. We hope this makeover post of Mal’s parents’ living room can be a break if you need one. It’s wild times, it’s important to stay informed, and we are glad to still be here.
My parents have hated their living room since they moved into their empty-nester house 9 years ago. They live in a builder-grade townhome that’s in an amazing location – it’s close to the beach, 5 minutes away from my amazing grandma (who’s 94!), and it’s crazy convenient to everything and anything you’d need. If you read my recent bathroom makeover post, then you heard about how many times we’ve moved as a family throughout the years (spoiler: it’s A LOT). My mom and dad have always been super adaptable, and honestly, I think they really enjoy moving around to shake things up. So they definitely didn’t think they would be in this house for as long as they have been, and they’re not moving anytime soon (especially because I’m going to be moving in really close to them…like REALLY close…my boyfriend, Austin, who I’m moving in with, owns the house 9 doors down). So luckily in the 9 years that they’ve hated their living room, I’ve become an interior decorator and content creator, which calls for…A ROOM MAKEOVER!
Let me brag about my parents for a sec so you can get a sense of who they are and how I’m going to tailor this room to feel like them. First off, my parents are the most incredible people ever. My mom, Melissa, is smart, fun, and beautiful (which is pretty unfair to have all 3). She used to be Snow White and Mary Poppins at Disneyland before becoming the ambassador of Disneyland during their 30th anniversary. Which basically entailed traveling around the world with Mickey Mouse (literally…there are photos of her and Mickey on the Great Wall of China). Then she worked for corporate Disney in special events…BUT WAIT, she’s also an incredibly talented pianist, so she now teaches music and vocals to children at Disneyland and at my high school, Orange County School of the Arts.
My dad, Bob, is (you guessed it) equally as awesome. He comes from an insanely musical family (all of his brothers are professional drummers), and he is the most incredible bass player ever (nope, I’m not even biased). He’s also a music producer and owns his own company called Audio by the Bay. They produce music for shows and parades at theme parks like Universal Studios and Disney all over the world (he also just produced the music for Paramount’s Christmas tree lighting, and it was epic). He loves cars, boats, jet skis, etc. (my parents have a house by Lake Mead because they both love to waterski, and we grew up wakeboarding). So when we were doing a shoot-up at Em’s Mountain House, Emily told us we could take their boat out, but we needed a driver (so we could celebrate after a long week responsibly, haha). I called up my parents, and they generously boated us around to the nearest country bar where we all danced our hearts out and had such a blast.

So I got none of my parents’ musical genes (but boy did they try when I was growing up with the piano, voice, and bass lessons), but there’s one thing I can do: design a bangin’ room and fast. So when AllModern reached out toward the end of December for us to do a quick January living room makeover, I knew just the space that needed some love. Ladies and gents, let me present to you the “50 Shades of Gray Living Room” (literally)…


So here’s the situation. 9 years ago, when they moved in, gray was IN. So everything in here was gray. The hard finishes in the house are all gray – gray vinyl flooring, gray cabinetry, gray tile – literally everything. So to “match the house,” my parents added in even more gray – gray accent walls, a gray couch, and a gray chair (which is a super common mistake). Hence why we all called it the “50 Shades of Gray Living Room”. Oh, and there also used to be a gray rug in there at one point, but our family dogs (Coco and Murphy) kinda trashed it. So in these photos, you’re seeing the first time they brought in some color to the space, only to realize the rug was way too dark and showed SO much dog hair.
The thing is, my parents always say “they suck at design” (their words, not mine), but really, they just do what a lot of people do: they never create an overall design plan for the space and instead they would just buy and replace one item at a time with no style, color palette, or goal in mind. So, for example, if their rug was starting to look dirty and old from the dogs, they would just go out shopping and would pick up the first thing that was fine, fast, and affordable, and replace it (that’s how they ended up with this rug they ended up hating). Then for some larger purchases they would get design paralysis and would just live with what was already there because they didn’t know what would look better (see the coffee table that used to have storage under it but the dogs ate the fabric so they just tossed the storage pieces and said “it looks fine enough and we don’t know what to get instead”). Well, that’s how they ended up hating their living room – every piece was just fine to them. They had no real attachment to anything in there. None of the furniture in the room made their hearts sing, and the gray color palette quickly became cold and depressing.
So here’s where I stepped in. I perused the AllModern website looking for timeless, high-quality pieces that would warm up the space and that would last a long, long time (even with two pups). I also wanted to bring in more storage because their house really doesn’t have a ton. AND BOY DID I FIND WHAT I WAS LOOKING FOR!

Desk | Desk Chair | Accent Chair | Drink Table | Floor Lamp | Grid Rug | Sofa | White and Brown Pillow | Light Brown Rug | Coffee Table | Credenzas | Round Pillow | Black and White Pillow | Charcoal Pillow | Cream Pillow | Side Table | Red Lamp
So here’s what I pulled together for the design plan. Last year, my parents had purchased a new sofa, and I installed some simple, cream pinch pleat curtains as a surprise gift for them when they were out of town one weekend. Those two elements really helped the space, but it still didn’t feel cohesive or warm. So I wanted to bring in lots of rich, warm wood tones, both in walnut and oak, to bring out some of the brown hues that are within the gray vinyl flooring. I mixed in some gray-toned elements like the desk chair (that’s actually a dining chair on casters, which glides SO perfectly, and is so comfy), the sofa, and a few of the pillows to make the space feel cohesive with the rest of the house.
I placed this order right before we closed our office for our 2-week holiday break, and then it was (literally) Christmas morning with furniture arriving left and right. My parents were SO STOKED.
When we were back in the office in January, I started to really pull everything together, and I did a few fun DIYs to really make the space feel custom and personal for my parents. Then the week after that, it was finished, and we shot the room!! It was hands-down my fastest makeover to date, but it’s easily one of my favorites now. Here’s how it turned out!

Accent Chair | Drink Table | Floor Lamp | Grid Rug | Sofa | Coffee Table | Credenzas | Charcoal Pillow | Red Lamp | Bowl | White and Brown Pillow | White Throw Pillow | Red Lamp
HERE IT IS! I’m smiling so big just looking at this photo again. First – let’s chat about the incredible credenzas (yes, plural!!) I put two of these incredible walnut sideboards next to each other, and they did SO much to elevate the space. First off, the quality is actually unreal (it’s solid wood and those babies are THIIICK). We were so grateful they came with white-glove delivery because they’re heavy and substantial. A tip if you’re putting two credenzas side-by-side: go with something without legs because it will make them fit together more seamlessly – the design of this credenza is perfect for this because you can hardly tell where one starts and the other stops, so it really looks custom! My parents were also blown away by how much storage they gained by spanning the cabinetry wall-to-wall.

I found the big art piece on the right from a vintage boating supply store (so random) for $100, and the couple in it looks identical to my Grandma and Grandpa on my mom’s side. My grandpa wore a captain’s hat everywhere he went and made everyone call him “Captain Vern” (even though he would get seasick and would rarely go on boats). So this piece is super special. We painted the random gray accent wall (that used to be to the right of the chair) and just made the whole room the same white paint color, but then once we got everything in, I knew we needed to add more visual interest and height to the room. All of the furniture is on the lower side (and most of it doesn’t have legs because our sweet pup Murphy is blind and deaf, and he just bumps around and gets trapped under furniture). So we kept everything low to the ground and as little of a Murph-trap as possible. He’s gonna make his blog debut below, don’t worry. So all this is to say, there just wasn’t enough drawing your eye upward. So, literally the weekend before we shot this space, I decided we absolutely needed to try out a DIY shelf idea that randomly popped into my head. I absolutely love Austin and my parents because they were immediately down to head to not 1, but 2 different Home Depots to collect the supplies and help install these shelves 3 days before the shoot.
So this is what it looked like before the shelving…

Needs some more pizzazz, am I right?? I found the perfect-sized floating shelves (we couldn’t order online because they wouldn’t arrive in time), so they were (of course) gray…which was the exact color we were trying to minimize, haha. So we decided to paint them the same white as the wall (which honestly ended up looking much better than if we had just bought sterile, white shelves online…this looked much more custom). Make sure that if you’re painting laminate to use a shellac primer before! It makes a huge difference in durability.


My dad and I installed the shelves as evenly as we could without a laser level (we immediately bought a laser level after this, though, because it would’ve been helpful). And then I bought4 basic, unfinished wood closet rods (that had free delivery, which was awesome) that my mom stained with natural oak stain. Then Austin cut each piece to size with his jigsaw, and we really had an assembly line going…it was crazy. Because many hands make light work (as Em says), we were able to get this done in 2 days (and it only took that long because we had to let the paint dry…it probably was a total of 6 hours of work between two days).

Accent Chair | Drink Table | Floor Lamp | Grid Rug | Sofa | Coffee Table | Credenzas | Black Footed Bowl | Black Vase | Fluted Bowl | Floor Lamp | Charcoal Pillow | Large White Bowl | Large White Vase | Large Black Vase | Ribbon Candelabra | Leather Catchall | Red Lamp
Then came the fun part – styling!! I think my parents were pretty surprised by how long it takes to style a space and how much you end up just moving things around over and over again. They said, “It’s so crazy because as musicians we have auditory patience and can listen to a song or practice an instrument over and over again until it’s right, but we have no visual patience.” That made me laugh because that’s exactly the skill you need to style – visual patience!!


Large Cream Bowl | Black Vase | Fluted Bowl | Terracotta Vase | Floor Lamp | Charcoal Pillow | White and Brown Striped Pillow | White Throw Pillow | Large White Vase | Large Black Vase | Red Lamp
I incorporated as many of my parents’ objects as I could – the trumpet was originally my Grandpa’s (he was a band director for 60 years!), and then my dad played this same trumpet in high school. The image above the trumpet was a gift from a famous photographer who shot Woodstock – my mom helped him sell his house (oh yeah, she’s also a real estate agent…this woman does it all). On the left is the vintage metronome my sister and I used when we practiced piano as kids, and the photo under that is my mom’s certificate from the Great Wall of China. The giant bowl on the bottom right is one of my favorite AllModern finds, and I juxtaposed it with tiny vintage composer busts that I found at the Sherman Oaks Antique Mall.

There are the pups! Murphy (our blind and deaf rescue) is on the left, and Coco (our boujee King Charles Cavalier) is on the right. These dogs crack me up because they’re very different vibes, but they love each other so much. I love this photo – we’re just missing my amazing older sister, Madi (who works at the Disney Studios in Burbank and understandably couldn’t drive an hour on a random Thursday morning to hop in one photo…but she is here in spirit!) She’s the best person ever, and in case you couldn’t tell, I just love my fam so much.

Storage Coffee Table | Rug | Sofa | Floor Lamp
Remember how we wanted to add more storage?? Well, this incredible coffee table has a GIANT DRAWER!! Perfect for storing bulky, fuzzy blankets. Plus, the quality of this table is really off the charts; it’s just so well made.

Chrome Bowl | Hi-Fi Book | AD Book | Storage Coffee Table | Rug
Crazy – you would never know that that’s a drawer!! It’s so seamless. Also, you might’ve noticed in the moodboard earlier that I had planned to layer this awesome light brown rug on top of this grid-patterned rug. That was because I initially thought it would be too much “grid” with this notched coffee table sitting on this rug. But when we laid it down, I actually thought it looked amazing, and it was visually more dynamic, so we just kept the bottom rug! Both rugs are super well priced for the quality and size – I could not recommend them enough.

This grid rug is also super forgiving with the dogs, and my parents are very impressed with how it’s holding up. Also, how cute is this floor lamp?

Desk | Desk Chair | Grid Rug | Sofa | Coffee Table | Round Pillow | Black and White Pillow | Charcoal Pillow | Side Table | Metal Dome Lamp
OKAY, onto this really fun family photo DIY I created! You may relate to this – my parents have books on books and boxes on boxes of old family photos that just sit in the credenza and never see the light of day. Well, I wanted to bring some of those old photos out and create a large piece of wall art for them. I had seen this photobooth art by Amanda Jane Jones that’s all over Pinterest (it’s so chic and genius) and knew I wanted to create something similar. So I went into the physical photo archive, took pictures of the pictures on my iPhone, and then uploaded them to Photoshop and started arranging them into a loose grid.

This is where the “grid” theme really started popping off, but I’m pretty into it, honestly. (Also side note: check out that blanket that I found at a vintage store in Arizona for $34!! The loose grid motif is everywhere, and I love it.)

The key is to vary the color in the photos – if they’re all black and white or all sepia, it starts to lose visual interest. So I colorized the photos in photoshop so some were brown, some were black and white (you could also do this to each photo individually on your iPhone; it was just faster in Photoshop). There are over 250 photos in here, so it took me about 2-3 hours to arrange them and get the colors how I wanted them to look. Then I sent it to the framing store and had them print and frame it HUGE. It’s 48×48, which is awesome. It’s full of baby photos of my sister and me, pictures of my parents when they were first dating, photos of all my grandparents from years ago, etc. We’re all very obsessed with it, and it really made the room feel personal.

My parents both do a lot of work from home, so desks are valuable in this house. I love that this one has a drawer (for more storage!) and the leg joinery detail is so pretty. It also came in 2 days, which was pretty amazing. I mentioned it before, but this dining chair on casters is actually the greatest desk chair hack. It’s so comfortable, and it glides around SO easily. I highly recommend this chair – it comes in a ton of colors too 🙂 Also side note – that plant was a Christmas gift from my sister and me when my parents moved in…we truly can’t believe my mom has kept it alive all these years!


This might be one of my longest posts ever, so if you made it this far, THANK YOU!! We had the best time doing this “50 Shades of Gray” living room makeover, and I’m just so happy that my parents finally have a living room they truly love and one that will last a long, long time. HUGE thank you to AllModern for sponsoring this makeover – we couldn’t have found a better partner for this project! I’ll chat with you all in the comments – hope you love it as much as we do!
*Design by Mallory Wackerman
**Photos by Sara Ligorria-Tramp
It happened slowly, then all at once. When we first revealed the pantry, we barely lived in the house, and I had no idea how much I’d cook or entertain here. Turns out it’s a lot (which is wonderful), and therefore the needs of “the hardest working room” expanded quickly (and messily). It is not only a dumping ground for school stuff (piles of notebooks) or hiding quick mess during parties, but Brian and I have become quite the collectors of counter appliances that we actually use. And while putting them on the stairs down to the basement seemed like a fine idea at first (“we barely use this!” we said), not when you actually use it 1-2 times a week. So slowly, I’ve removed the pretty things to make room for what we need – food, my ever-growing supplement library, and appliances.
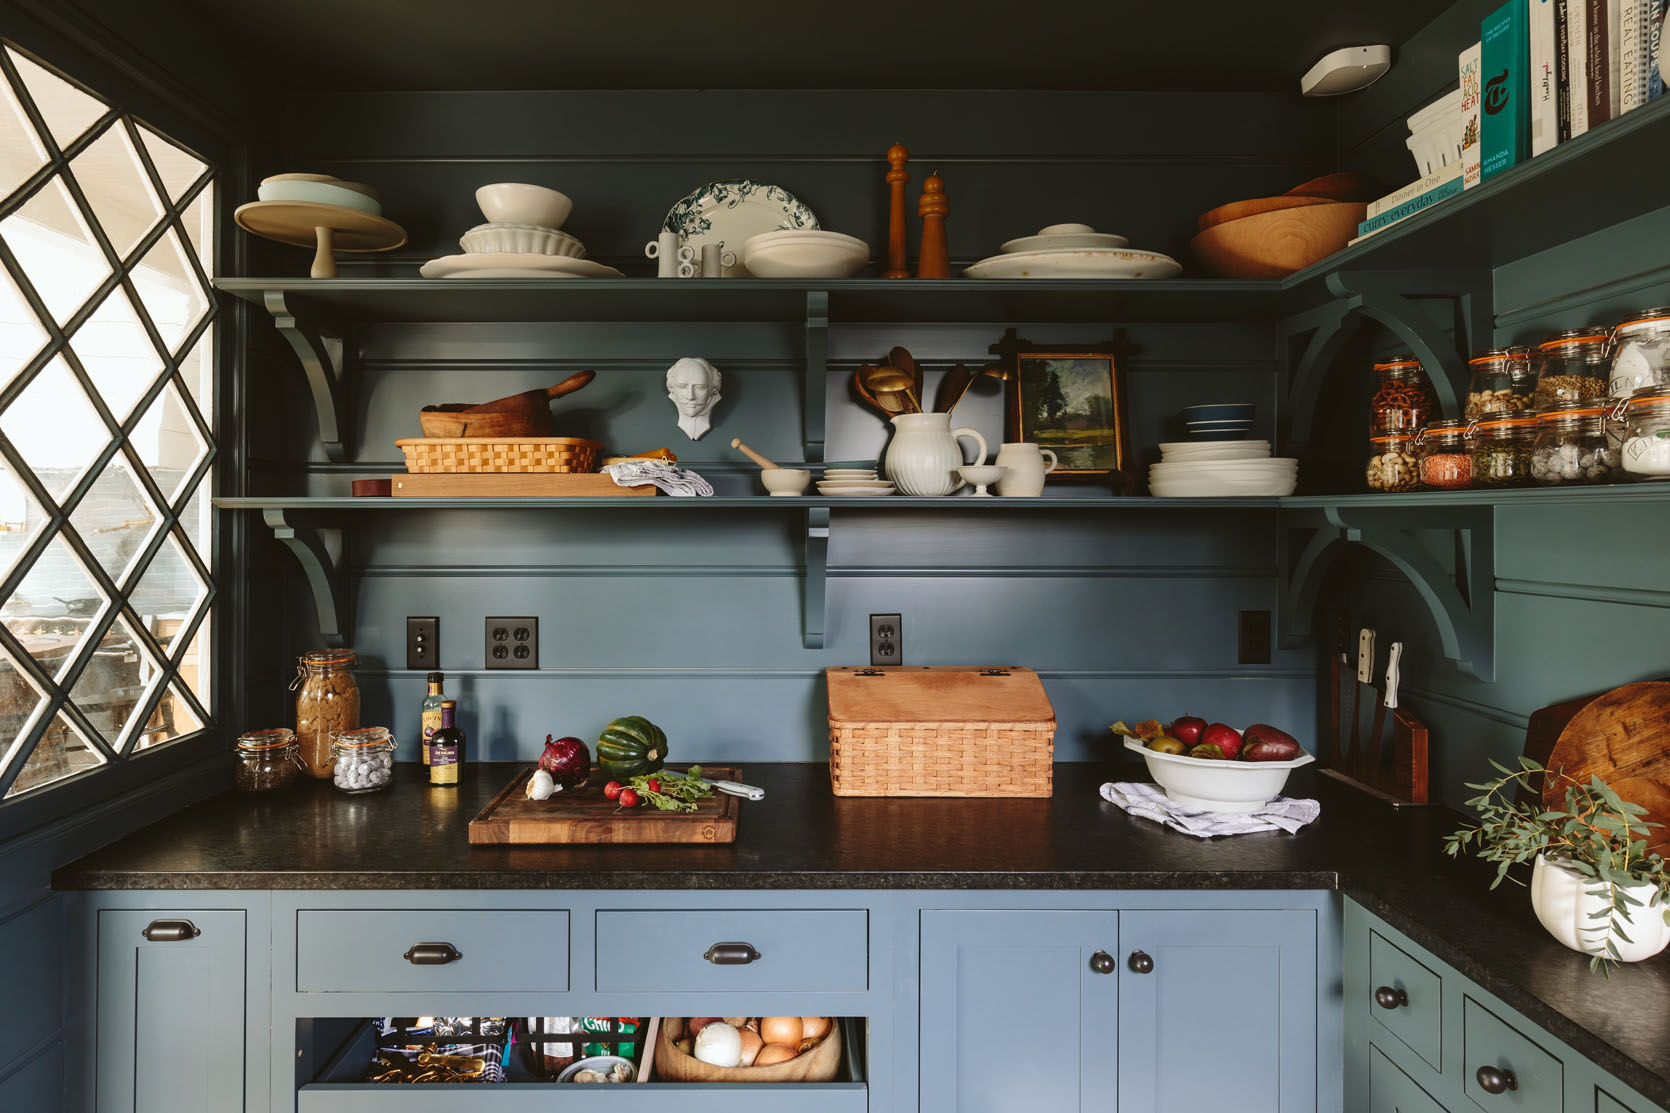
When I saw this shot recently as the opener to a blog post about staying organized, even I was like, “Whoa, this is not a real person’s pantry”. But at the time (3 years ago), we didn’t have the inventory we have now. First, the tall oils needed a home, then the bags of vitamins, then the larger platters and bowls we pull out for most parties. Every few months, I would reorganize (always so messy) and take pretty but rarely used stuff out to the prop garage, making room for actual life.
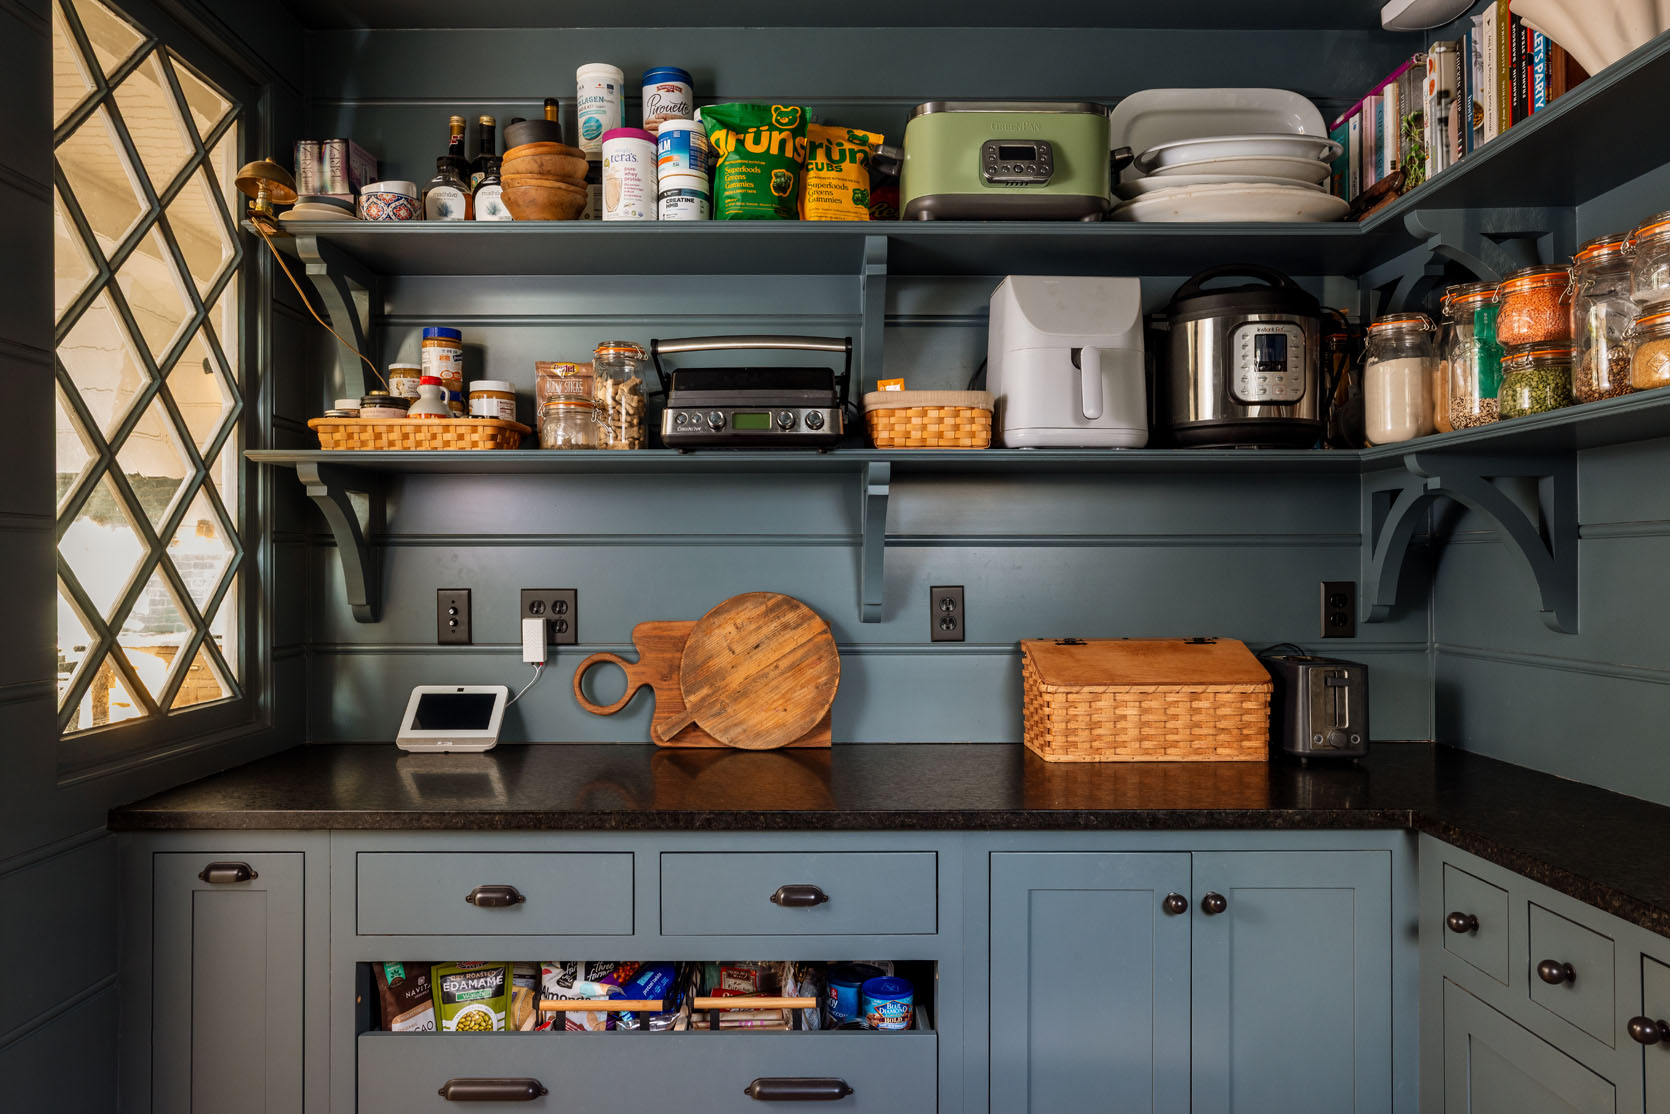
TOP SHELF: Let me walk you through the changes. Top left is random stuff (including some Brez, which I order online – a 2.5 mg THC drink that is a great weekend wine replacement and super light), then all my protein, creatine, and Gruns vitamins (spoiler, some kids love these, mine do not, but I like them). My slow cooker (love), and platters we pull for parties.
LOWER SHELF: Peanut butters/honey/syrup, dog treats, panini press (kids love these sandwiches), basket for some treats out of reach of kids. Then the air fryer (weeknight chicken strips), which we can plug in below and not even move it down, and the Instant Pot (weekly hard-boiled eggs).
COUNTER: We try to keep this as clear as possible. It has our house alarm keypad, a couple of cutting boards, our bread box (which indeed has our bagels and bread in it), and our $18 toaster that could probably use an upgrade, but we’ll use it til it breaks.
This wall has remained very similar to how we styled it originally, mostly because it’s a sightline that you see from entering the house and while in the kitchen, so it has to look really pretty, or it would bum me out on a daily basis. I love our decanted jars (and for the most part keep up with them). Naturally, the pretty apron and broom were crowded out by the one billion coats that you need in Oregon. Here’s what it looks like now:

I obviously needed a place for that incredible vintage still life painting of pears and figs (on that red and white tablecloth? SHUT UP). That pitcher full of pretty wood spoons is for my own visual pleasure, which I’m comfortable with admitting in public 🙂 I added more jars of decanted beans and lentils (hot tip: keep the bag folded up inside of it so you know what it is and how to make it), and then there are more bowls and cookbooks as I add to my collection.
This is the exact sight line from the kitchen door where almost everyone enters through our house, so while the walls on the left and right can be totally disgusting, the back wall has to remain clean and pretty (Or I need to put a door on this room, which is not on my five-year plan).

These drawers look far more real than they did. I originally designed them to have that gap so that we could put potatoes and onions in them, or just have them easy to access. But it’s just bags of popcorn and chips. The gap doesn’t bother me, but would I do it again? Dunno. This is the first time I’ve thought about it 🙂
Now good news is that while I haven’t used one scoop of that fancy ass tea I bought to style out this shoot, this side is pretty much the same. Sure, we have more to-go coffees and the plant is now dead (RIP), but it’s almost exactly the same (sorry, we didn’t re-shoot it).
A quick shout-out to the hidden cheap microwave – if you are designing a kitchen soon, I highly suggest this instead of something more built-in. I’ve heard too many stories about the microwave breaking, and then what? This allows us to have a mediocre microwave that works just fine (mostly to reheat coffee and make popcorn).

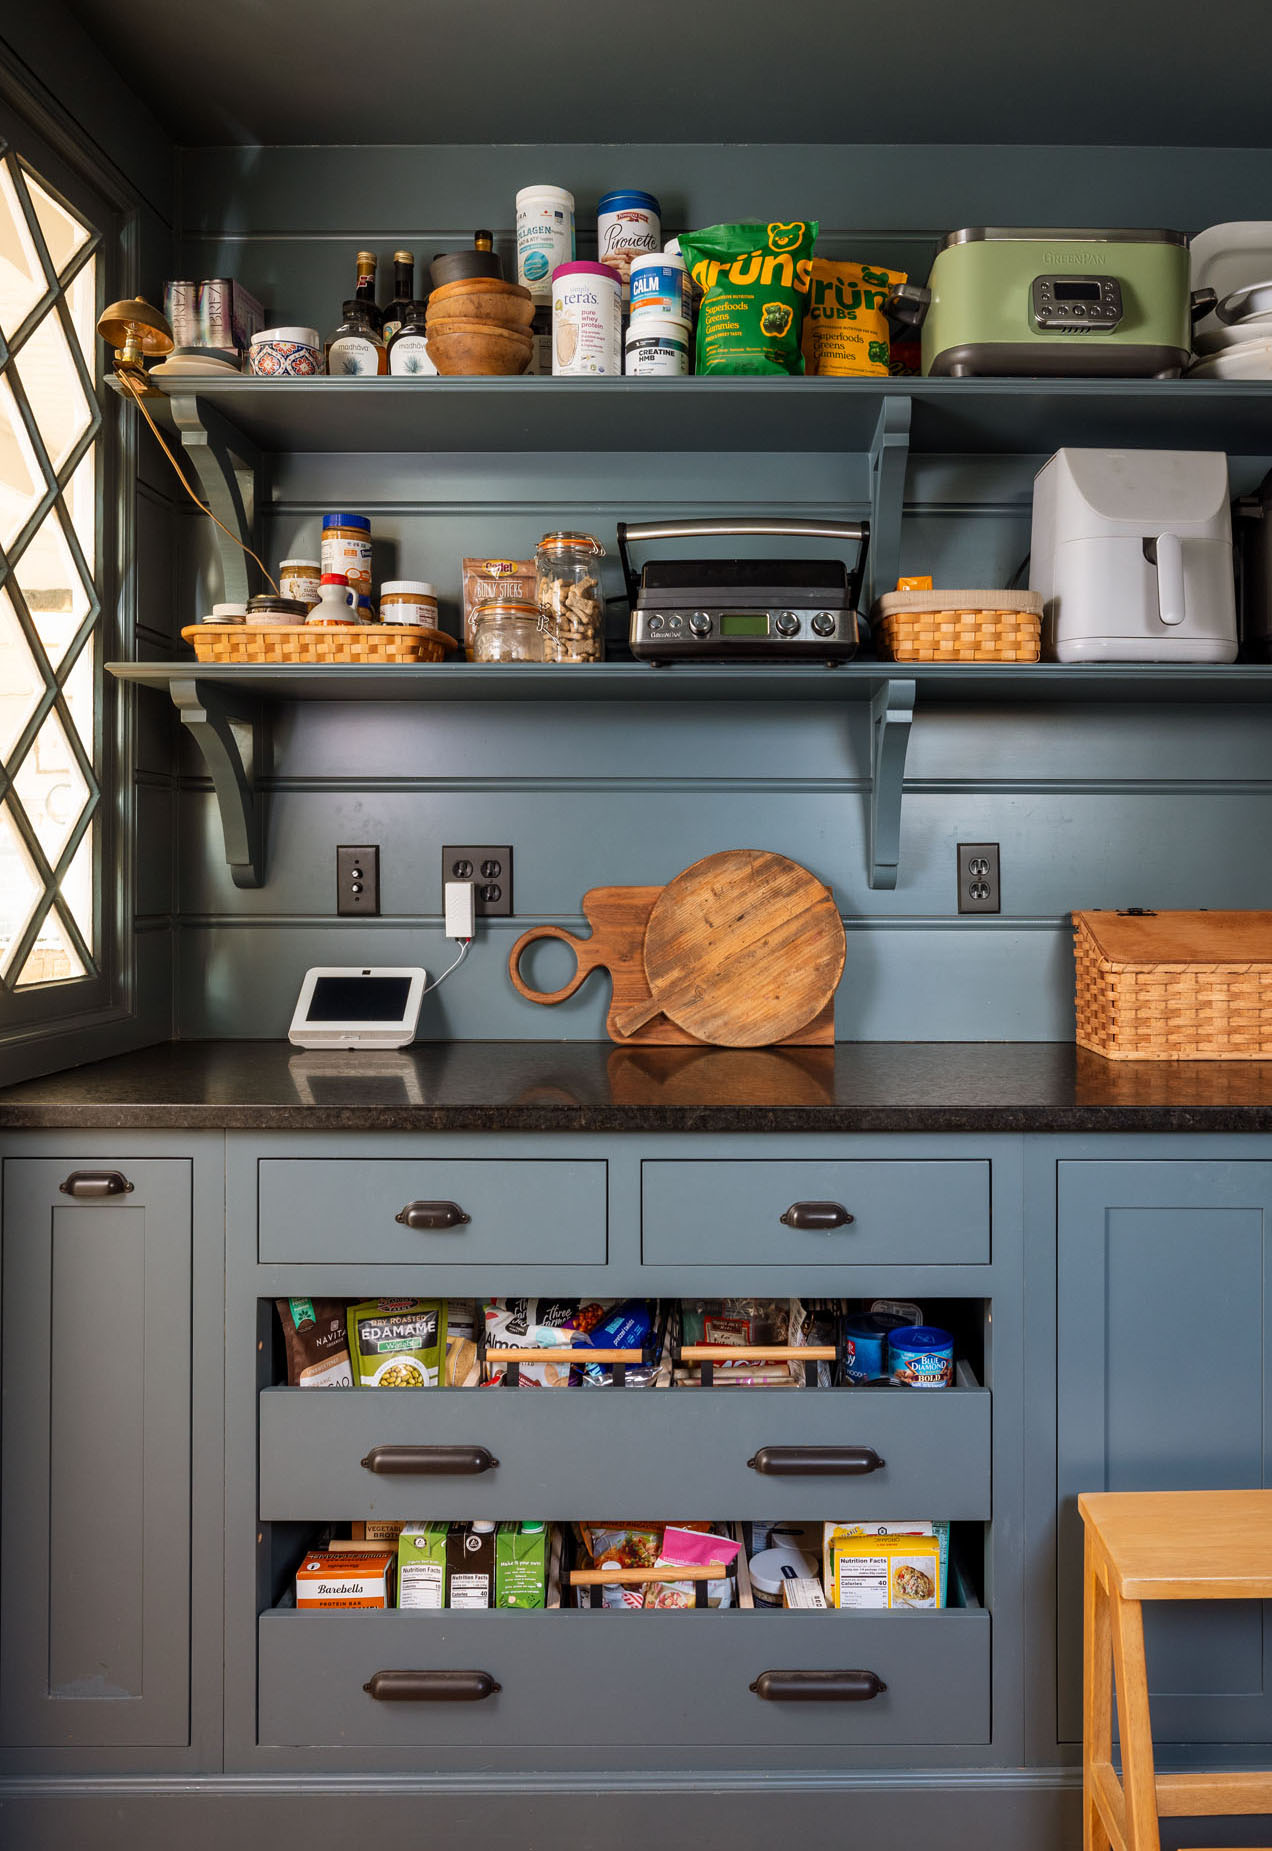
While there are some rooms I do like to keep looking pretty, this one just stopped making sense, and once I started the transformation, I let her rip. It’s wildly more functional (especially using the appliances actually in the pantry and not even needing to bring them out). I suppose a door on this pantry would make a massive difference, but I know what would happen – I would use it even more as a dumping ground when people come over, a “don’t even look in here” room of shame. 🙂
*Photos by Kaitlin Green
]]>